And now we finally come to the most interesting moment: doll painting, hair and hairstyle. Why the most interesting? Because it is these components that determine the future image of the doll: we will build on the painting and hair color when further choosing the color palette of the fabric and the nature of the accessories. And with the help of " make - up "We can easily" define "the age boundaries of our pupa: it can be a child, a young girl or a lady of Balzac age.

According to the already established tradition, before starting work, we will prepare our tools.
We will need:
- Acrylic paints (any firm of your choice)
- Brushes, water
- Makeup Sponge
- Glue "Moment"
- Toothpicks (or matches)
- Piece of lace
- Finish acrylic varnish (matte and glossy)
- Hair
- Scissors
- Knife
- Foil
- Mechanical Pencil Shaft
I'll tell you a little about brushes. If you are a creative person (in terms of needlework), then you probably have brushes for every taste and color. Choose those that suit you personally, but only the pile must be synthetic. My choice: flat synthetic brush # 6 (for painting the body) and round # 00 (for the eye).

Now about sponge: you can buy it in any supermarket in the women's cosmetics section. It is very important that it had a "finely bumpy" structure.

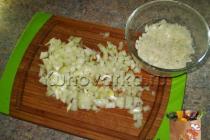
We are planning not a black woman, not an Indian woman, but a Russian girl - Snow Maiden, so it is necessary to create a light skin tone. For this we take acrylic paint of the following colors: "zinc white", "natural sienna" and "red". In the same proportion as in the photo:

We mix, we get this:

We wrap our textile body with foil (so as not to stain), leaving only the head, arms, legs. Take a flat brush and paint. Like this:


Dry the first layer of paint applied with a brush. Next, we take our sponge, “dip” it into the paint, wipe off the excess, and then “make the doll's skin”: on top of the already painted surface we apply the so-called “pores”. Like this:


We pass over the entire surface of the head, neck, shoulders, arms and legs.

Let this layer dry well. We take a rod from a mechanical pencil and draw eyebrows, eyes and sponges.

Then came my favorite moment: to define the color palette in the painting of the doll's face. Now we are choosing the future color of the eyes, lips, cheeks, skin tone. And for this we just need to take the hair and, if you have already decided on the fabric, then and just attach it to the doll. Moreover, I don’t know how to explain it, but the doll “rejects” some colors and “accepts” others. This is how I played:

Initially, I was planning a blonde girl, so I attached hair called "platinum blonde" to the doll. Good, but not that.
Then I "applied" red and brown hair. No, no and no, it's not that. And then, finally, she took the hair, which lay modestly in the corner of the box - light blond. And the truth is not bad, this color suits her.

Okay, right? I will talk about hair, natural and artificial, a little later.

The choice of hair color and fabric helped determine the color of the "skin". So, in the previously “mixed” paint, we add a little more “natural sienna”, take a sponge, “dip” it into the paint and “pass” it along the outer and inner sides of the handles and legs, as in the picture below. We also apply this color to the "elbows" and "knees".

Here's what we got: a smooth transition from dark to light.


With regards to the face. Again we "dip" our sponge in paint and apply it, as in the photo below:


Again we take our hair and "apply" it to the doll, check how it looks from the outside.

Now we draw sponges. The upper lip is always painted darker, the lower lip is always lighter. Like this:

We draw eyes: first we make an "eyeball" with white paint.

Then, with a pencil, draw the iris and pupil. We paint with paints. The iris is blue, the pupil is black, the highlights are painted with white paint.

The hair color we chose for the doll is called light blond and has a gray component. Therefore, for the eyebrows, "shadows" and lower eyelashes, I took a gray acrylic paint. The arrows on the upper eyelids are black. In the inner corners of the eyes we put red dots - these are our "slugs". Here's what happened:

The painting must be fixed with a finishing acrylic varnish. There are a lot of options - from the cheapest to the most expensive. We wrap the doll's body with foil.

We take our varnish and spray on top:

Varnish gives the doll a light shine:

Now we take a glossy polish and apply it to the eyes and lips. To do this, use a brush, which you do not mind throwing away later.

One stage of the work is completed, let's proceed to the second: gluing the hair. The most popular are two types of hair: tress and kanekalon. Tress is animal hair (most often goat or llama) stitched on a thread:

Kanekalon is artificial hair. Sold in hairdressing salons. They are very similar to natural ones and are used by ladies for hair extensions or for dreadlocks, for example.
The big advantage of kanekalon is the length of the hair; it is very convenient to make the doll a braid up to the toes if its image requires it.

We take a small knife and make an oblong hole in the crown of the doll.

This is what you need for this: when modeling a hairstyle, you need to think about whether she will have a parting "in the center", "on the side" or even do without it. Hair gluing depends on it:

We will have a parting "in the center", so we glue the hair as shown in the picture below:

So, we cut off a small part of the tress, coat it with glue.

We glue it to the head.

We take a toothpick or a match and roll it on top for better adhesion of the hair to the surface. Like this:

Thus, we glue curl by curl until we reach the crown. Insert the last strand of hair into the hole from above. Everything, the hair is glued, it took a little time and a lot, a lot of patience.
Now we take a piece of lace and glue it on the line connecting the shoulders and the textile body. Like this:

And now, our doll is already with makeup and hair. Now all that remains is to do her hair. Do your braids? Ponytails, maybe? Or just curl up your loose hair?
 a series of master classes on making designer dolls.
 .
.
 We also invite you to admire
at our exhibition!
We also invite you to admire
at our exhibition!
Dolls are not just toys for small children, although most often they are intended for this very purpose. Throughout the history of human civilization, they have invariably been present in the life and culture of any nation, without exception, despite the level of its social development. There are so many varieties of dolls that separate collections and encyclopedias are devoted to this topic.
In what technique can be done
The creation of an author's doll is a special area of modern applied art. Such a thing is more for contemplation than for play. After all, a doll of the author's work is most often made in a single copy and is the fruit of long painstaking work.
For making dolls with your own hands, there are a huge number of specialized techniques and techniques, thanks to which sometimes even a decent copy can be made from scrap materials. But nevertheless, with a professional approach, the creation of designer dolls becomes a rather costly process, which in some cases can still pay off with the generous attention of others or a worthy sale.
All existing dolls can be roughly divided into two groups: soft and hard.
Soft dolls are most often made of threads and fabric with or without a frame, but dolls made using the sculptural textile technique are considered the most popular in this category.
This technique allows you to create toys that are anatomically completely reminiscent of real people, with a "live" facial expression and truly unique features. Most often, such dolls are called "stocking dolls", because one of the main elements for them is elastane or nylon, from which well-known stockings and tights are made.

When creating an author's textile doll for a start, a wire frame is formed. Further, observing the anatomical similarity, joints and muscles are wound on this "skeleton", which are then covered with padding polyester to add volume to the doll. And after that, nylon comes into play, which is very similar in color and texture to human skin.
With the help of special tightenings, linings and certain stretching of the nylon, all the features of the face and body of the doll are created. When creating an author's doll, talented craftsmen can easily reproduce in their creation any oval of the eyes, the shape of the nose and cheeks, the expression of the lips and even the smallest wrinkles.
The most popular solid dolls include products made of wax, wood, porcelain, polymer clay, plastic and polyurethane.
Techniques for creating a doll from polymer clay and plastic are quite fascinating, but laborious. Depending on the type of doll, it can be created with or without a frame. Every detail, be it a handle, a leg or a head, is carefully measured and carefully sculpted to replicate human features as much as possible, and then carefully baked or dried.

Subsequently, a wig is put on the finished base, an individual outfit is sewn, exclusive makeup and jewelry are added. Sometimes, looking at such an author's doll, the thought arises that it is alive.
And finally, let's consider the most difficult option - the technique of creating a ball-jointed doll. Of course, you can try to create such a toy yourself using master classes and author's techniques, but in modern world this technique has already become a separate business strategy and is called BJD (ball-jointed doll). Now real sculptors are engaged in the development of such models, and the details for them are cast by hand on special equipment from polyurethane, a hard and inelastic material. 
All parts of the doll's body are connected to each other using hinges that anatomically repeat the location of the main joints of the human body. Due to this design, the articulated doll can be taken in almost any position.
Even though she does not have a rigid skeleton, she will be able to stand upright. It is not cheap to order such a doll, but at the same time you can choose any desired parameters for it: image, shape and color of eyes, hair, makeup, clothes. But in order for it to become a truly author's model, it is better to do it all yourself.
Free style doll making
By itself, the free style implies the use of any technique at your discretion, without original copying of our recommendations. Just adhere to the basic principles, and in the choice of color palettes and materials, operate with your wishes and views on this matter.
If you want to work in a free style, then polymer clay, all kinds of yarn, genuine leather and various fabrics are best suited for these purposes.
You may also need acrylic paints, brushes, and quick fix glue.
In our lesson, the work on creating such a craft in a free style should proceed in the following sequence: the very body of the doll must be formed from the wire. Next, wrap it with foil, forming a torso. After that, build up mass from polymer clay, make the body realistic, apply color transitions to the face and visible areas of the body (use crumbled pastels or diluted acrylic paints), extend hair, make clothes. Here's what you should end up with:

This requires the following materials:
- baking polymer clay;
- strong, thick wire for forming the frame;
- soft foil (you can take food);
- wet wipes, alcohol-free (to smooth the doll's surface);
- manicure spatula and needle (for working out the details of the face).


After the frame is wrapped in foil, it is better to start shaping the doll from the head. After making the eye sockets, wipe the workpiece with a napkin, leveling the surface. Now the workpiece must be secured by semi-firing (enough for 30 minutes at 100 degrees).

When the piece has cooled down, continue to shape the head by building up layers of clay. Use a needle to mark the mouth, nose, and other features of the face.
![]()


Only when you are satisfied with all the details of the face, proceed to sanding with a napkin (be careful, do not press). Wrap a napkin in a single layer over the head of any thin oval tool and walk over the surface of the workpiece.

When finished with sanding, apply the required amount of crushed pastels on the desired places. Remember that the pastels will brighten up after firing, don't overdo it!

When finished with pastels, send the blank for the second semi-firing.
After cooling down, make the doll's ears and proceed to build up the toy's body.

First completely sculpt the torso, then the limbs. Sand the result and send it to a full bake for 35 minutes at 135 degrees.


Now we need to extend our hair. Make a cut at the top of your head. Begin gluing the tufts of hair from the back of the head, going up. The cut will become the natural parting where you should stop.


It remains only to sew a suitable outfit for the doll and put on a toy.
Dolls are not at all like ordinary toys, especially when it comes to handmade designer dolls. They do not just look like living things, because any master who creates these little masterpieces with his own hands puts the whole world into each doll: he comes up with and thinks out its future image to the smallest detail, endows the creation with a name, character, destiny and own history... That is why all dolls are so original and unique.
If you want to become a part of the world of doll makers, try to learn from already recognized and venerable masters. Thanks to their tips, photo lessons and master classes, you can also make a beautiful doll with your own hands. The main thing is just to want and start inventing her image ...


The doll is like a mirror of the soul of its author
Any creation begins with an idea, with a spark of an idea that has come. Not all master classes can show this, but often the masters draw sketches of the future doll so as not to miss anything and not to forget. Depending on which image is planned, the material is selected. However, sometimes a master can work with only one material, trying to improve all the time and achieve the ideal in his creations.
Designer dolls are created in a variety of techniques: they can be made of plastic, papier-mâché, molded from polymer clay or porcelain, sewn from fabric, have a soft body or a wire frame, etc. Today we will talk about frame dolls for making which uses a material such as paper glue.

Translated, its name means "paper clay". This material is a pliable mass created on a cellulose basis (it is worth distinguishing between a polymer-based material and a clay-based material). You can sculpt and model anything from it. Paperclay has many advantages over other plastics:
- it is lightweight and is not subject to dust adhesion during the molding process, like baked plastic;
- you can easily sand the product so that the sandpaper will not leave scratches on it, and you can get rid of small flaws with a simple putty;
- paper glue is like a canvas that you can paint in any desired color, based on the range of the doll's costume and its image, it is also worth noting that paper glue can be easily painted with acrylic paints (their advantage over oil is that they dry faster).

True, this material is rather fragile, but this small flaw can be dealt with by observing some of the secrets of the puppeteer masters.
For inspiration and search for possible images, look at the works of famous authors who have been creating dolls for a long time: Alisa Bazhenkova, Galina Shitova, Lyubov Lukyanchuk, Minenko Victoria, Yulia Nazarenko, Dyachenko Oksana and many others. Their dolls can be found in various famous art galleries, they are also often exhibited in thematic exhibitions and are acquired by avid collectors for private collections.
Of course, such designer dolls cost quite a lot, for example, the simplest copies can be bought from 10,000-12,000 rubles, and if you want to get a custom-made doll in an outfit of some historical era, completely handmade using various techniques, with expensive fabrics or accessories, then its cost can start from $ 100 and more.

From theory to practice, from idea to creation
Do not be discouraged and afraid that you will succeed in the same way as the masters, because they once also started small. Be prepared for not entirely successful specimens at first, but believe me that after numerous practical exercises, you will definitely be able to make a dream doll with your own hands.


Paperclay frame dolls are presented in collections in the most unexpected ways: gentle angels, mysterious fairies, nymphs, elves, fatal beauties and prim ladies, sophisticated dancers and graceful cocottes, harlequins, hatters, cute and naive children, etc. However, the manufacturing process will usually be the same.
- After creating a sketch of the future doll and preparing everyone necessary materials you can get to work. Your initial task will be to make a frame and a stand on which the doll can sit, stand or take the position that you have conceived.
- The frame with your own hands can be made of wire. It is better to use thin steel or copper wire (copper is suitable with a cross section of 2.5-3.5). The wire frame is a very important moment for a frame doll, because if you make it fragile, then the doll will fall over and will not be able to stay on its feet. It is also worthwhile to carefully approach the anatomical features and proportionality of the body parts of your creation, so that you can then blind them correctly.
- So, according to the proportions, we turn the skeleton from the wire. Get yourself some cuts different lengths so that you can not dwell on it in the process. You can take two roughly the same wires and bend them in half - so you get two pieces that have four tails on the bottom and a fold at the top. Shape the neck and bend the tails perpendicular to it to create the shoulders. Then twist all the tails below - you get a waist. Spread them at the bottom of the waist to shoulder width apart and form a pelvis.
- Next, you will need new pieces of wire to make the legs and arms. Bend one piece and tie it in the pelvic area to the already obtained frame (you can use a heat gun, medical plaster, electrical tape or the same wire for attaching). To get the handles out, take another piece, attach it in the shoulder area and bend it on both sides. Attach these handles to the common frame.
- Additionally, you can twist other parts of the body out of wire, such as a chest or butt for a doll. This is not necessary, but with them it will be easier for you to wrap the frame later.
- There will be five wires in the legs. Wrap them in a spiral with a wire of a smaller section so as not to twist together. If the doll's arms or legs are longer than you want, you can cut off the excess.
- Check the symmetry of the body. Next, work begins on its formation. Some craftsmen use cotton threads impregnated with glue for this, others prefer batting or synthetic winterizer for volume, you can also take foil, toilet paper, and for the final winding - floral tape or medical bandage with PVA primer. We build up the body and sew it with knitwear. At this stage, it is worth deciding on the pose of your doll, since when the "carcass" dries and hardens, it will hardly be possible to change it.
- Let's move on to sculpting the head and hands, as well as modeling the face. To do this, we need such a wonderful material - paper-glue, which is called self-hardening plastic. However, it looks a little like plastic. You can sculpt by building any number of layers until you achieve the perfect facial features. If you dilute it with water (to make a gruel), then you can smooth out the unevenness or smooth out an acute angle. When you are done sculpting, so that the head, face and hands look as they should, you will also need to sand the surface with a zero sandpaper (you can also use a nail polish at the end).
- Paint all exposed parts of the body with acrylic paint (very carefully, making sure there are no drips). Then paint the doll's face, apply the necessary makeup to her, make eyes (you can use purchased ones, outline a bead, make them from Fimo, etc.), sponges, cheeks. You can add glitter at the end and apply the last layer of matte acrylic varnish - this will protect the doll from dust and moisture.
- Make eyelashes and hair at your discretion - you can take thread, dreadlocks, fur, special items for dolls or real natural wigs.
- Clothes can be sewn directly on the doll, then it will not be possible to remove it. If you want to make her a wardrobe, then you need to create outfits separately. Do not forget about shoes, hats, jewelry and other accessories that your doll needs.
Do you want to take revenge on an evil boss, husband's mistress or sworn rival? Perhaps you will find useful information on how to make a voodoo doll with your own hands. You can also make such a doll for yourself - made yourself, it has more direct access to your aura. Thus, you can influence your personal life, attract love, money, luck.
Anyone who wants to can learn about creating such a magical artifact at home, regardless of the level of ability. You need to use a Voodoo doll based on your own religious needs, as well as personal life principles.
Voodoo originated in the mid-16th century when African slaves landed in Haiti. Catholicism prevailed there, which then mixed with Hinduism and Islam. From this mixture of religious and cultural aspects, this religion arose. This hybrid form then returned to Africa again.
 Today, cult practices of Voodoo are held in West Africa, especially in Gabon and Ghana. These are mainly transrituals for the treatment of various diseases. The doll itself has a name - Volt.
As in many primitive religions practiced today, Voodoo magic is dominated by the idea that "reality" is only in the form of a human facade, and behind it are powerful forces of gods and spirits. Therefore, in rituals there are spirits of revenge and healing.
Voodoo is usually associated with black magic and is positioned in many media as ritual murders and the like. In fact, it is like a tool that can be used to create something beautiful and at the same time can help someone destroy the thing.
Those who believe in the effectiveness of thoughts, in the positive or negative charge that they carry, can imagine how Voodoo works. For in each ritual personal convictions are invested and strengthened. In this regard, the duty of a person who wants to know how to make a voodoo doll is to be aware of the responsibility he bears for his thoughts and actions. What we send always comes back.
Making a classic Volta
Needle selection
 The color of the needle head represents the areas that may be affected. If you want to do something good for a person yourself with the help of Voodoo, then, for example, yellow (success) is the right color. If you curse someone, contact with yellow can change the fate of that person and no luck will shine for him.
Color meanings:
- yellow is a symbol of success;
- white - health;
- red is suitable for those who are looking for power;
- purple - spirit;
- green - wealth;
- blue - love relationship;
- black: to reflect or attract negative energy.
We are looking for the necessary materials
In case you are going to make a Volta yourself, you will need some materials:
- 2 sticks;
- soft filling material (e.g. Spanish moss);
- several threads or cord;
- buttons;
- strips of fabric and glue.
 You can also use narrow leather strips to tie individual materials together if available at home. The more material is wrapped on one part, the easier it is to connect it to others. Part retainers must be flexible.
If you want to know how to make a Voodoo doll in a dress, decorate or make a detailed face, you can, for example, use balls, buttons, feathers, fur, jute, leather, raffia, reeds, wood, shells, snail shells, teeth, bones , wax, clay, fabric and other materials that add personality or give it a special aura.
Make sure materials are clean and dry to avoid possible mold.
Process of creation
First, you need to connect the sticks in the form of a cross, while one stick should be slightly shorter than the other. We connect them with a tourniquet crosswise to make a semblance of a human figure.
Then wrap the sticks in the material. Start around the middle, this is the best way to do it. Wrap your head completely, and then return back to your arms, go to the middle and at the end - down. The volt works best if the material consists of a continuous strip. The idea is that the doll becomes stronger this way. Leave moss or bark on the ends before wrapping.
 After that, wrap the piece of fabric around the body so that the doll's head and torso are wrapped around.
Make sure to leave moss or bark at the ends of the doll, for example, for hair, and for arms and legs. Split the ends to shape and secure them with glue. You can reinforce the whole thing with a few stitches with a needle and thread.
To make a face, attach, for example, 2 eye beads, sewing them with a needle and thread, or glue. Add another bead to create a mouth for the doll.
If you can make your own voodoo doll clothes at home, you will get more personality and your own gender. You can complement your doll with other accessories, such as a gri-gris, an amulet or a talisman.
Remember that a voodoo doll can be a symbol of a specific person or spirit. If you mean a special person, it will be more effective to add something that belongs to this person, that is, for example, a lock of hair, a piece of clothing, a picture of this person, or another thing. The goal is to give Volt the energy of that person.
Making a modern voodoo doll

A wax doll is very popular, since it is easiest to hook foreign objects onto it. If you have clay at home, then you can create an image of a person from it.
Materials - a couple of small boards or sticks, a cord or thick woolen threads, fabric (color according to what you intended), thread with a needle, gluing materials, everything to create a face (what you can find at home or you can easily find on your own - beads, buttons). And, of course, a particle of the conjured person.

Volt from yarn

How to undo the effect of a spell
At home, you will not be able to recall the spell, you need to turn to the forces of nature:
- We wrap the Volta in a white cloth, sprinkle with salt and throw it into the river or deep in the forest, along with a fruit offering. We say thank you to the spirits you have summoned. We leave without turning around, upon arrival - a bath with salt.
- A doll wrapped in white cloth should be placed in a hole under a tree as far from the house as possible and set on fire (on Saturday). You need to take holy water with you and pour the ashes. Upon arrival, we also take a bath with salt.