- Made by Girl Spring, will not only decorate your interior, but will always remind you of spring. In this photo master class, I will show you how to sew a pumpkin head.
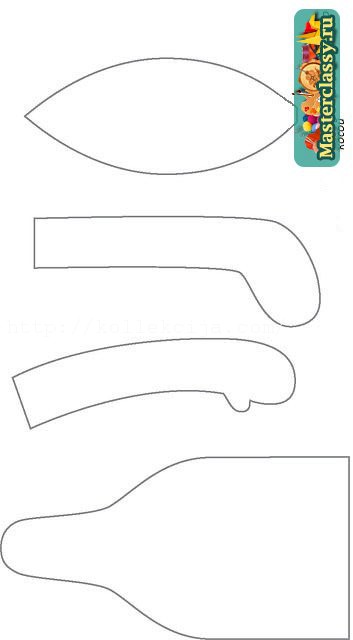
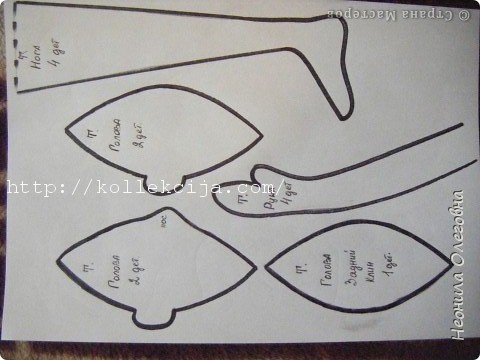
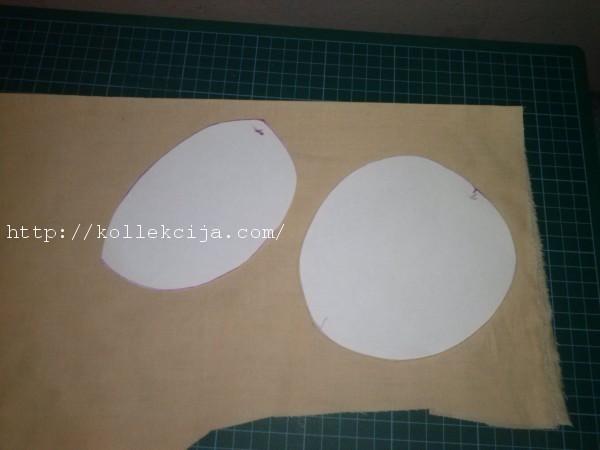
Photo 1-3. I do not have a single pattern, so I am making a prefabricated hodgepodge. The base body from the first pattern, the head from the second.
I made two pumpkin heads: the body is the same, but with different heads, one with a nose and ears, the second like the latter, which were from the pictures.
T dace, arms and legs, I took from the first pattern, a head with a nose from the second and another head from the third. See for yourself which one you personally find more interesting.
H do not pay special attention to the number of limbs. I always sew four dolls at a time.
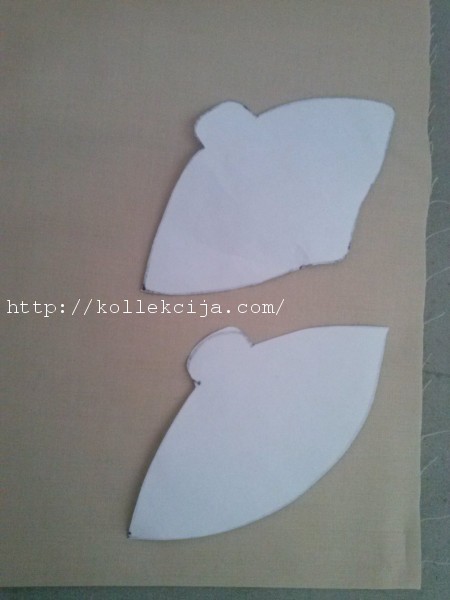
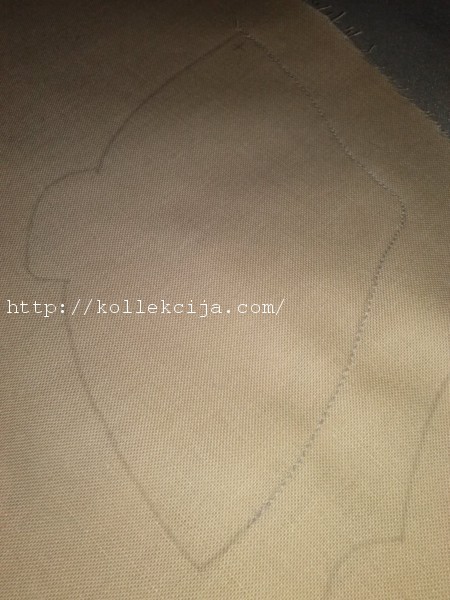
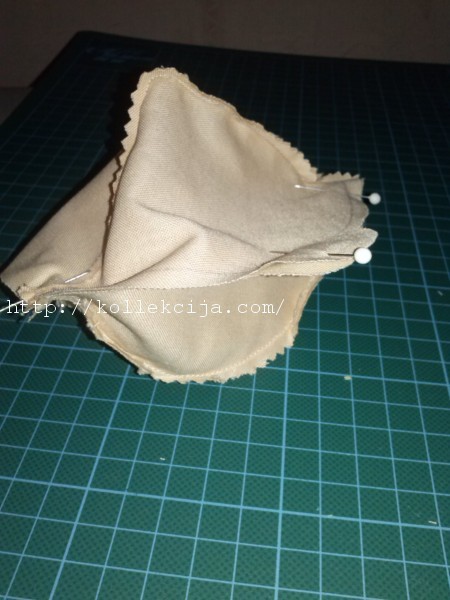
Photo 4. And so, we transfer the pattern to the fabric, everything is as usual, one but ... the head of the pumpkin head, which is sewn from wedges, must be cut obliquely, i.e. arrange the pattern like this:
Photo 5. В we also cut the cut of the head of the second type along the oblique.
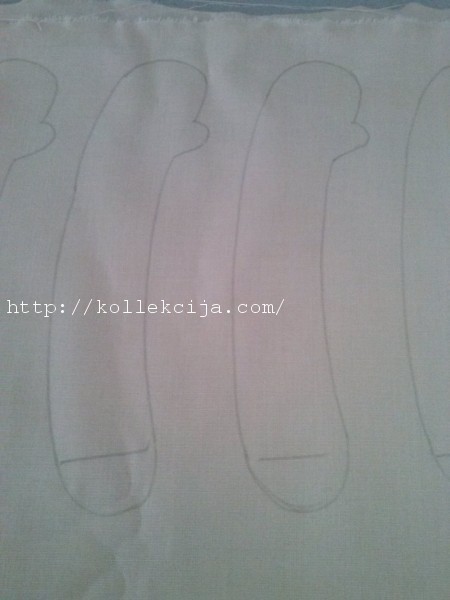
Photo 6. Handles: I i round my hands on the fabric when I cut. ABOUTit is best to leave the eversion hole on the back, just above the elbow.
Photo 7. Н we sew the lights and the little body, as usual, again, I do the same as in Tilda's, first I sew and only then I cut out with magic scissors. We fill the handles. Have hands there is a hole for turning and stuffing, we sew it up with a blind seam.
E if someone wants to make fingers, the palm should not be stuffed tightly, otherwise not very beautiful sausages will turn out, and at the very top the handle is also tedious to stuff not tightly, the legs at the very bottom are very tight, about weaker from the knee, we leave the last 4 cm empty.
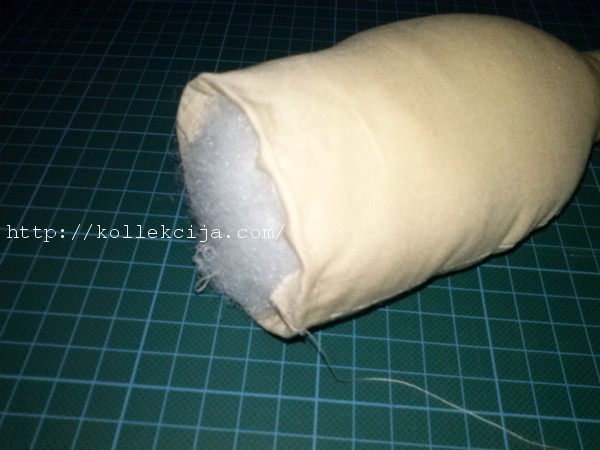
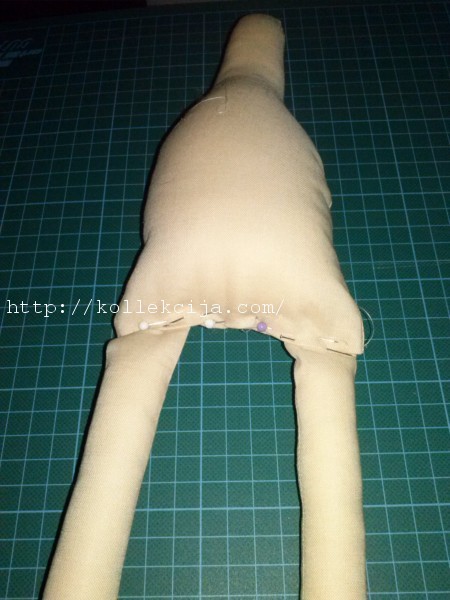
Photo 8. Now making a little body. We stuff the neck very tightly, I usually stuff it up to the shoulders with medical cotton wool, it is rammed and it turns out like a brick. If the neck is not filled tightly, then there is a danger that the head will then hang. At the calf, bend the edge by about 0.5 cm and basting.
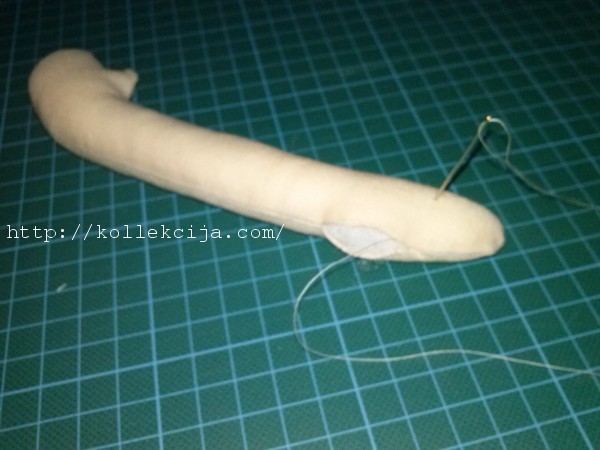
Photo 9. В we put the legs, carefully align the length.
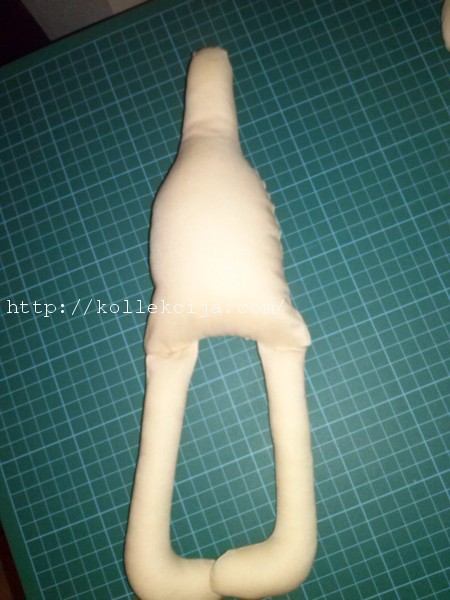
Photo 10.P we sew the legs with a blind seam.
Textile doll head
Photo 11.C start the head of the first doll: first I sew the front seam where the nose is, then cut it out. Z first I cut out the upper part, sew it in three parts, two sides with ears and a wedge in the middle.
IN from now an important point, at the very bottom, where the neck will be, we do not reach the end of about 1-1.5 cm on each wedge.
Photo 12. U we should get two parts like this.
Photo 13.T now we combine all the seams and ears.
Photo 14. And we sew in a circle, again, do not forget to leave about a centimeter in the neck area not sewn up, it will then be necessary to turn it through this hole. Particularly attentive drew attention to the small crosses on the pattern - I mark the top of the head in this way, when it is sewn, you cannot immediately tell where is the top and where the bottom is.
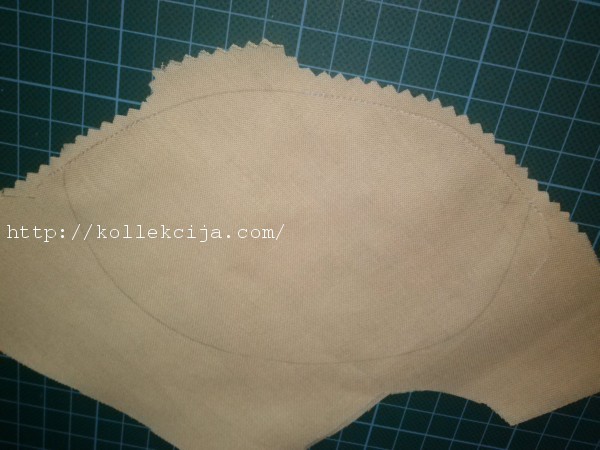
Now the head of the second doll: Bwe cut it again along the oblique, sew the two back parts of the head, leaving a hole for turning out, like this:
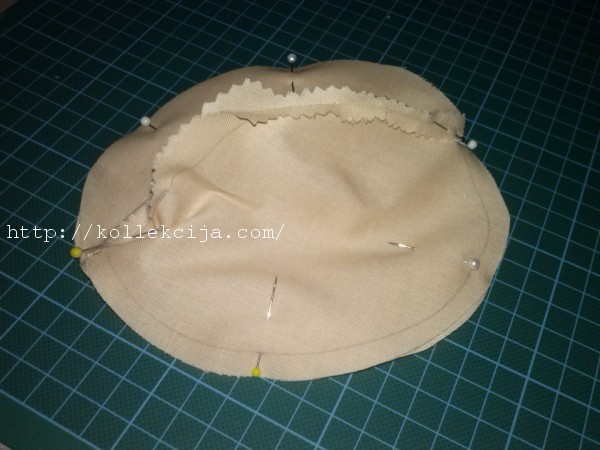
Photo 15. В we cut and fold with the front of the head, here it is important to carefully combine the seam with the marks on the pattern so that the head does not warp later.P we sew along the entire circumference, we already have a hole for turning out in the back seam, cut off all seams with a zigzag or make neat notches.
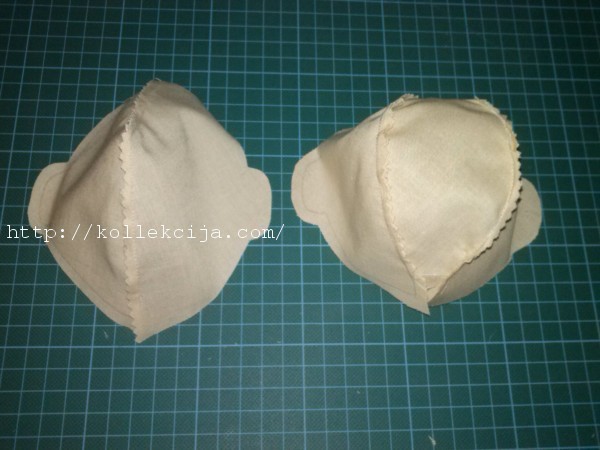
Photo 16. В we turn it over and get two such heads.
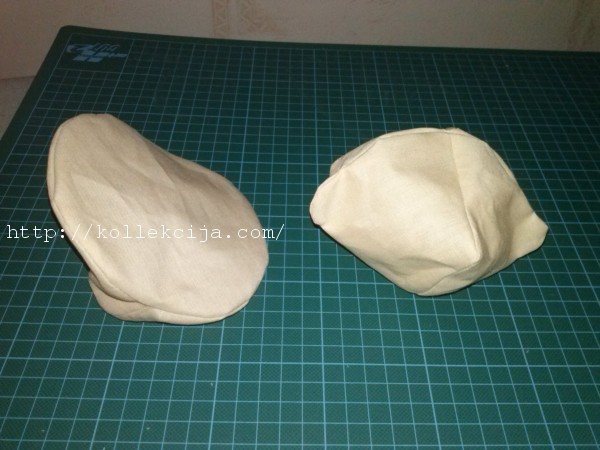
Photo 17. About we stuff it very tightly, at the head without a spout at the back we sew a hole through which we turned it out and stuffed it, at the head with ears we didn't sew anything up. As a result, we get two such heads.
R the dimensions of the wedge at the head with ears are about 14 cm, so I also made the second 14, but this is too much, you can do 12, but I will leave it that way.
Clothes for a textile doll
Photo 18.T the ear is ready, we begin to dress it.We sew clothes: at first the pants, I have no ready-made patterns, I make them as I sew.E these pants will be without ruffles and folds, if anyone wants more romantic pants, you need to make more increments... I do the panties pattern like this: i fold a sheet of paper in half, put the carcass on the fold and trace around the edge.

Let me present to your attention my first master class, which is devoted to the creation of a textile, interior doll.
I tried to do everything in great detail so that everyone could create such a girlfriend for themselves.
I love autumn! These colors, this smell of autumn air, so special, so fabulous. Therefore, working on the autumn master class brought me great pleasure.
We will create a doll in a warm, autumn image. I named her Yasenka, in my opinion, very autumnal. I wish you a pleasant viewing! Let's start ...
In order for our baby to be born, you will need:
- body fabric (cotton and knitwear);
- fabrics for dresses and accessories;
- threads;
- hair for dolls (tresses);
- shoes for dolls (I have shoes made of natural suede, I also do it myself);
- scissors;
- tweezers or stuffing stick;
- synthetic fluff or other filler;
- sewing machine;
- pattern;
- hot gun (optional). 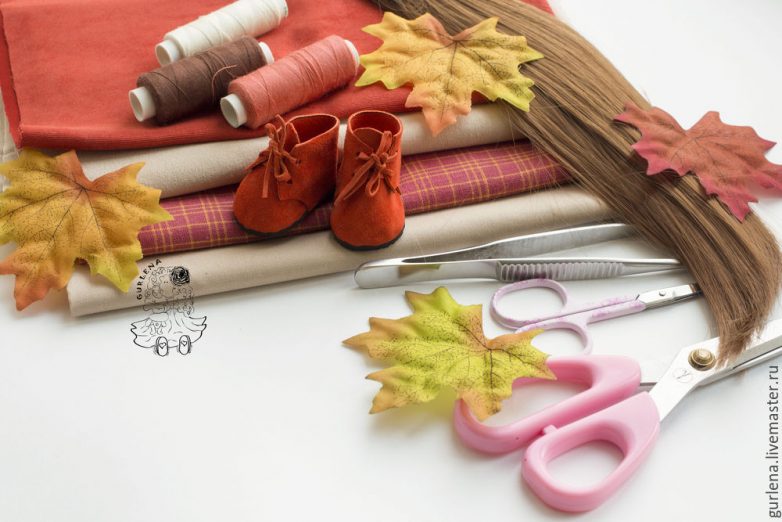
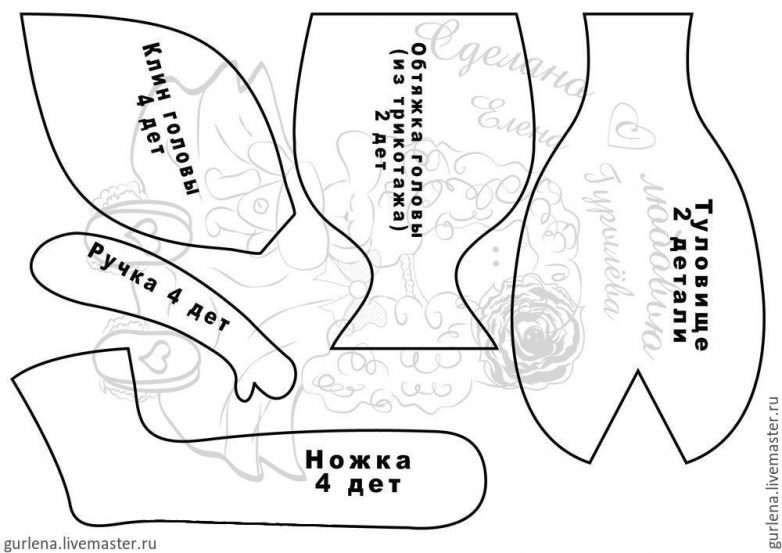
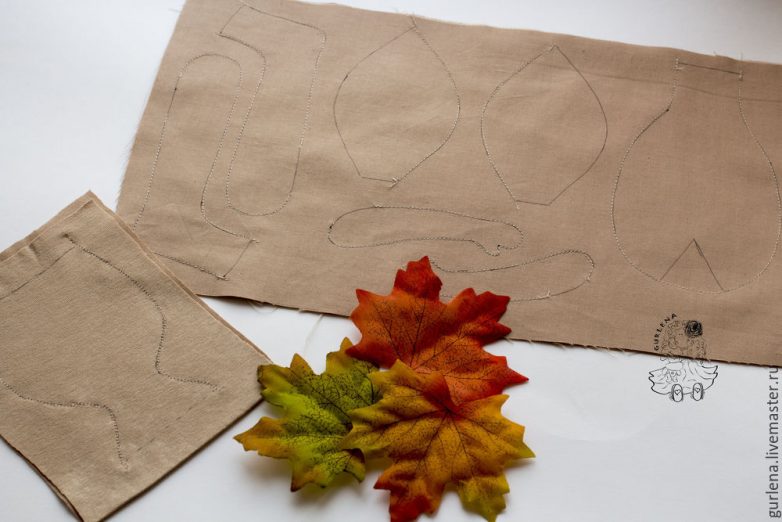
We print and cut out the pattern. I want to draw your attention to the fact that you can play with the size of the doll simply by decreasing / increasing the pattern in the editor. You just need to monitor the proportions while doing this.
My doll was sewn according to this pattern without changes. If you shorten the legs a little, then you will not get a slender girl, but a cute little lyalek, a little plump in appearance. So experiment!
We translate all the details into cotton, except for the one that looks like a glass. We translate it into knitwear.

Fold the fabric face to face and pin it off. 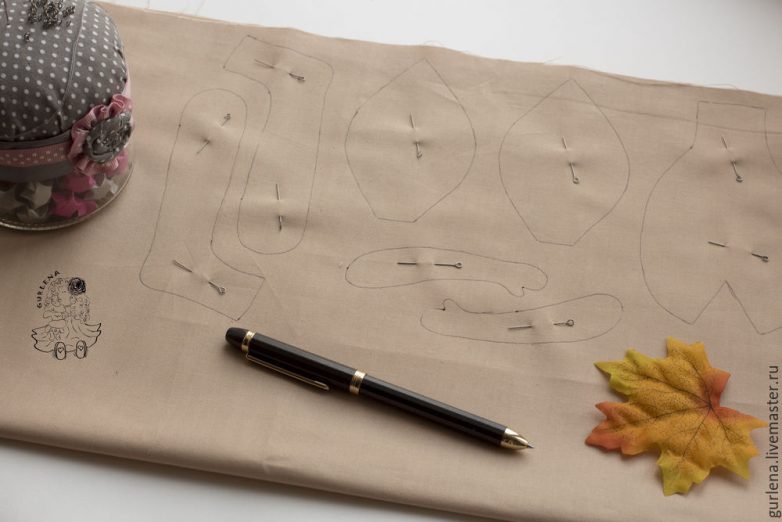
We sew on a typewriter, leaving holes for stuffing. You should not first cut out the details and then stitch them. If you first flash it and then cut it out, it will work out faster and more accurately.
The next collage shows what improvements need to be done after the main stitching.
1. Head. We fold the wedges of the head, stitched on one side, face to face, pin the seam into the seam with pins and sew. We will only have the bottom hole for stuffing and securing the neck.
2. Leg. We fold the foot, as shown in the photo and make a seam in the form of a slight smile.
3. Torso. We fold the dart, sew, then cut off the excess with scissors. With a dart, the body turns out to be more rounded, but you can do it without it. 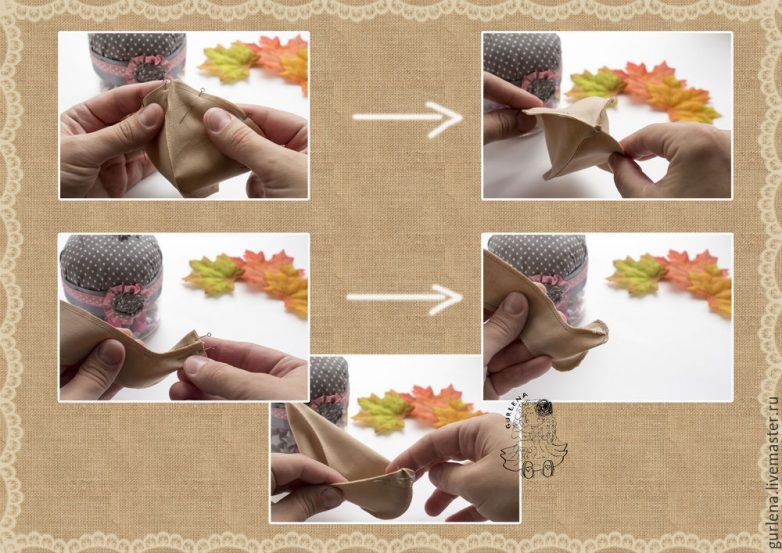
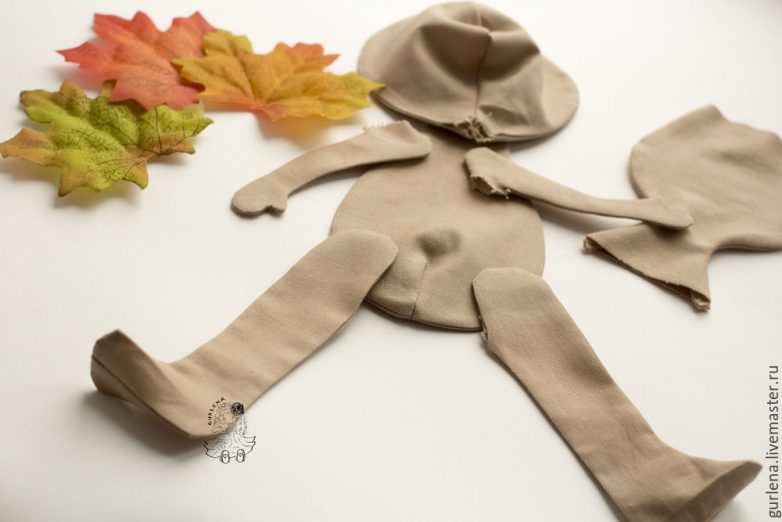
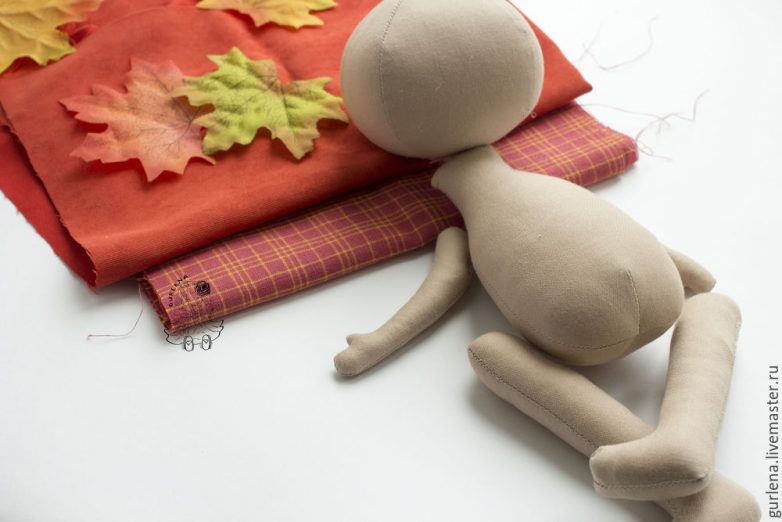
We turn out all the details. This is what the little man turns out to be at this stage.
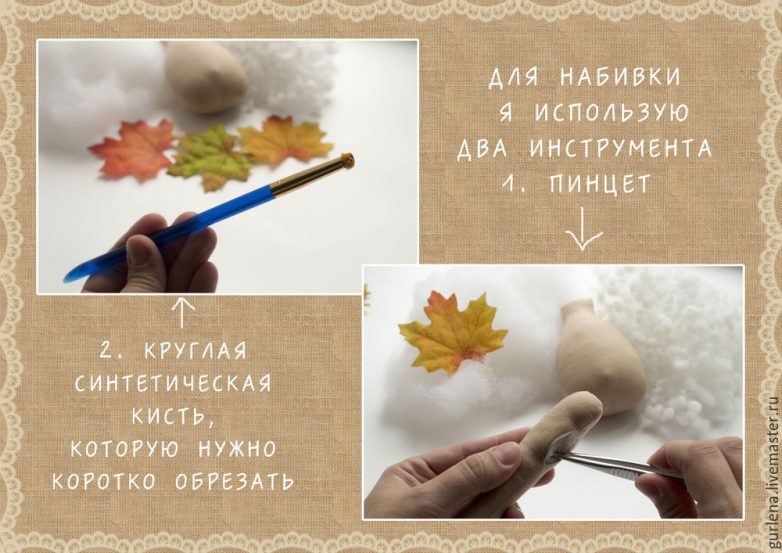
Let's start stuffing. I used to stuff with holofiber, now I switched to synthetic fluff, and although it is more difficult to stuff with them, the effect of stuffing is much more aesthetic. No cellulite :)
We stuff tightly, especially the legs and neck. It is very convenient to use a synthetic brush, short cut and tweezers. But with tweezers, you need to be careful not to damage the fabric.
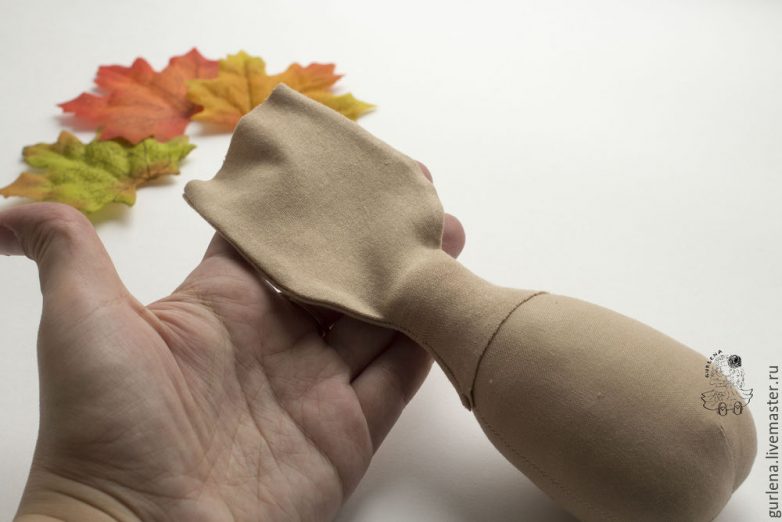
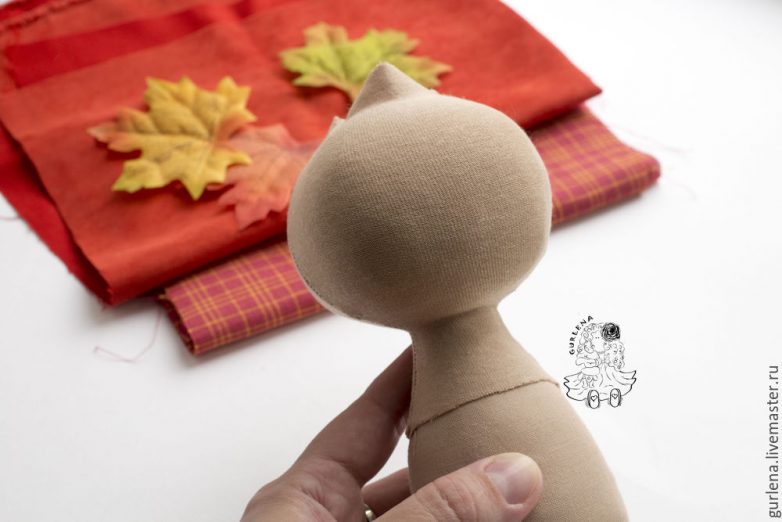
Our doll has taken on a volumetric shape, now let's make her a beautiful neck and head.
We take a piece that we made from knitwear - a glass. We pull it around the neck.
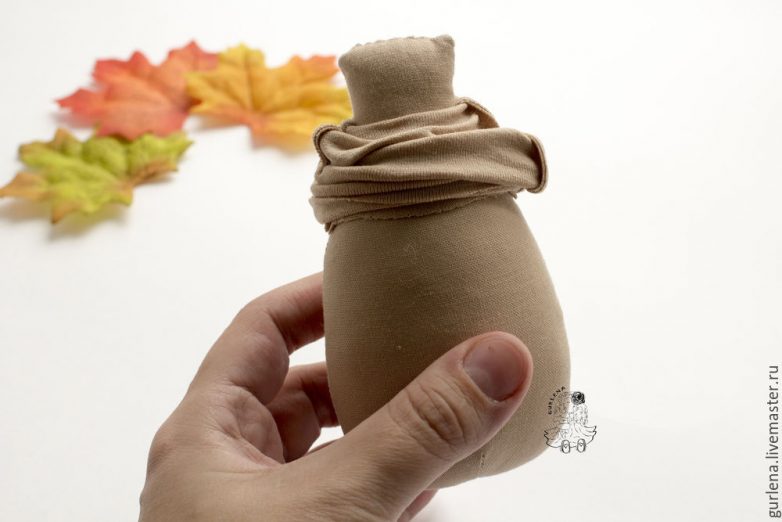
We lower everything to the body, exposing our neck to the autumn rays of the sun.
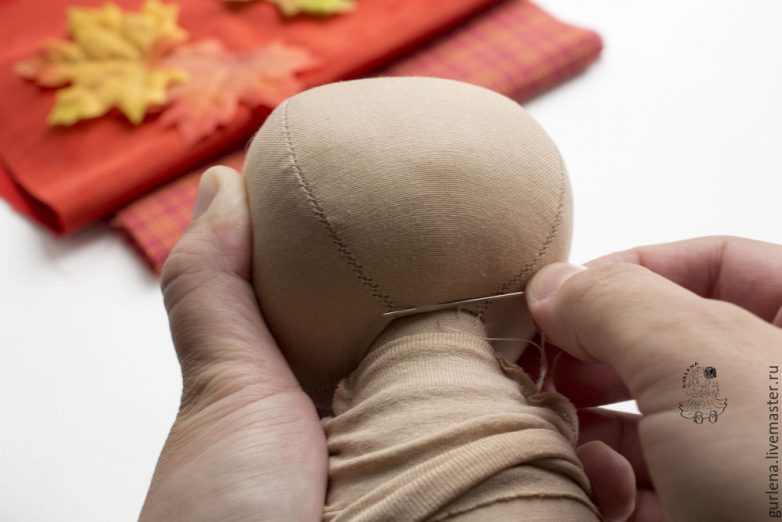
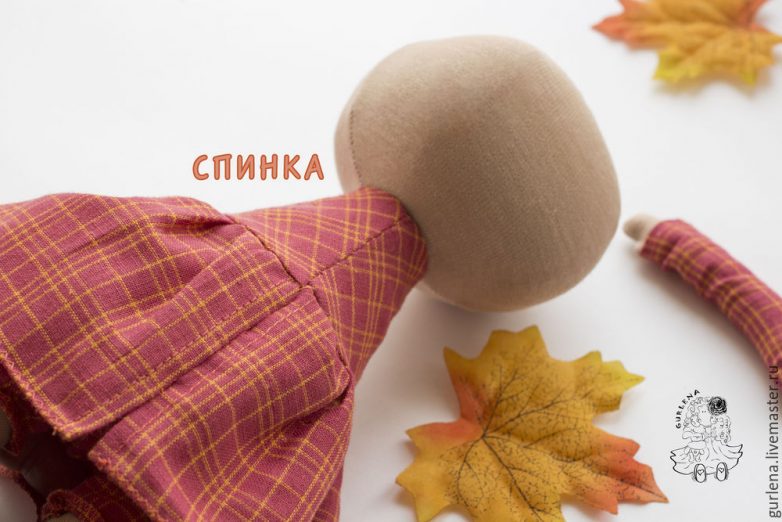
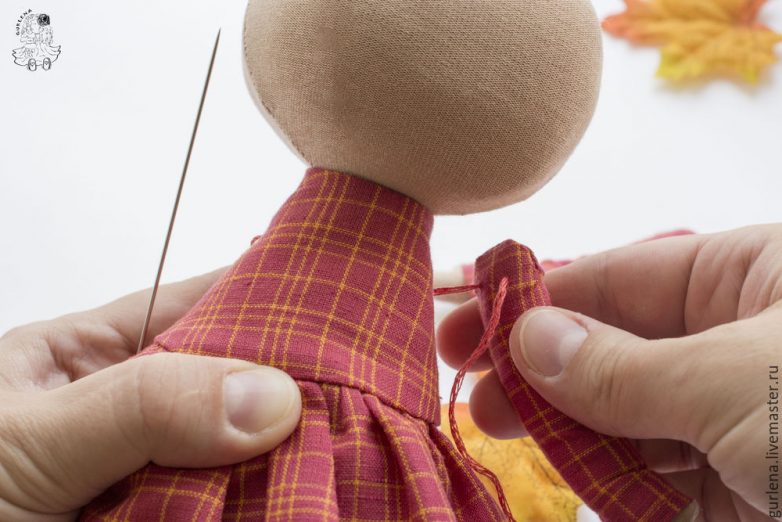
We begin to sew on the head. The seams of the wedges are located along the edges from the face (not in the center), we put the head deep enough, but make sure that the neck remains. Can be secured with long needles to prevent twisting. Sew on with a blind seam in two circles.
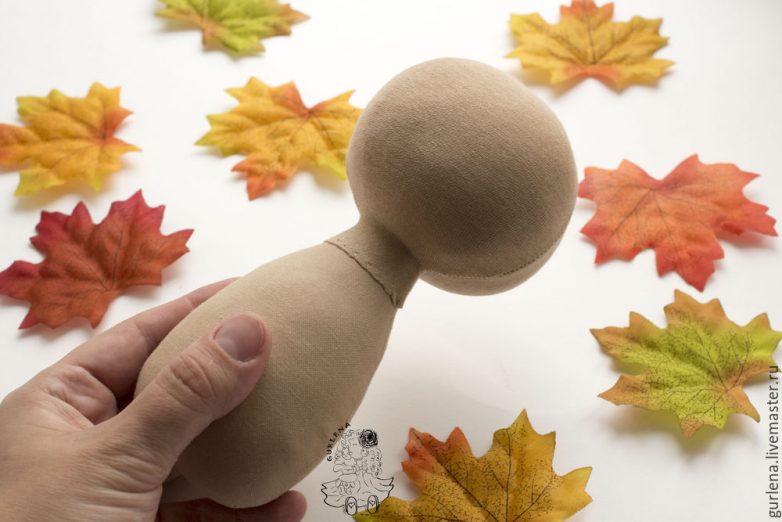
After that, we stretch the skin over the face and imagine ourselves as plastic surgeons. We have rid our doll of wrinkles on the neck and face.
It remains for us to sew the bottom edge neatly and pull off the top, forming a beautiful crown. Done!
In the next step, let's teach Yasenka to sit and stand.
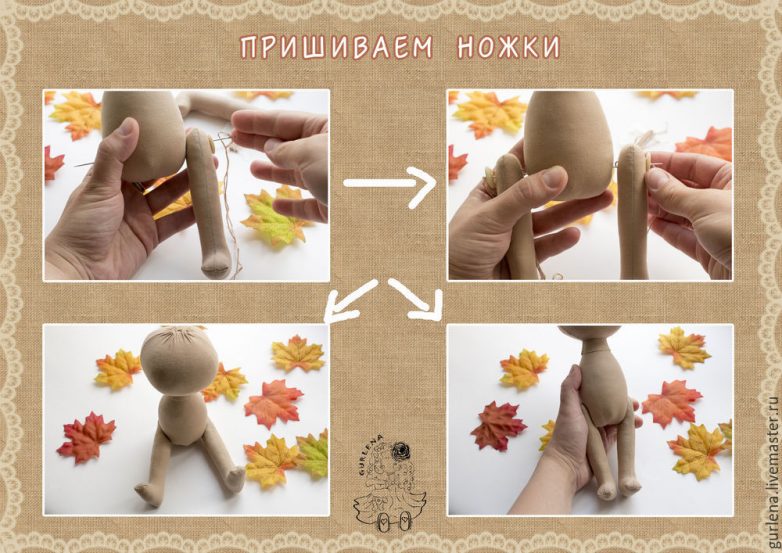
Sew on the legs using the button method.
We take a strong thread, a needle for toys, align the legs so that it does not turn out crooked.
We insert the needle into the button, then into the first leg, pierce through the body, then the second leg and then the second button. We turn around and make the way back. We tie the ends of the threads, pulling tightly so that the distance between the legs is not wide. If you had buttons with 4 holes, then repeat the procedure.
I always use it with four, it's more reliable.
Well, Yasenka can sit and stand. Let's start creating clothes. We will make pantaloons and a dress with long sleeves. We print and cut out the pattern.
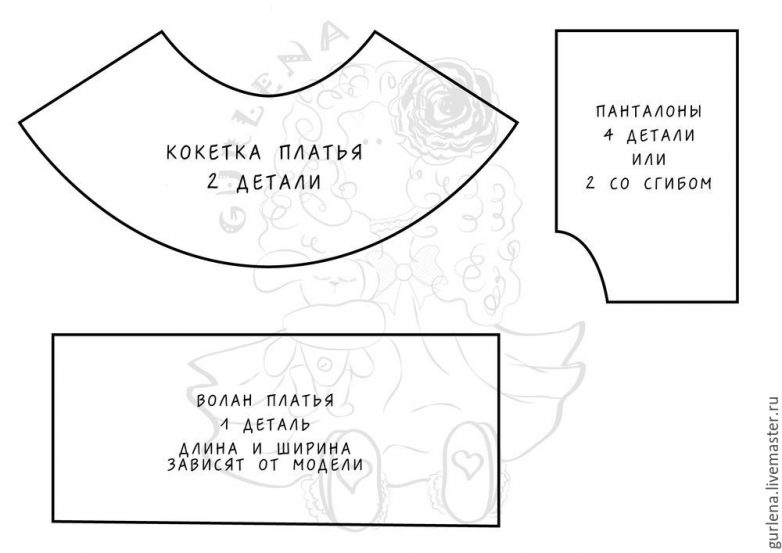
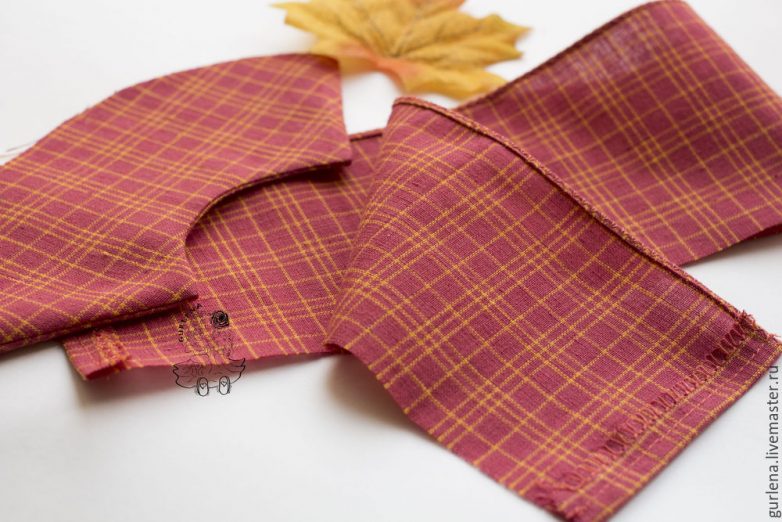
The flounce is a rectangle, we take its height depending on the desired length of the dress, and the width - on the desired volume of folds.
Dress coquette - 2 details.
Pantaloons - 2 pieces with a fold.
It makes no sense to make a pattern for mittens. We just measure the length of our handle and the volume in the widest part, with these sides, and draw a rectangle (note, I also do it with a fold). Draw a semicircle on top of the rectangle.
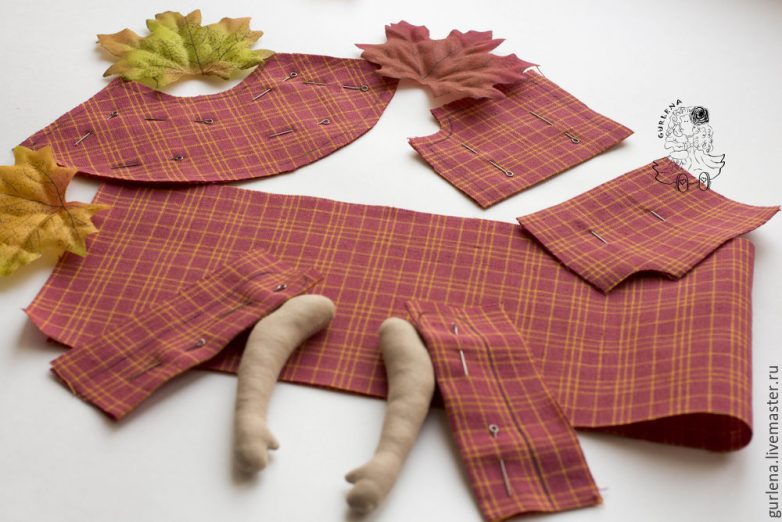
Trousers.
1. We process the upper and lower cuts, grind the side seams on the legs, overstitch them.
2. Turn out one leg and put the right side into the other.
3. Sew the step seam. We sweep.
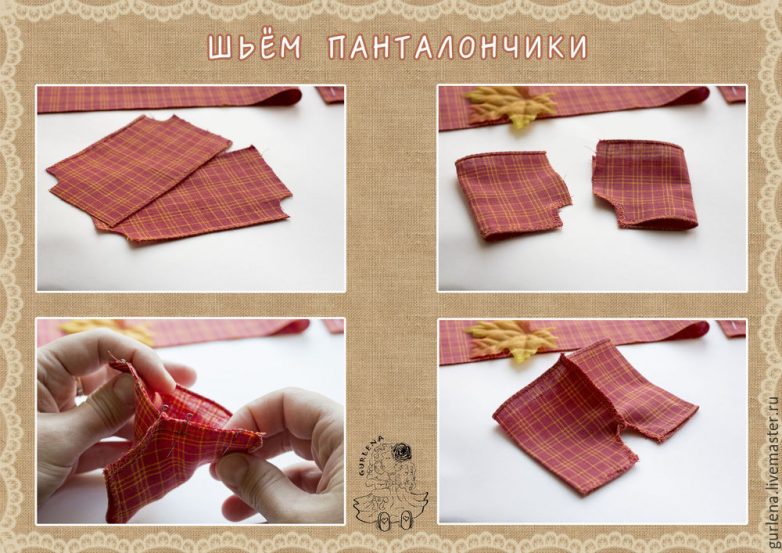
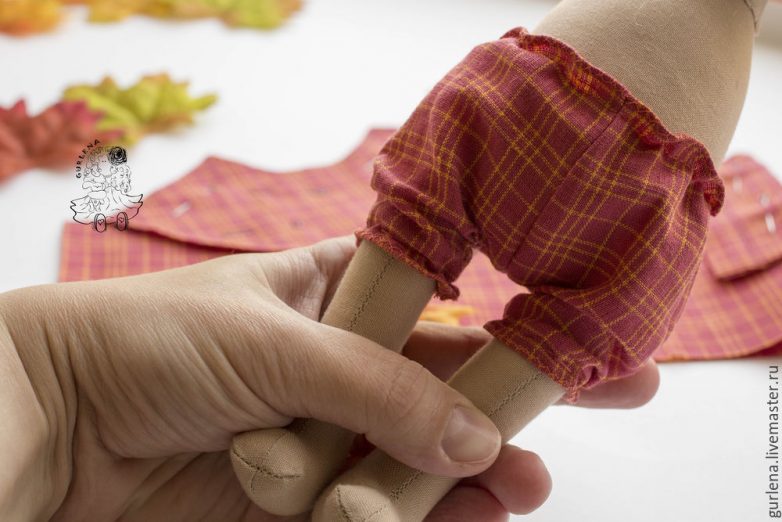
We lay a line along the upper edge and along the edge of the legs by inserting a bobbin with an elastic band into the lower thread of the machine. It turned out to be romantic assemblies. Trying on and admiring the trousers.
For the dress, we grind the yoke on three sides. Cut off the corners for better eversion.
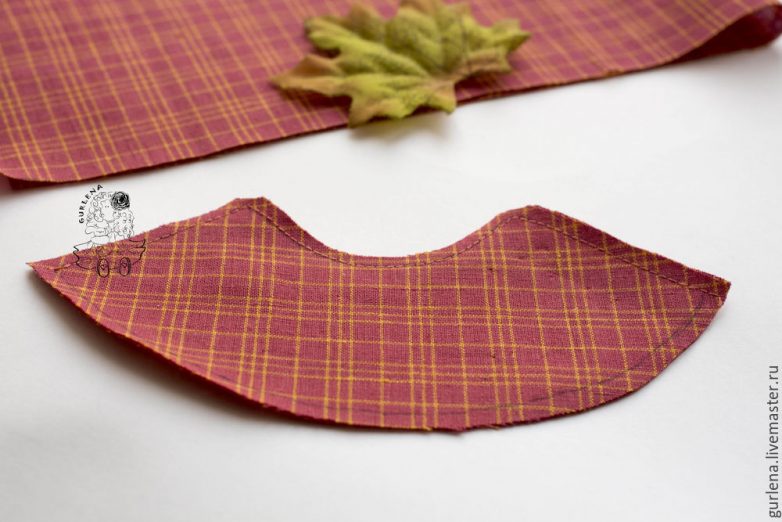
We turn it out. We iron it out.

We process the shuttlecock along the bottom edge and on the sides.
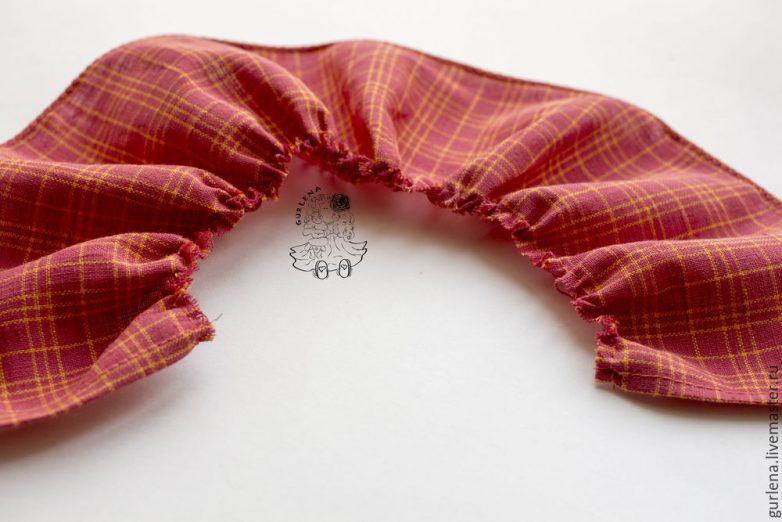
Along the upper edge, we start a machine line 4-5 mm wide.
We tighten to a size equal to the size of the bottom edge of the yoke.
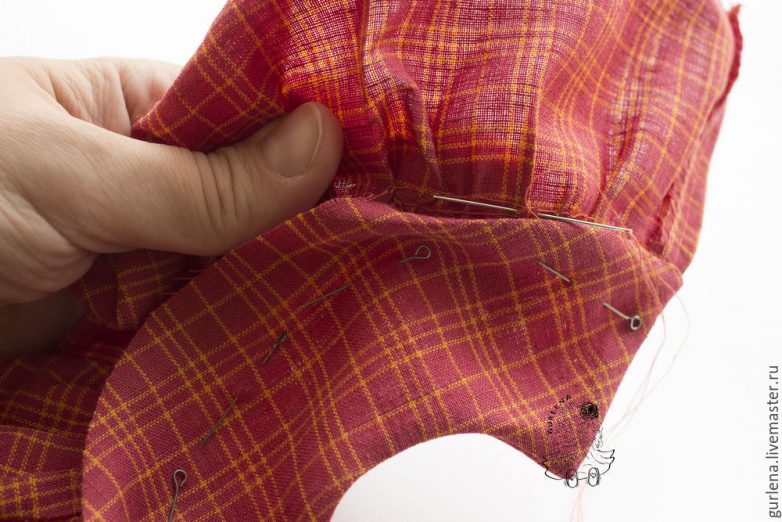
We sweep, and then we attach a shuttlecock to one of the sides of the yoke. We remove the basting. We iron.

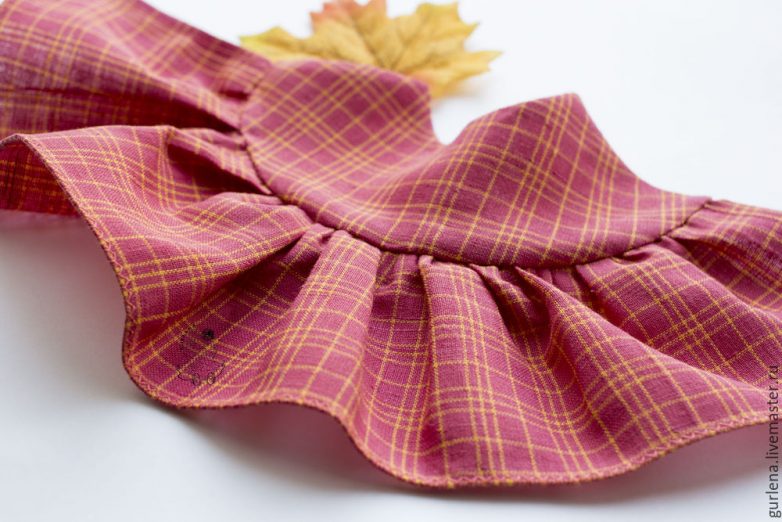
Now we turn the bottom of the yoke and sew it to the shuttlecock with a blind seam, but try to lay the seam not lower than the first seam so that no stitches are visible on the front side of the dress.
The dress is ready.
We try it on and connect it on the back with a blind seam.
Of course, there is a way to create a dress much easier. To do this, simply first sew the yoke directly to the doll, and then the shuttlecock. In this case, the connection point of the shuttlecock can be decorated with a belt made of the same fabric.
But in this master class, I wanted to show a more complex dress.
And you can make a full-length, removable dress, but this is more suitable for play dolls.
You can also make a jacket on the dress, then we will have sleeves from the fabric from which we will sew the jacket.
Sew on handles.
We make a through puncture in the first hand.
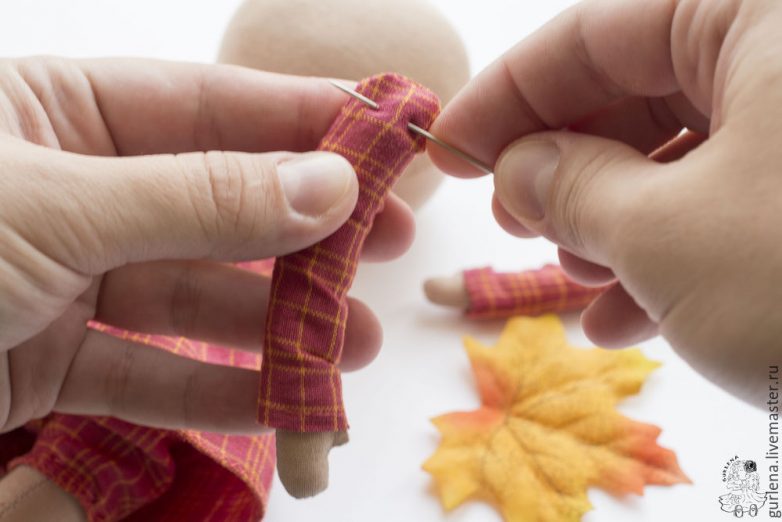
We insert the needle into the body on the right and draw it on the left. Pull the needle out completely.
We make a through puncture in the second handle.
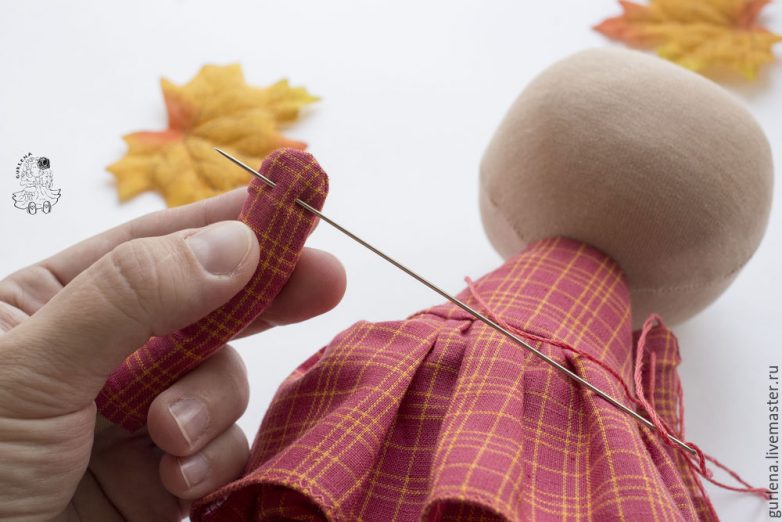
We return through the body to the first hand.
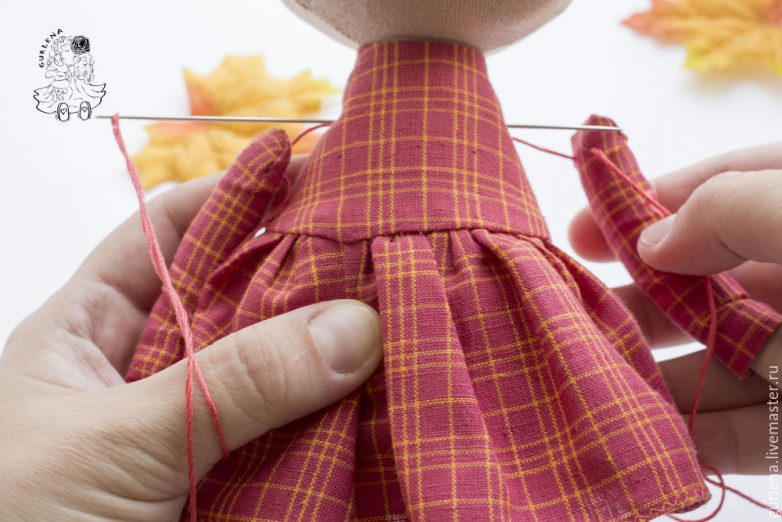
We tie a strong double knot and hide the ends of the threads with a needle inside the body.

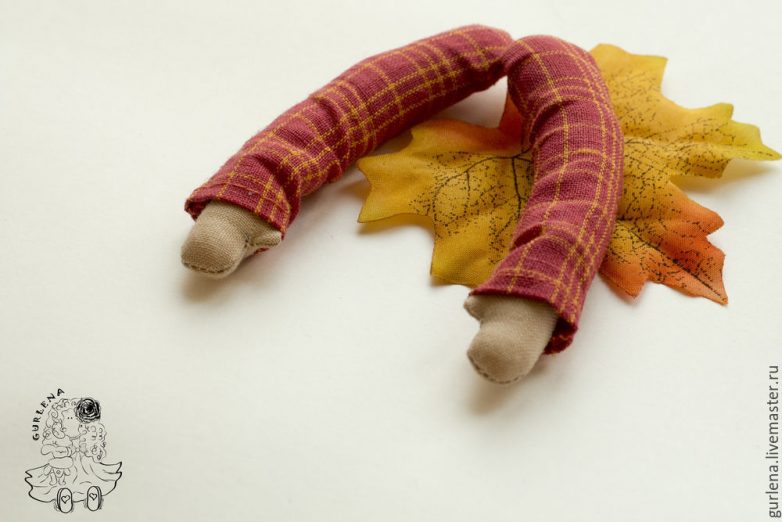
Here are the pens. They move, you can do exercises! :)

Let's get started with the hairstyle. Since I use a hot gun, I pack the doll in a bag in front of the hairdresser.
If you don't have a hot gun, you can simply sew on the wefts by hand.

Immediately before working with tress, you need to make such a roll of them, with a diameter of about 1 cm. We just wind and sew.

There are two seams on the sides of the doll's head, so we outline the first row and glue it from seam to seam.
We glue the second and subsequent rows, starting a little closer to the face than the previous ones.
On the second photo of the collage, 4 rows are glued.
5 row will already be glued round.
And starting from it we glue the weft without departing from the previous row. Plump - row by row.
We continue this procedure until there is a crown equal in diameter to our roll.
We glue a roll of tress to the center of the crown of the head and we get a girl with a palm tree on her head.
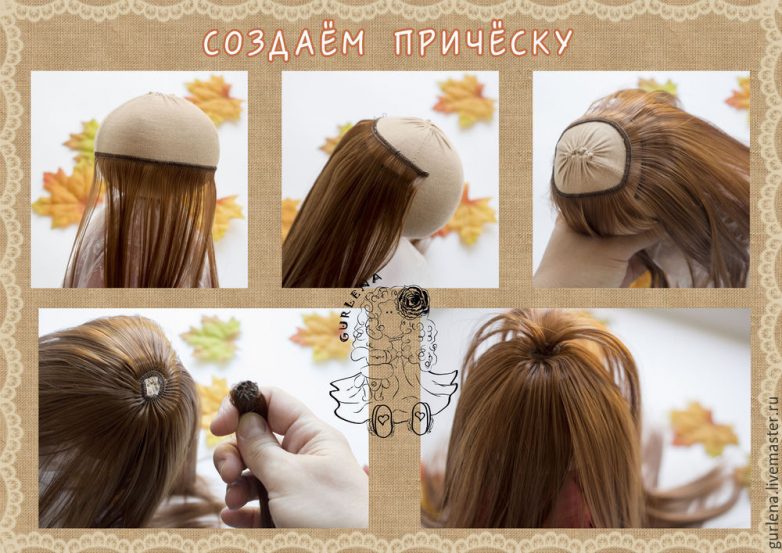
Let's get rid of tropical vegetation.
To do this, lay out the palm on the sides, finding the center in it, gently holding it, cover the top of the head with a damp cloth folded in 4 layers.
And we lean against the top of our head, covered with a cloth, with a hot iron, literally for 1-2 seconds.
Well, now a gorgeous head of hair, you can advertise shampoo.
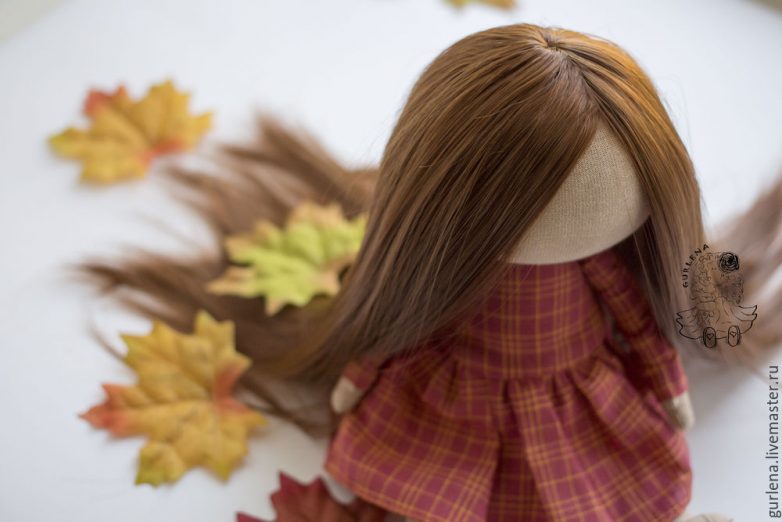
Basically, we can say that the doll is ready. It remains to draw the eyes (I just put dots on the fabric with a black outline), rouge the cheeks, put on shoes and dress up.
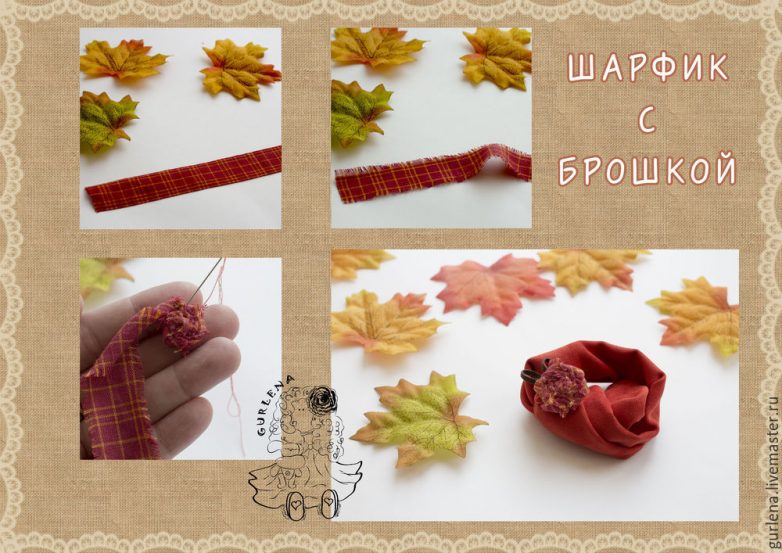
Let's make a scarf with a brooch.
Cut out a rectangle from micro-corduroy (or other material), of sufficient length and desired width so that the scarf is voluminous.
Fold the wrong side out, stitch the three sides, turn it out, sew the fourth side, tucking the cuts inward.
Making a brooch. A strip of "mohrim" fabric along the edges, twist in a spiral, while twisting the strip itself and fasten it with stitches. I also added two suede cord loops.
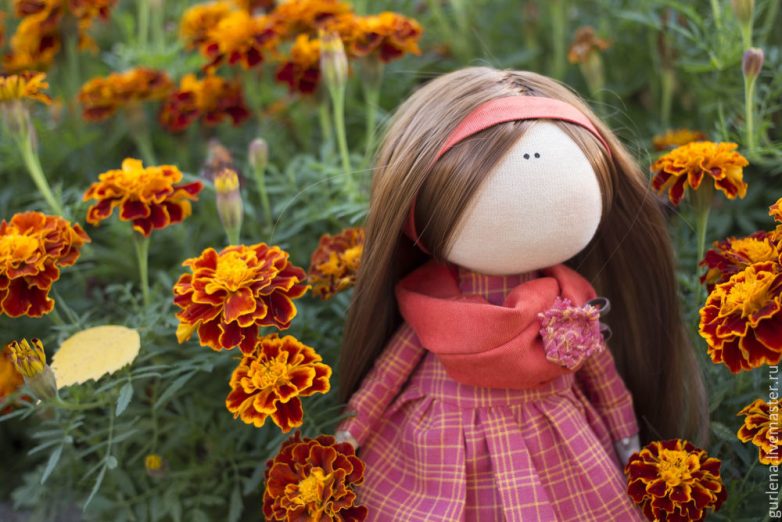
Yasenka asked for a narrow textile bandage on her head. I could not refuse her!
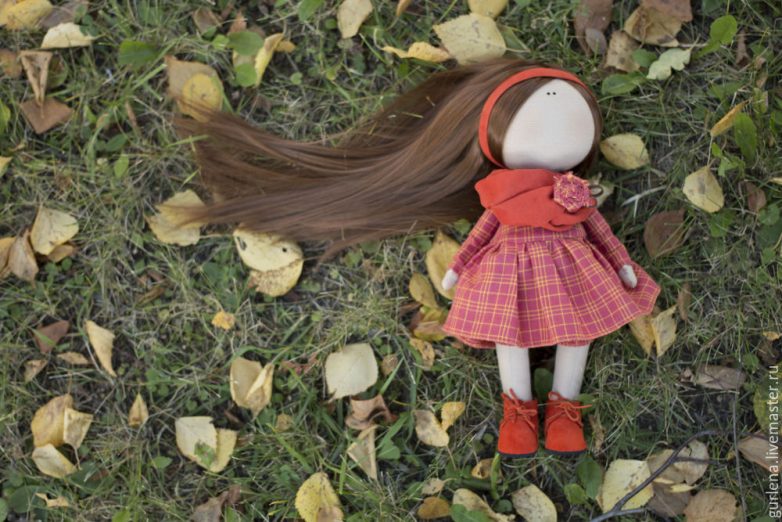
Well, our doll Yasenka is ready! Dressed up and went to be photographed against the background of autumn nature.
Breathe in this air, it is the charm of nature. Now nature smells of her perfume, the perfume of autumn ... Autumn feels happiness! She is simply the most beautiful and most real, because she cannot breathe without rain. Open the window, let the cozy, tender, autumn rays penetrate into your house and remain in it until spring ...
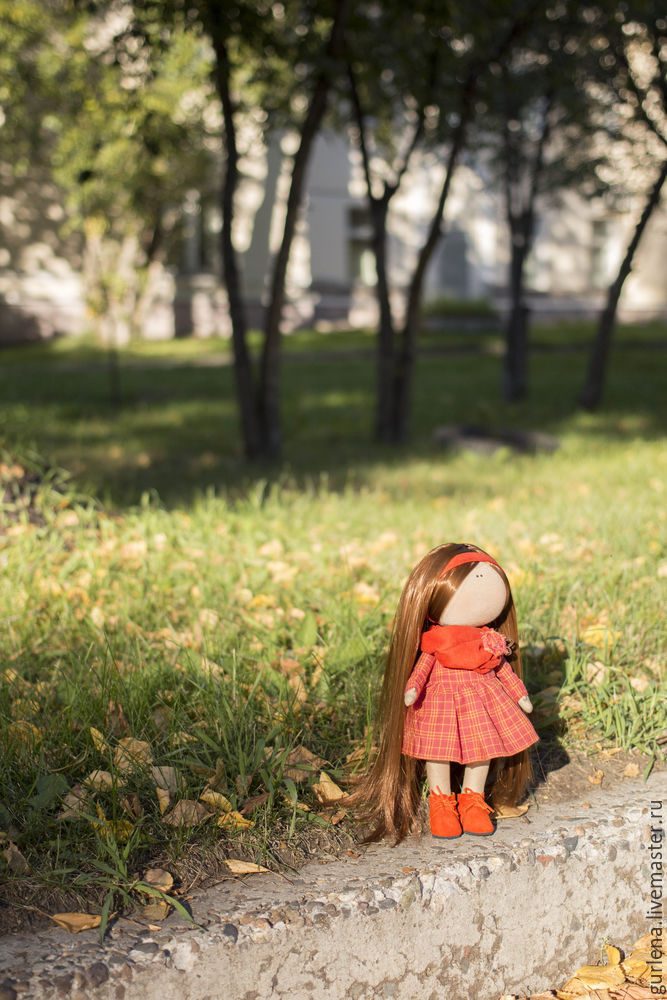
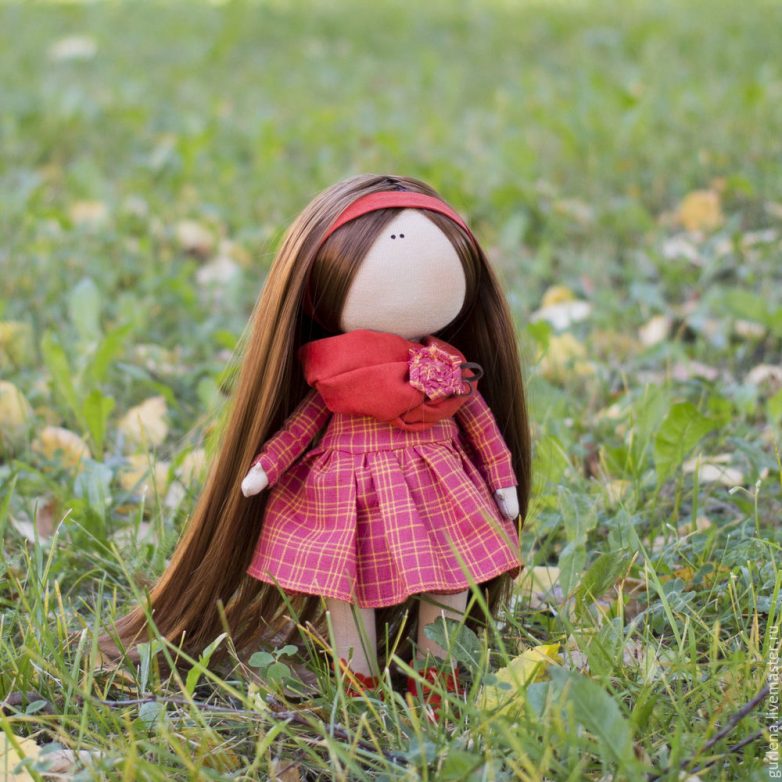
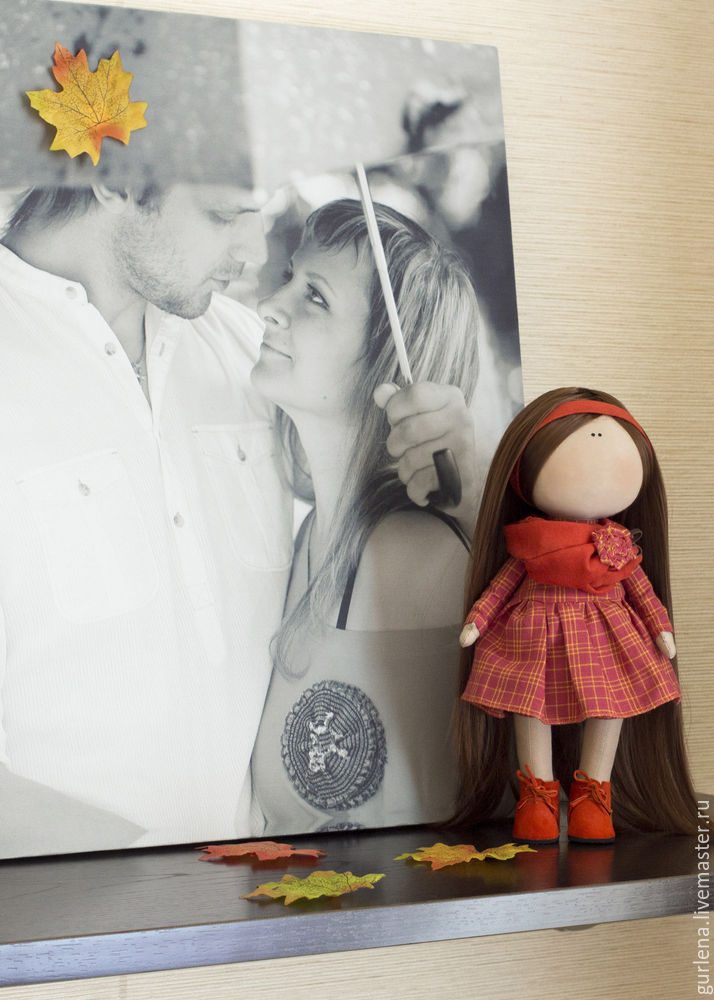
And since the doll, we have an interior - a photo in the interior.
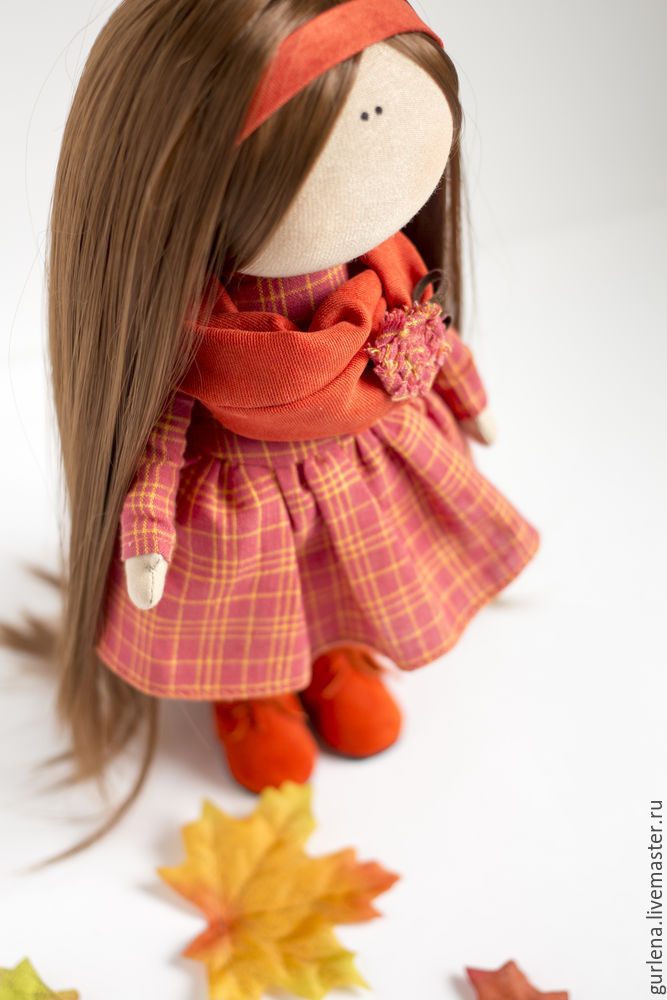
Finally, a few photos on a white background.
There are a lot of questions about the pupa's face. The common man cannot even believe that dolls are made of fabric. So I'll open the curtain a bit and show you some of the workflow. In order for the one who starts to sew dolls to understand in which direction to move, well, or choose another method :)
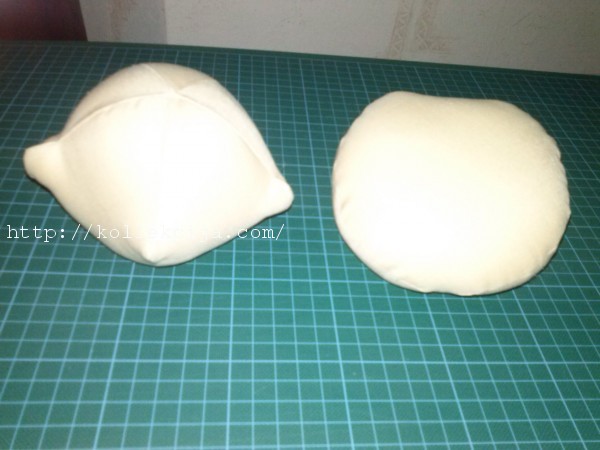
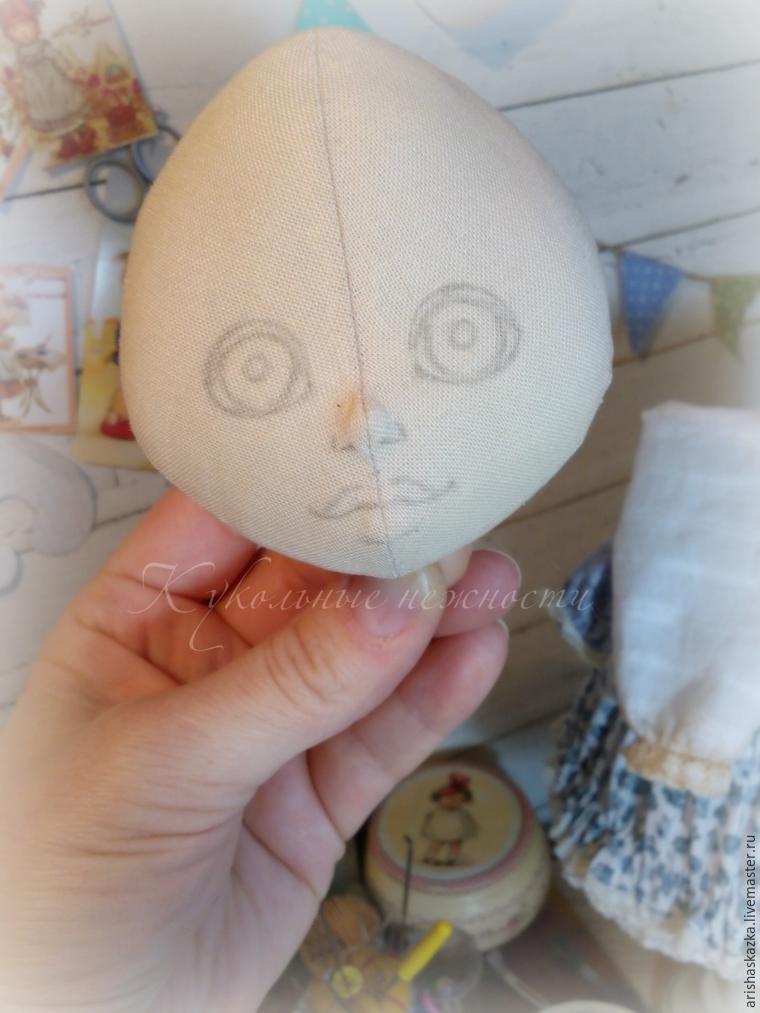
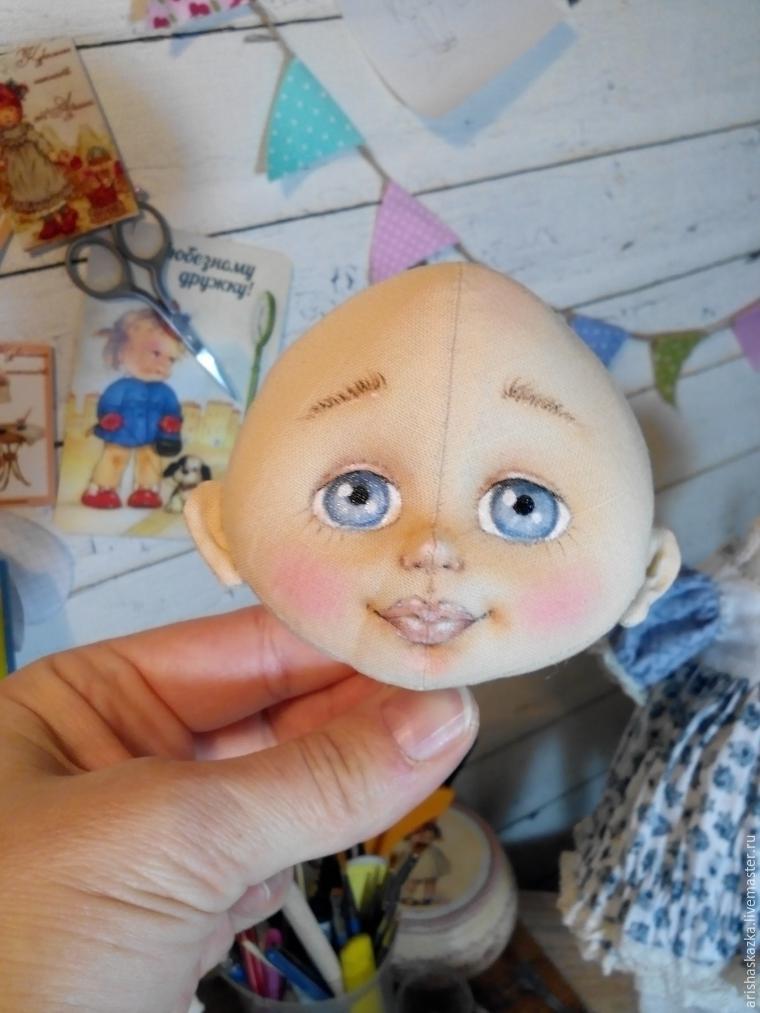
Everything is simple for me :) I use good American cotton from KONA. I don’t tint cotton, it has a factory color in a flesh tint, thin, but with a fairly dense weave. The pattern of the doll's head consists of four parts, this is what allows you to form the contour of the head and the relief with the nose.
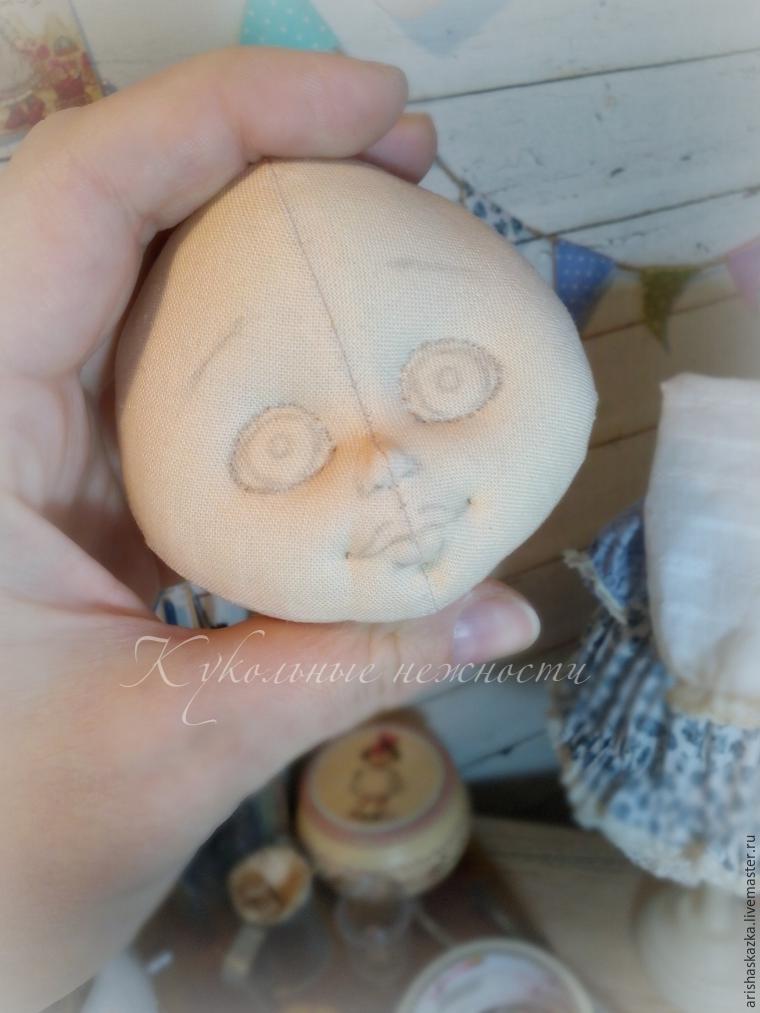
Look at the picture, it looks like a newly sewn, tightly stuffed doll head. There are a lot of patterns on the Internet, sew one head according to the selected pattern and see what you would like to change in it, maybe move the nose somewhere, maybe change the oval of the face. So you will be able to make your own unique pattern, which will be easy for you to work with.
Draw the details of the face. It is very difficult to maintain symmetry, especially when the eyes are tired. I try to put my head back for 5-10 minutes, so that later I can look with a fresh eye and check the symmetry.
We tighten the face. Remember thick winter blankets, the pattern is usually stitched there and it forms bulges and "bumps". So here we are stitching through and through. We fix the tightening at the back. I pull with a strong thread, but you can use a regular thread and monofilament. This will take some skill from you and more than one head will fly into the trash can. Eyes, nose, corners of lips, chin.
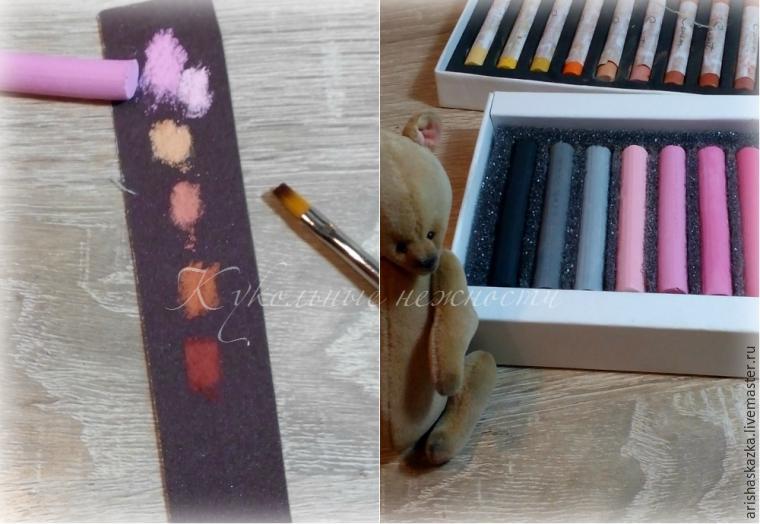
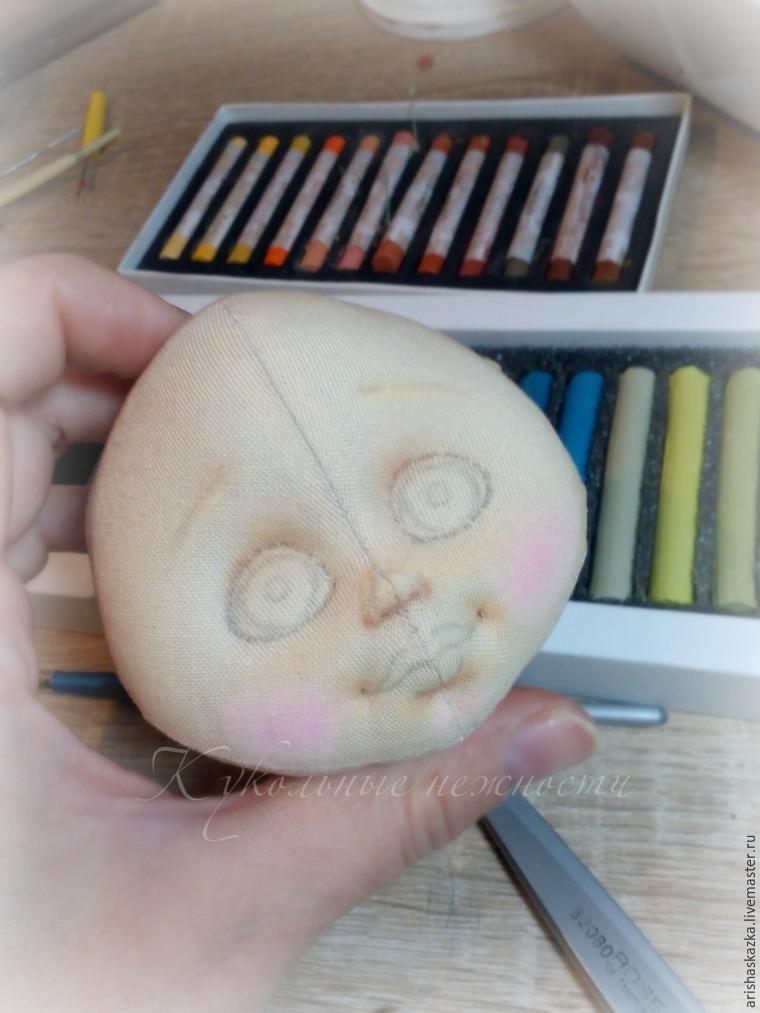
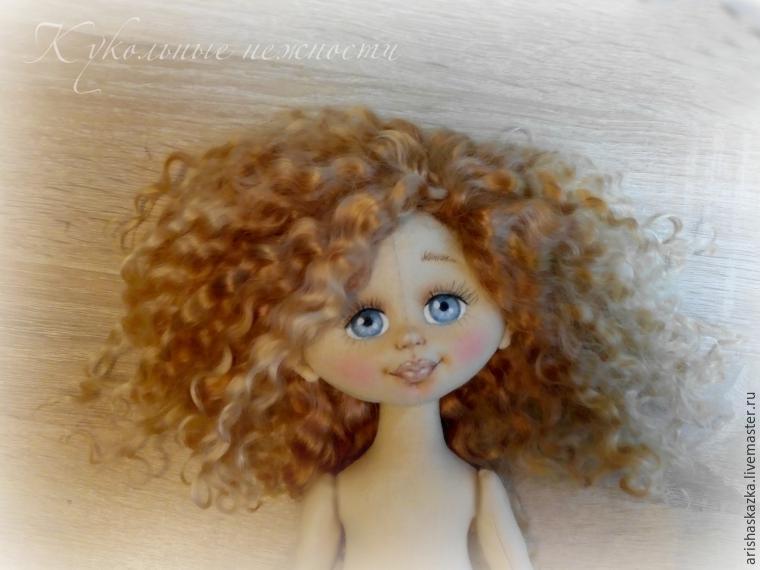
I used to tint with oil paint. Now I'm using pastels. I'm much more comfortable. And the brushes are clean and shaded well. The pastel must be dry, there is just oil. I rub the pastels on sandpaper and dip the brush into it (pictured). The more halftones, the more interesting the face is. Let's say you tint your cheeks, take pink and light pink.
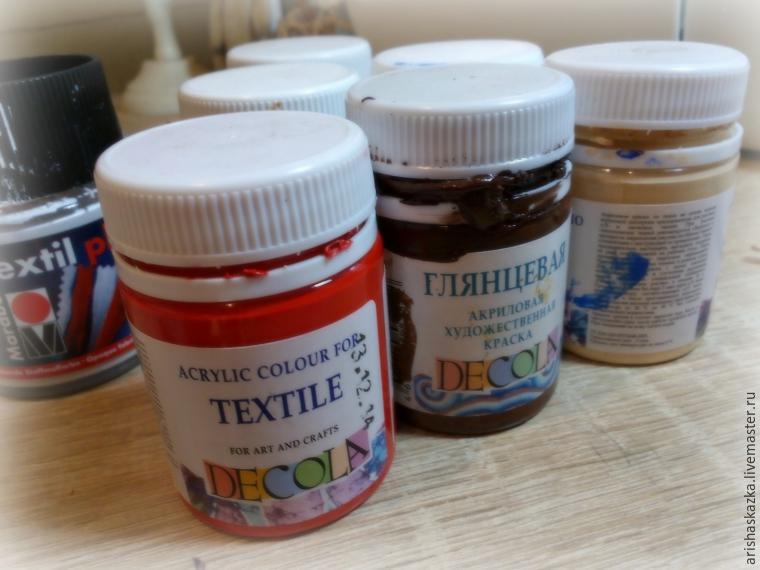
For the eyes and thin dark lines, I use acrylic fabric paint. Eyebrows, nose wings, lips, whites of the eyes, the eyes themselves, all this with acrylic paint. The eyes can be coated on top with clear acrylic varnish.
After painstaking, concentrated work, I got such a face.
We glue the eyelashes, sew on the hair and now a new doll was born.

Of course, all this requires perseverance, perseverance and time, and of course, great love for what you are doing and desire! If you have all this, you will definitely succeed!