Delica Pape on February 23 - The postcard applique in the form of a uniform is a beautiful and simple handicraft that the child can do on his own as a gift to dad for the feast of the defenders of the Fatherland. Difficulty level - primary School.
It should be noted that efforts, materials and time to make such a craft to the holiday will take quite a bit. But the result will delight the child himself, to which it will be very nice to make a beautiful craft, and the recipient of the gift.
Crafts on February 23 Dad, brother or grandfather of colored paper for children of preschool or younger school age. The postcard "Mundir" is done very simply and quickly - with such a task, any kid can cope with pleasure.
And dad, and grandfather, and older brother will gladly get so interesting and original gift, with your own hands.
Delica Pape on February 23, elementary school: materials
 Crafts by February 23
 tight white paper sheet
colored paper
Scissors and ruler
Glue and pencil.
Step 1
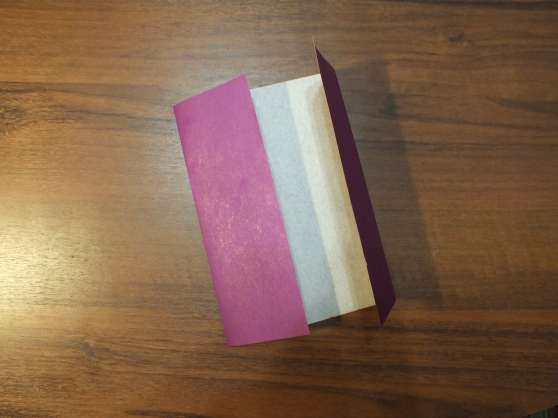
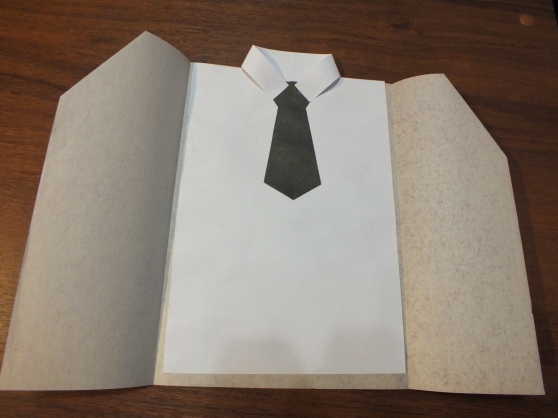
Postcard do it yourself by February 23 It is done as follows: We prepare the uniform. Turn the sheet of colored paper with a long side down (horizontally). Next, the child must fold the sheet as shown in the photo - that is, carefully bend the edge of the paper to the center. Make sure that both "shelves" of the uniform obtained from your chad the same width.
Do not forget to bend the lapel uniform.
 Crafts by February 23. How to make a postcard "uniform" with their own hands
 Step 2.
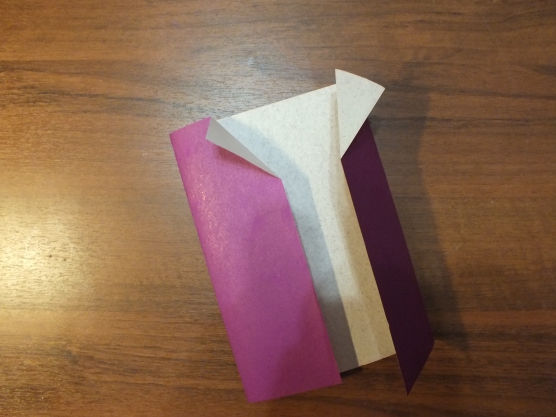
Next step in manufacture postcards on February 23 with your own hands - This is a shirt on which the child can later write a congratulation to dad, brother or grandfather.
Delica Pape on February 23. Step 3.
 Crafts by February 23. How to make a postcard "Mundir"
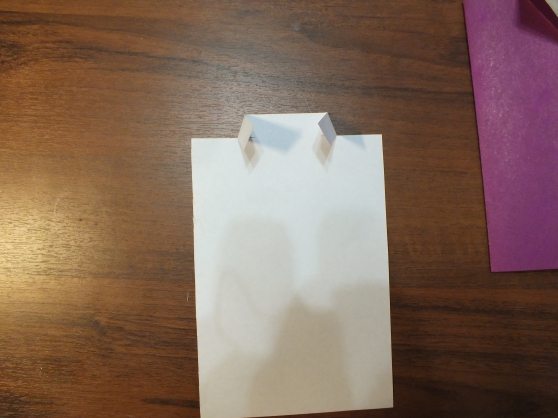
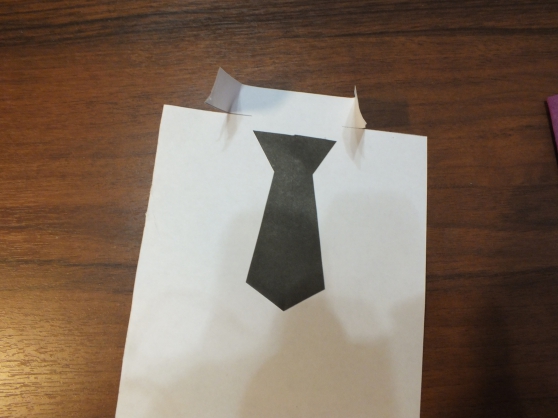
 At the top of the sheet, the child must draw a flat line using a line and cut it on both sides, not coming to the end. The tips are rejected - and thus turns the collar of the shirt.
Making a postcard on February 23 with your own hands, elementary school. Step 4.
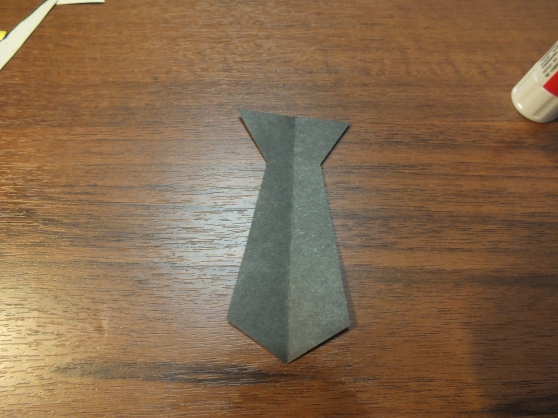
From black of dark green paper, the child carries the tie and sticks it to the shirt.
 Crafts by February 23. How to make a postcard "Mundir"
 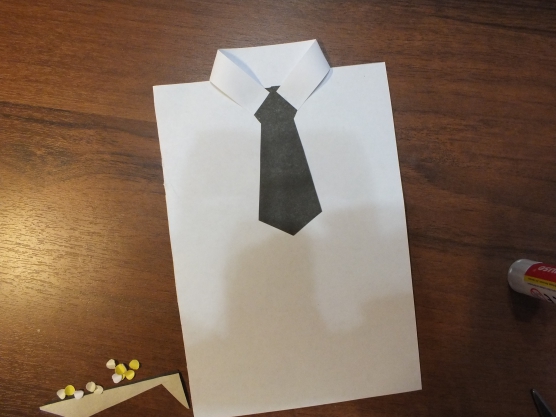 DIY on February 23 with their own hands - this is a great reason to spend time with the child and help him cook the gift for dad, grandfather or brother.
 Step 5.
 DIY in the garden on February 23 - such a postcard applique is easy and just can make children in kindergarten. It is worth only to show the kids as such a uniform is made and then make sure that they repeat your actions correctly. Crafts for February 23 in children's garden. Children's crafts by February 23 with their own hands. Crafts by February 23.
 The holiday February 23 is approaching, and the kids are diligently looking for new ideas for creating original and colorful gifts to their dads, grandfathers, unuse and senior brothers. Well, what gift on February 23 is the best? Traditionally - made with your own hands. 🙂 As an option - Applique or postcard. Or 2 in one - postcard applique.
In general, if there is a child in your family who wants to make a gift with his own hands, then this article is for you. I will give you examples of pretty homemade postcards that we did together with my daughter for a gift to our dad and grandfather.
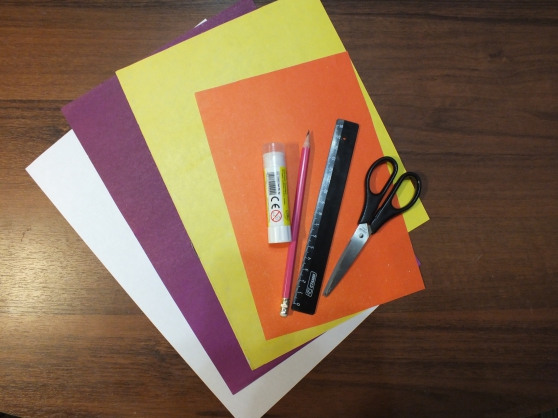
To work, you will need:
- Scissors.
- Color cardboard and paper.
- Simple pencil and ruler.
- Glue (better transparent silicone, but can be PVA).
- Flomasters or pencils for coloring.
- Pieces of fabric, leatherette, thin beautiful ribbon.
- For decor - Persesal, flowers, butt, seashells - everything you can use to decorate the postcard.
- Beautiful congratulations on February 23 in verses or prose.
Take a white or yellowish cardboard sheet and cut a square from it. Fold it in half diagonally to get a triangle. This workpiece will be our postcard.
To give a gift to the colorfulness, I cut out a square of a white leatherette square, slightly smaller than the workpiece and stuck it to a future postcard. The edges saked fine golden ribbon.
For decoration, I used found in the closet, drunk many years, the old grandfather's medal, the time of war. She was very harmonious fit into the overall picture of ideas. The medal attached to the leatherette with a fastener and fixing slightly glue. The Georgievskaya ribbon drawn on the paper was bonded on paper - the symbol of the valor of the soldier on the battlefield.
On the free space made an inscription pencil. After that, each letter outlined glue and sprinkled with sparkles (a broken glass was used as a sparkler). If you do not have a sequin, you can use a simple inscription with a felt-tip pen or special handles with sparkles. You can also make an inscription brilliant nail polish (in the arsenal of any mom there is such an attribute).
Since the postcard turned out and so quite festive, I decided not to burden her extra decorations.
![]()
On the inside of the postcard we pasted a leaf of yellowed paper, to give a shade of antiquity. The daughter drew a stomaster a simple frame and wrote a congratulation.
That's what happened in us.
For this postcard I used the Green Cardboard sheet of A4 format. Folded it in half.
The front part was sticking, carved from soft tissue (by type fleece), a rectangle with uneven edges. From the same fabric I made a workshop for the face and neck of the soldier (see photo). Cook and sinel cut out with a rough greenish material resembling military uniform. 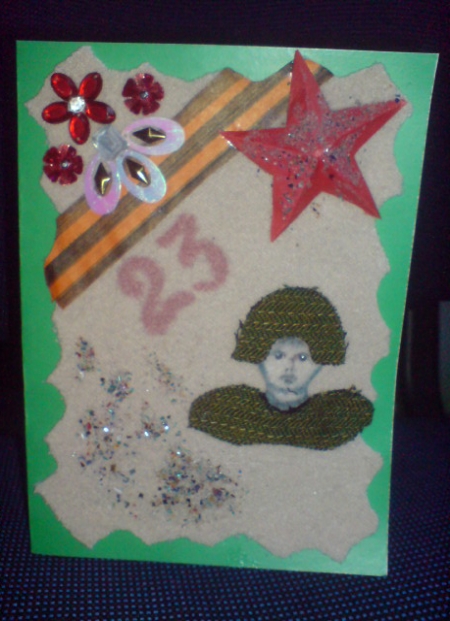
He decorated, as in the first version, a paper George ribbon and made of colored red paper, a bulk five-pointed star.
To give brightness, the compositions of flowers made from artificial pebbles and sequins in the form of flowers were glued in the corner. The star and the edge of the postcard slightly smeared with glue and sprinkled with sparkles.
It turned out an interesting bulk composition.
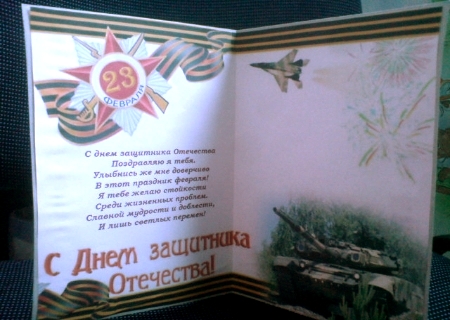
To look more careful, my daughter and I decided not to write from the hand (our doodle could spoil the impression as in the first version), and print on the printer the prepared pattern of congratulations in the beautiful frame of military theme.
If someone from your men served on a fleet, very weltering will have a postcard with marine motives.
For such a postcard we took a blue cardboard. Moved him in half. On colored paper, the blanks were drawn for our applique - the sun, waves, ship, sails, seagulls - and cut out. 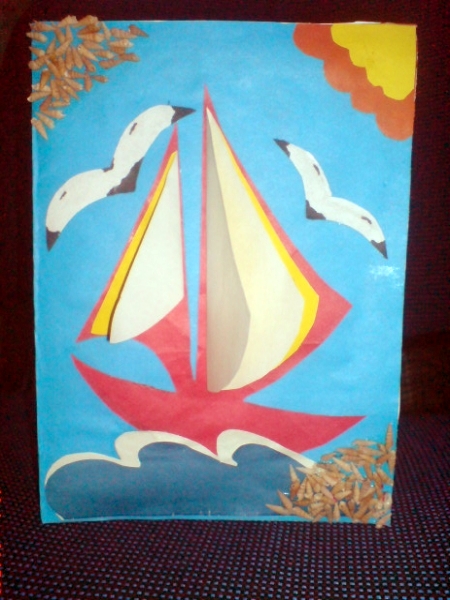
For the waves, two blanks were used - out of blue and white (foam) paper. For the sun - out of orange and yellow. Sails made from several layers to give volume. Seagulls are cut out of white paper, and the tips of the wings and the torso are diagnosed with a black marker.
A composition made of cooked parts. For the volume of sails are made double and glued with only one half to the base. The second half remains free and gives the ship of realism.
To add a highlight, opposite edges smeared with glue and sprinkled with real small shells.
The inner part is the inscription in the frame with images on the marine theme.
I did not paint each step of creating the proposed postcards, as the application is a fairly simple type of creativity and what it becomes clear with the careful consideration of the photo.
Examples of postcards made by the hands of other children and their parents
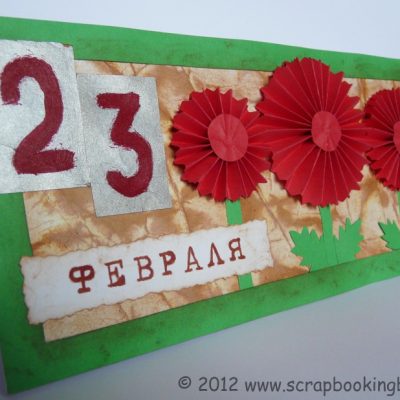
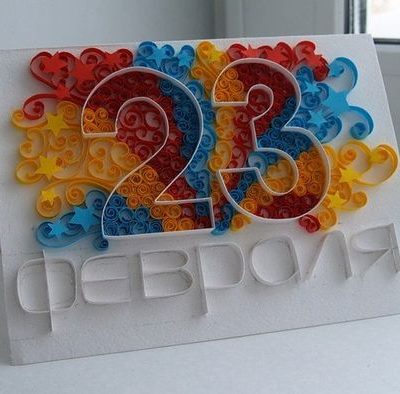
Classic greeting card with paper cloves, bulk star and St. George ribbon, please contact any man. It is quite easy to perform and create it will not take much time. All parts are cut from ordinary and corrugated colored paper.
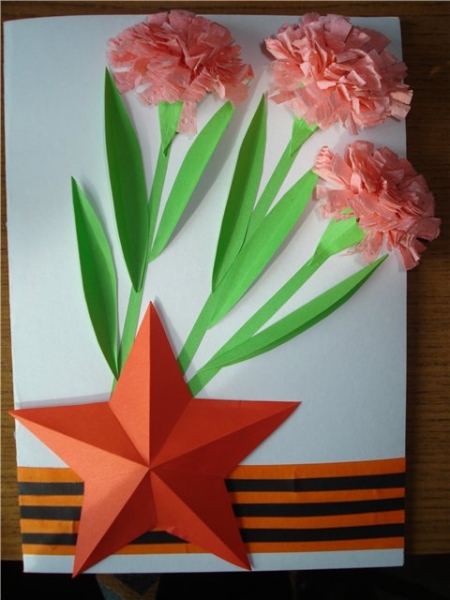
This postcard is able to make almost any child.
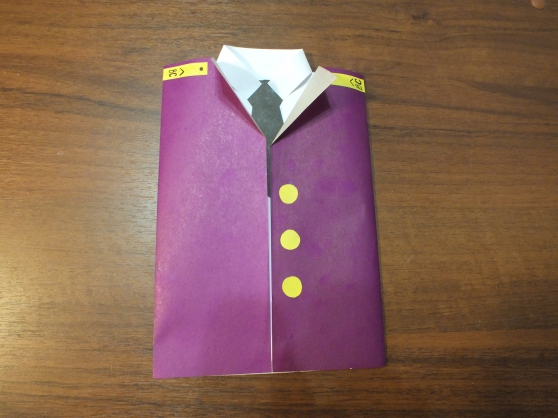
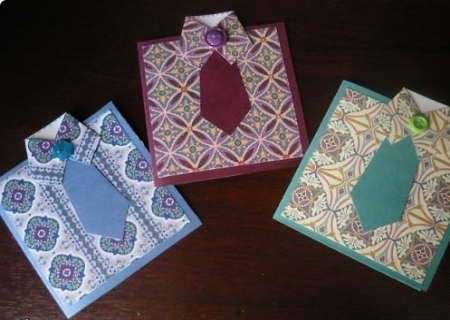
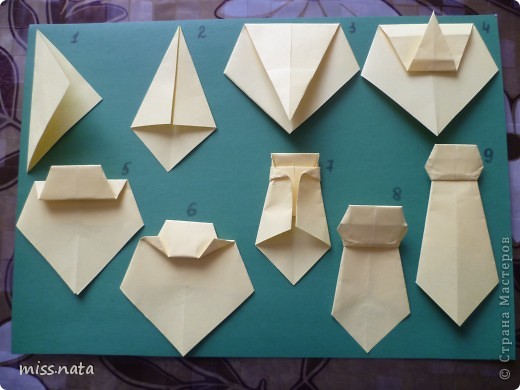
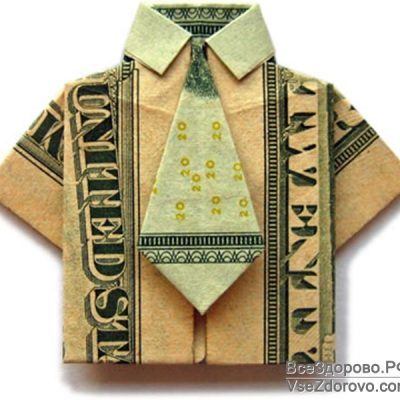
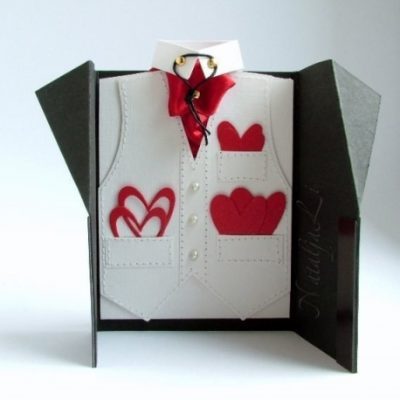
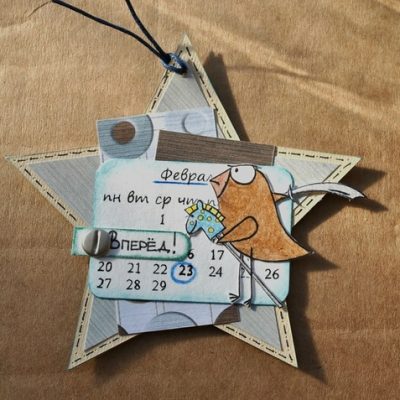
A greeting card in the form of a folded shirt with a tie, you will have to see lovers of folk motifs. Just and tastefully.
The ornament for the "shirt" can be printed from the Internet, and you can cut out of the journal on needlework.
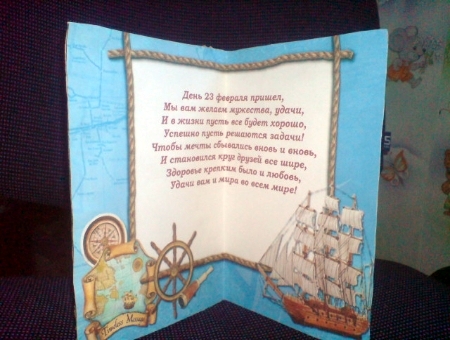
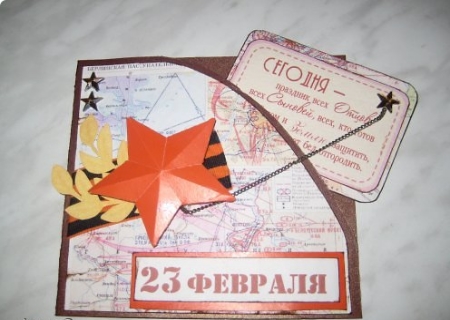
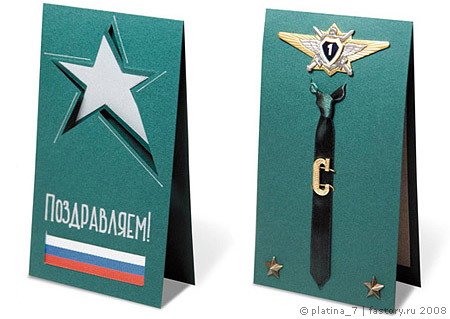
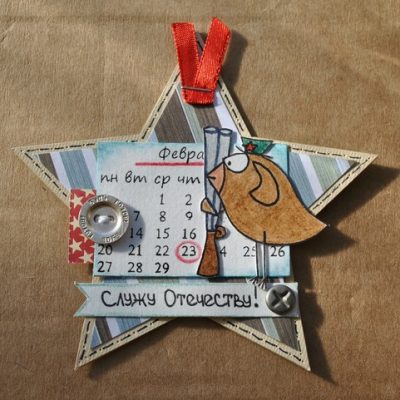
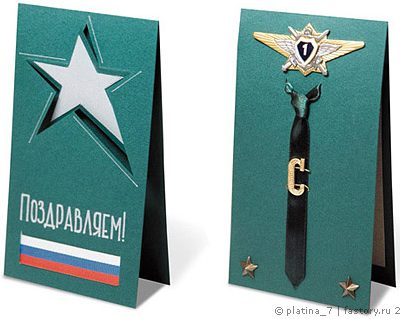
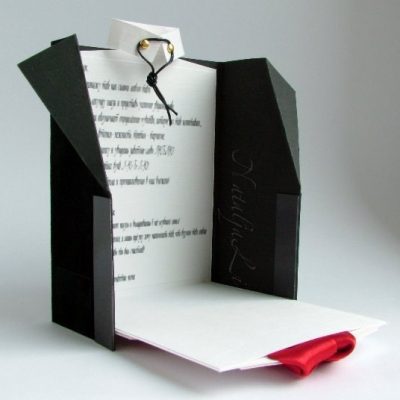
It looks very original and described colorfully a card with a pocket and a double-sided note on a chain. To create it, you can use any old map that will be found in the house.
The metal chain and asterisks give a postcard truly male character.
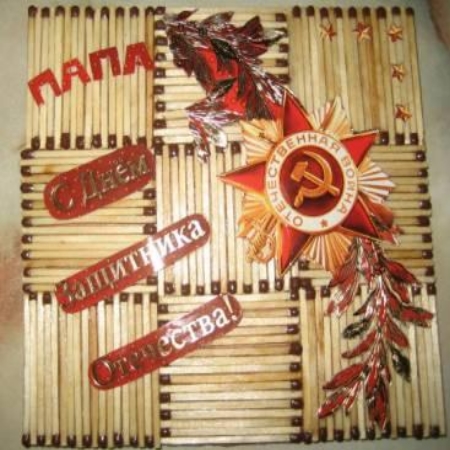
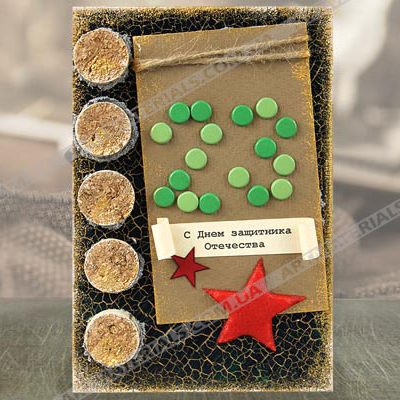
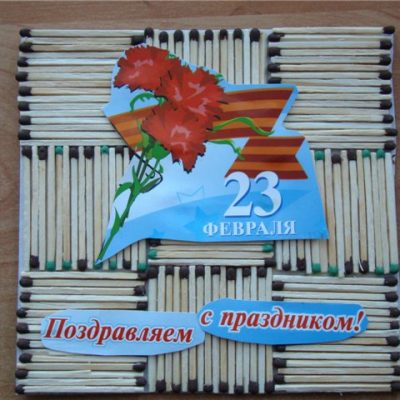
Very original looks greeting card with the basis of matches. Above it will have to work pretty.
The main component of the postcard is matches pasted on a durable cardboard or a fane. To post the child's pattern, you will need patience and time.
To create decor and inscriptions, you can use the old greeting card and foil. From above ready product It is necessary to cover varnish.
Such a gift will be happy to get every dad.
These postcards are just an example. You can come up with your own design, relying on the ideas filed. The variants are a great set - from the simplest paper applications, to complex patterns from the combinations of the most different material. When choosing, consider the age and features of your child's character.
Holidays are an excellent reason to stimulate the creative abilities of your children.
You can not make postcards - travel for dad. Or travel thematic
Try to attract kids as much as possible to create gifts for relatives and friends with your own hands. The process of creating not only develops creative talents and fantasy of the child, but also quite positively affects the psyche and the formation of character, especially if parents also take part in this process. Joint classes bring together the whole family, give the baby a sense of security and understanding of their own significance.
Create, and let the fruits of your creativity bring joy to you and your loved ones!
Today in stores you can find a huge selection of the most incredible postcards "Happy Defender of the Fatherland Day." But you see, such a thing is more interesting if you do it with your own hands. After all, she trays all the warmth of a loving heart. We offer and we learn how to make a postcard on February 23 with your own hands, with photos and video instructions that will help to make a masterpiece.
Best ideas of postcards for Defender of the Fatherland Day
Now we will present 8 original ideas For postcards with your own hands, which can be made quickly from grated materials: Colored paper, fabric, beads, so it will be interesting, well, and how usually cool photos of the idea for your unique postcard leave you.
Postcard "Combat Technology"
For the product you will need:
- dense colored paper;
- line;
- scissors;
- glue;
- yellow foil;
- pencil.
Manufacturing process:
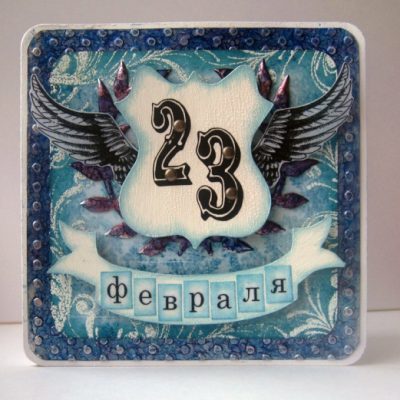
Take a white tight paper sheet and bend it properly. First - twice. It turns out a "book". Then each half also need to be folded in half, only in different directions. There will be something resembling a harmonica. After that, you need to cut three paper strips: red, green and blue. On one side we glue the red and blue stripes in such a way that the combination of colors of the Russian flag.
Green, you need to glue on the other side. It is on it that will be placed on figurines. After that, on multicolored paper, you need to draw military equipment. That is, tank, airplane, ship, etc. and cut. Images should not be big, because they will need to be placed in the resulting workpiece. And, most importantly, each drawing should be "leg". It is this part that needs to be smeared with glue and fix the postcard on the green field.
After that, the gold foil must be cut down, three and several stars of different sizes. Place this brilliant decor at your discretion.
Postcard "Air"
For the product you will need:
- very thick white cardboard;
- multicolored chops from candy;
- good glue;
- scissors;
- pencils;
- colored paper.
Manufacturing process:
From thick cardboard you need to cut the rectangle of the desired size. This is a blank for a future postcard. Then, around the perimeter of the product, glue multicolored sticks. They must be placed so that the product looks bright. That is, alternating at will. It turns out a "frame".
Postcard "Military shirt"
To create it will take:
- white sheet of paper;
- paints;
- scissors.
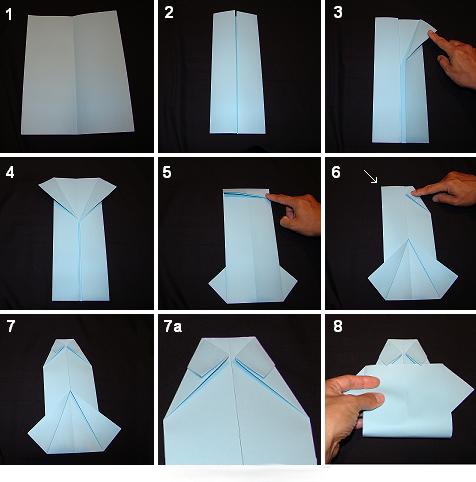
Manufacturing process:
For a start, we take a sheet of paper and bend it twice. The parties should be beaten inside in such a way that four folds are obtained. From the upper edges we make sleeves. To do this, they need to bend them in the example of the wings of the airplane. After that, the sheet needs to flip over the other side and bend the bottom edge. We turn over again and bend the top corners toward the workpiece. It turned out the collar of our "shirt."
After that, you need to heat the bottom edge of the postcards and shove it under the "collar". Additionally, you can make a tie, butterfly, pocket or buttons. The paints show off the "shirt" in the style of Militari. From the reverse side, make a sheet in the size of the product and write beautiful greeting. It can be decorated with yellow foil stars.
Postcard "Sea"
We need:
- dense paper of different colors;
- scissors;
- glue;
- pencil.
Manufacturing process:
On blue paper, draw the waves and clouds and cut them out. From white-sail ship. From brown - the basis for him. From yellow - sun. Next, we take a light blue cardboard and glue all the blanks to it, placing them in the right places. It turned out a postcard with appliqué on the marine theme.
From the reverse side, write the original congratulations and root with pencils or wovers.
Postcard "Order"
For the product you will need:
- whitekarton;
- scissors;
- colored paper;
- pencil.
Manufacturing process:
Cardboard sheet must be folded twice. If it turned out too much the "book" you can cut too much. On a sheet of red paper, you need to draw a star and cut. We glue the star on the front side of the workpiece. Its size is allowed to vary at its discretion. You can cut the magnitude of the entire page, and you can make a small asterisk and glue in the corner.
After that, from yellow paper you need to cut a circle, the diameter of which will fit harmoniously in the size of the star. And glue such a workpiece through its center. On a mug with a marker or felt-tip pen, you need to draw a twice and three. The presence of foil or other shiny paper will be a good reason to make an additional decor in the form of stars or small stripes. Ready! It remains only on the reverse side to write a warm greeting.
Postcard "Star"
To work, you will need:
- colored paper;
- scissors;
- glue;
- cardboard;
- pencil;
- line.
Method of manufacture:
On red paper, you need to draw a star with extra stripes - allowances. By contour, cut out the workpiece. Punches bend and fix inside the star. Make a ray lines. You need to bend well for them. The star will turn out volumetric.
After that, from the cardboard by the magnitude of the bulk star, we cut out such a workpiece. We glue a red star to it. Volume card ready. You can decorate sequins along the contour, and on the reverse side place a good greeting.
Postcard "Unusual"

For work it is necessary:
- red and white cardboard;
- beads;
- decorative tape;
- pencil;
- scissors;
- beads.
Manufacturing process:
From red cardboard you need to cut three stars of different sizes. In the center of each it is necessary to fix the bead. White cardboard bend in half. On the corners we glue the strains of the decorative ribbon. In the center place the sprocket. Ready! In the middle of the postcard you can write a greeting. Stars for such a postcard can be made not only from ordinary paper. This is also suitable fabric and leather.
Postcard "Original"
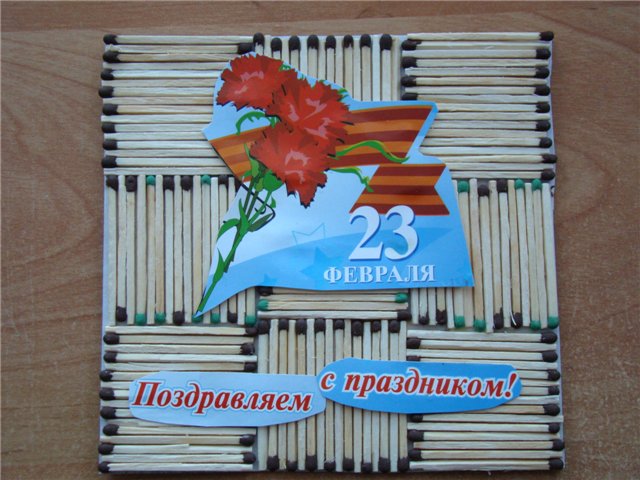
It will take:
- tight white cardboard;
- glue;
- scissors;
- matches.
Manufacturing process:
Cardboard cut out in the form of a big star. The workpiece must be well lubricated with glue. Then all the place of the star glue matches. Do it need it quickly until the glue is dry. Matches are placed tight so that there are no free space between them.
Next, proceed to the decor. Probably, you have any pictures with army topics or images dedicated to the Day of Defender of the Fatherland Day. Cut out such a picture. And after the workpiece will dry completely and the matches are firmly fixed, stick to them. If there are no such drawings, you can make it yourself. Cut from multi-colored paper or draw pencils, and then fix on matches. From the back, you can write a few warm words.


Greeting card for the Day of Defender of the Fatherland. Master class with step-by-step photos.
Greeting card with cloves by February 23. A gift to the hands of a child. Step-by-step instruction with photo.
Birina Daria, 9 years old, educational association "Needlewoman" MBOU DOD Lesnovsky House of Children's Creativity.
Leader: Pedagogue additional education Novichkova Tamara Aleksandrovna MBOU DOD Lesnovsky House of Children's Creativity.
Work description. Master class is designed for children of preschool and younger school age, teachers, educators, parents.
Purpose. The product is intended for a gift grandfather, dad by February 23.
Goal: Making a postcard as a gift.
Tasks:
- Learn to create postcards with your own hands and make them beautifully;
- learn correctly, pick up materials and color combinations;
- improve the skills of working with paper, scissors, observing the rules of TB;
- develop individual creative abilities, artistic taste;
- educate hard work, accuracy in work.
- educate attention and care for loved ones;
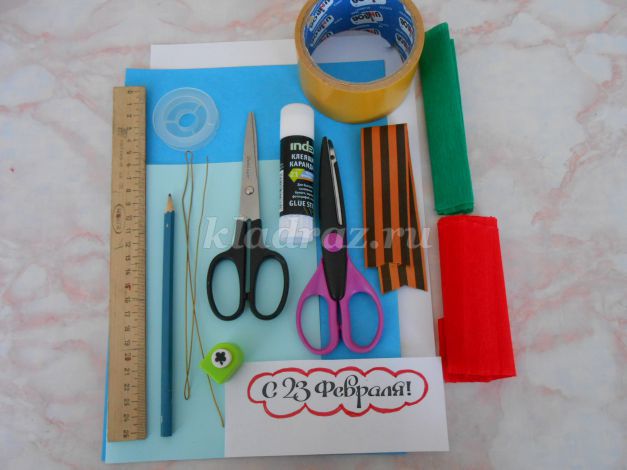
Materials and tools:
Scissors with straight blades;
- scissors with curly blades;
- curly holes;
- pencil, ruler, coil from wire;
- bilateral scotch, pencil glue;
- Color cardboard (base postcard);
- red and green crepe paper;
- Colored office paper;
- Georgievskaya ribbon, inscription for postcard.
For more than 80 years, the date is celebrated in our country - February 23. The name of the holiday changed more than once. In 1922, the holiday was installed in the USSR as the day of the Red Army and Fleet. Since 1946, the holiday began to be called the Day of the Soviet Army and the Military Fleet. In 1995. The State Duma Russia adopted the federal law "On the days of military glory and memorable dates of Russia" and February 23, the Day of Defender of the Fatherland. But no matter how this holiday was not called, annually on February 23, we congratulate everyone who defended, protects and will protect our native land - all men. After all, it is on them that they are the honorable duty to be defenders of the Fatherland. Among the traditions of the holiday, preserved and today, veterans are honored in the country, there are flowers to commemorate places, meetings, festive concerts and in many cities Salutes are rated. Men give gifts, greeting Cards. So we offer to make festive, greeting cards for your favorite men.
Step-by-step instructions with photos.
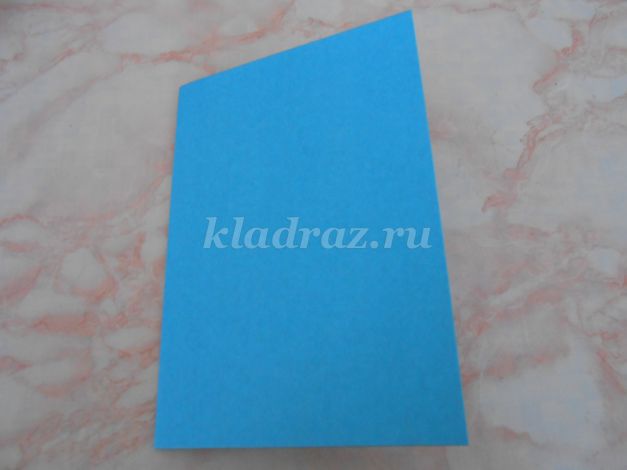
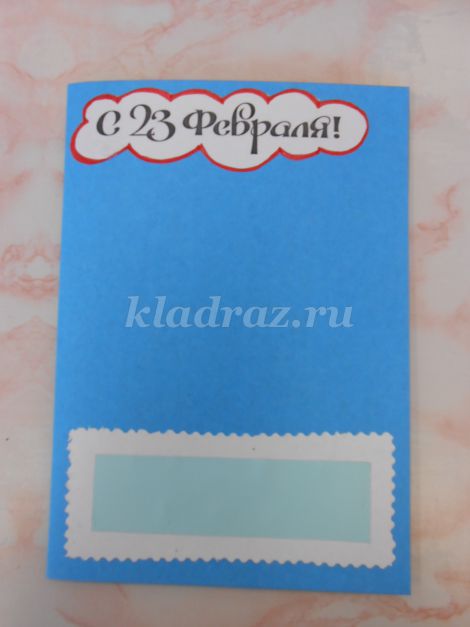
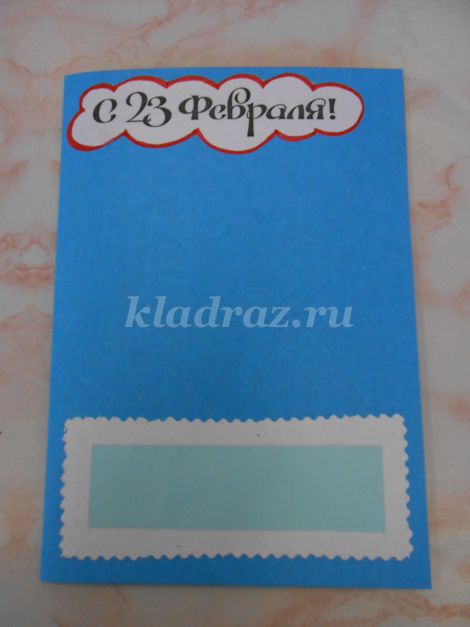
Take a color cardboard. We chose blue. We fold in half. This is the basis of the future postcard.
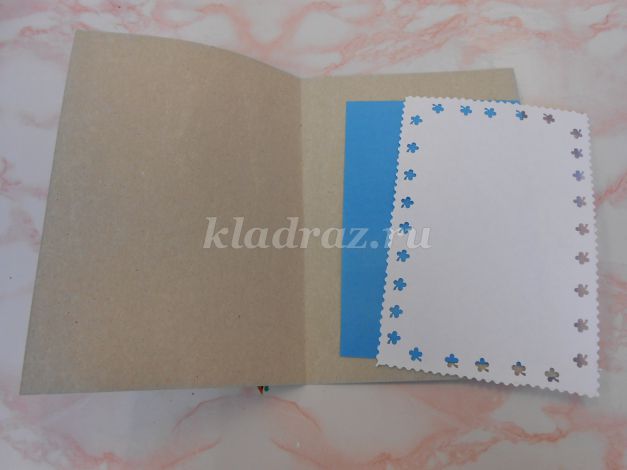
For postcards, we will need two rectangles. Blacks are black on a white sheet of office paper. One rectangle is a size of 13 cm by 5 cm. Make sure that the children will be engaged in economically spent paper and correctly made markup. The second rectangle is 18 cm in size by 12 cm.
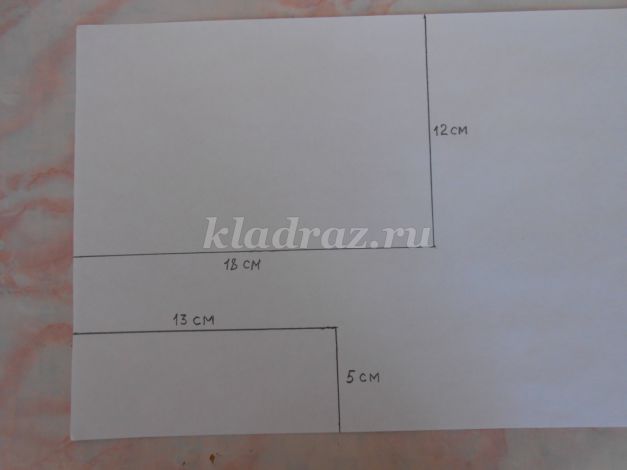
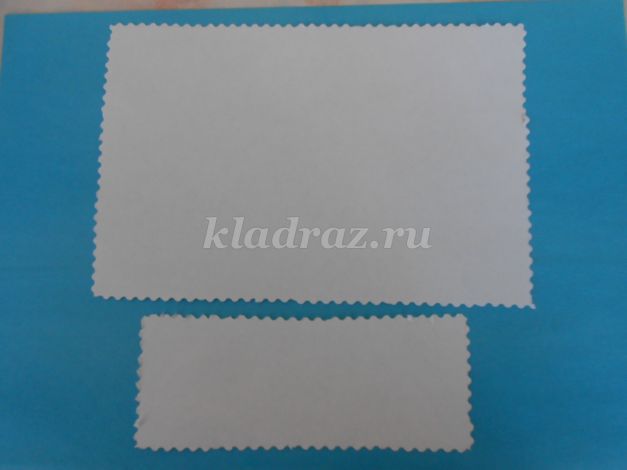
Cut the rectangles with scissors with curly blades.
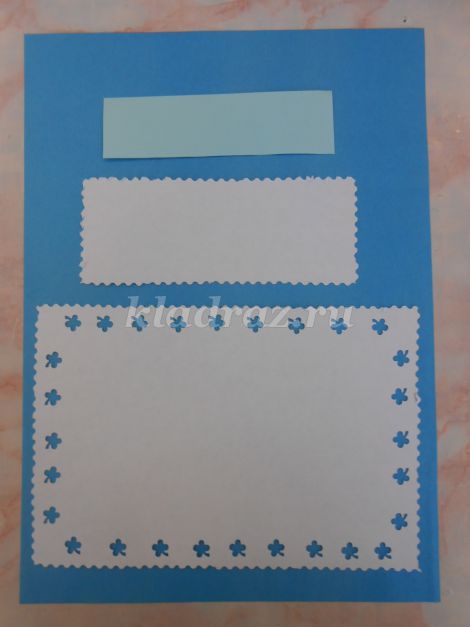
The edges of a large rectangle decorate with flower, making them a curly hole. If you have a punch "Star" - it will be in the topic of the holiday. Take advantage of them.

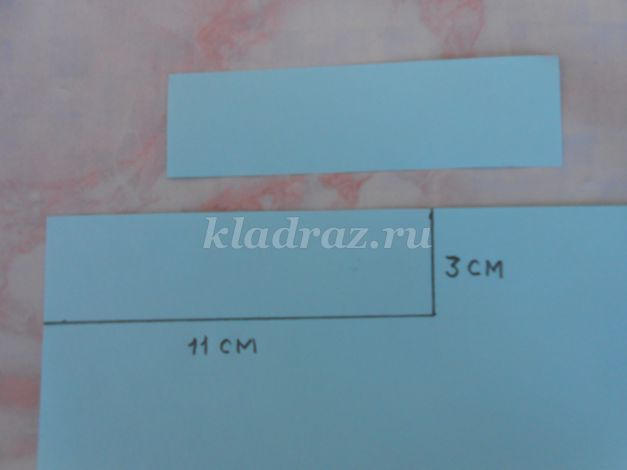
On the light blue sheet of office paper, black is another rectangle: 11 cm length, 3 cm width. Cut with straight blades.
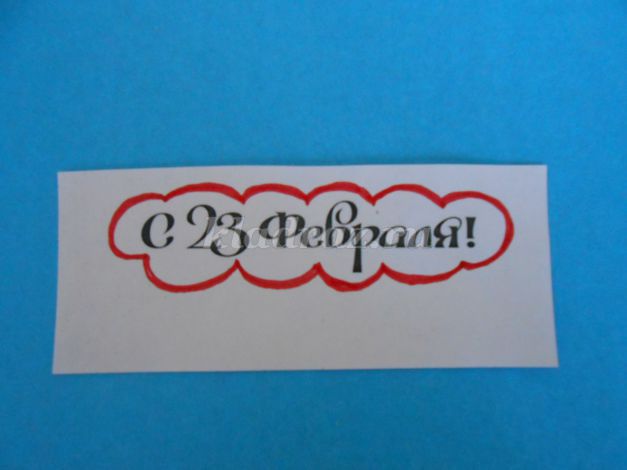
The printed inscription cut on a winding contour.
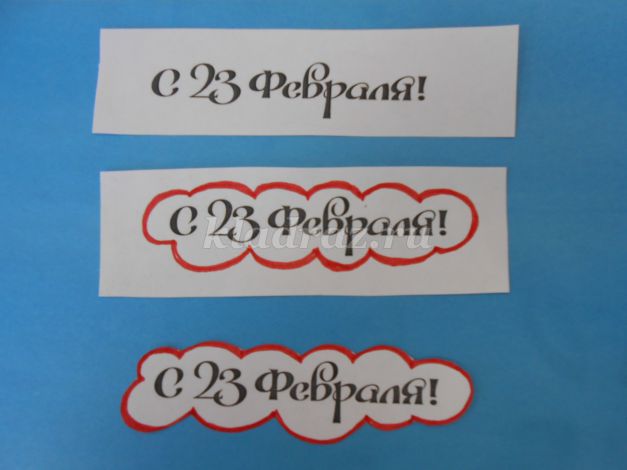
All items for postcard design are ready. They will look like this.
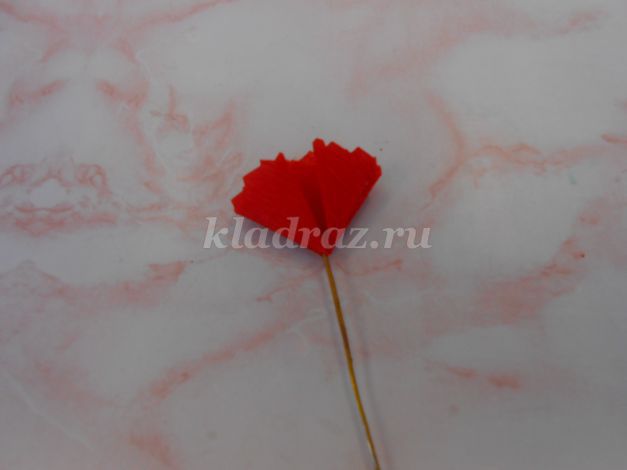
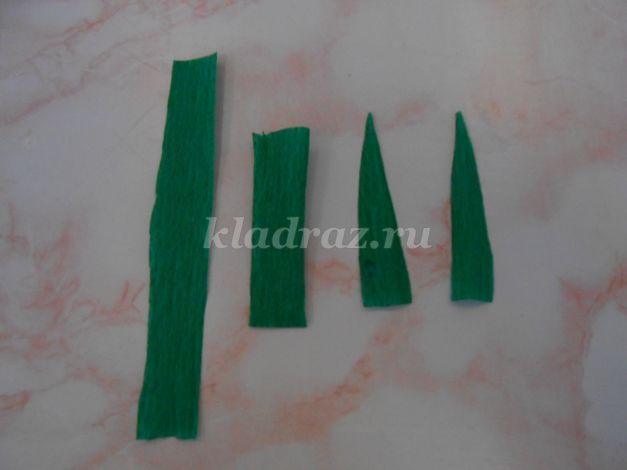
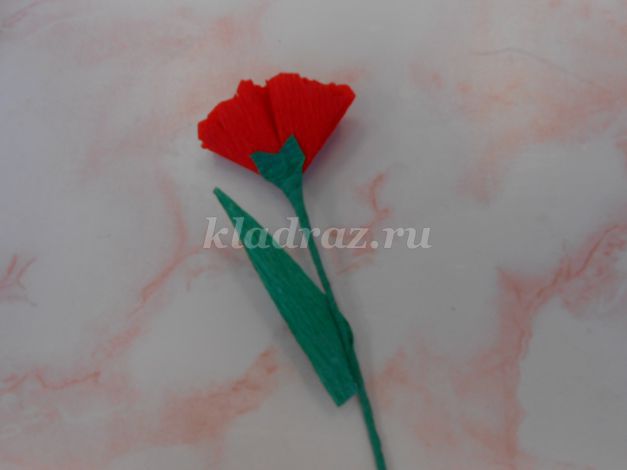
I got to the most interesting. We will do cloves that will decorate our postcard. Cut off the red crepe paper striped with a width 6cm and fold it with a harmonica. We supply a circle with a diameter of 5 cm. We took advantage of the coil from the wire.
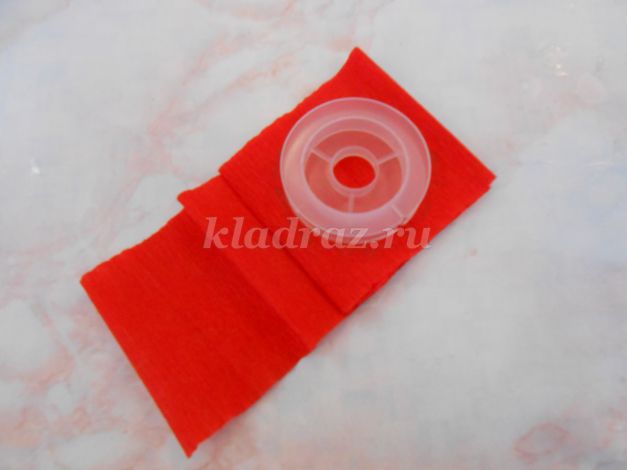
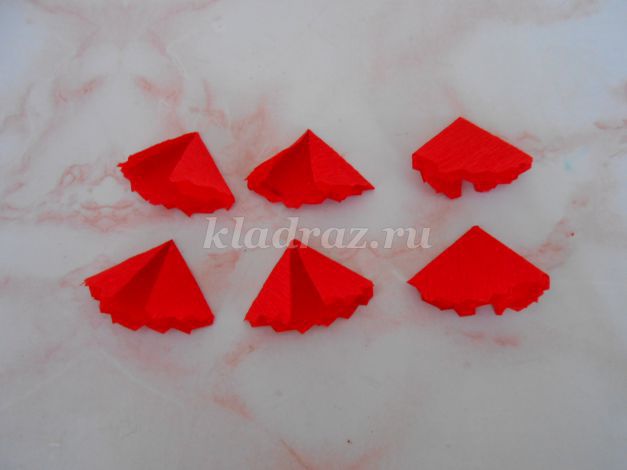
For three carnations we will need 6 circles. Cut the mug with curly scissors.
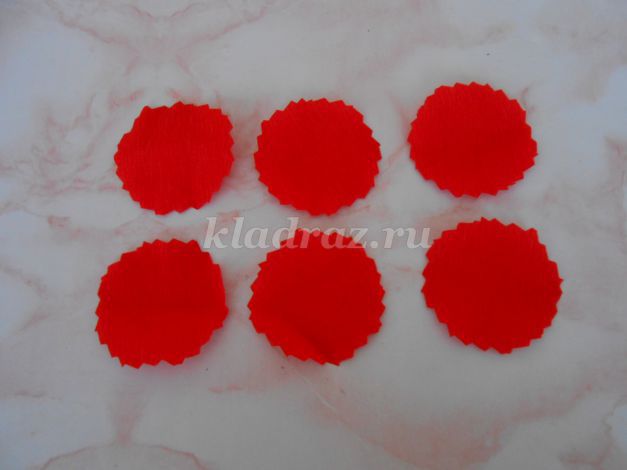
We form a flower. We put the circle in half, and then bend the side edges to the center.
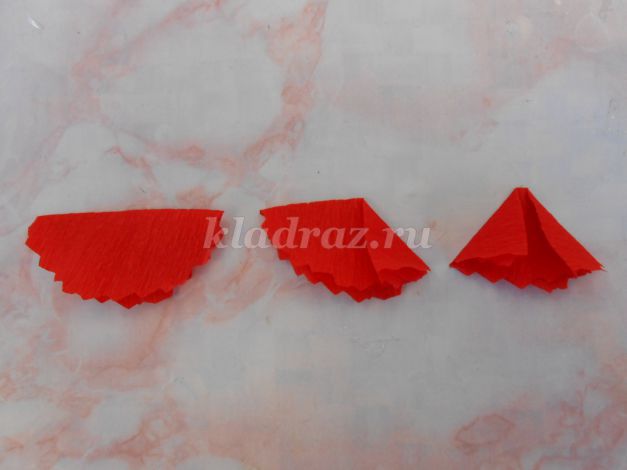
This is what the petals of the carnations look like.
We take a thin wire and with the help of bilateral tape fix it on a flat side of the petal.
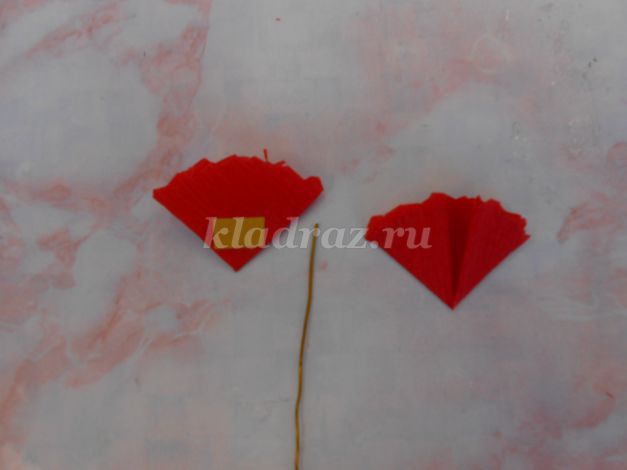
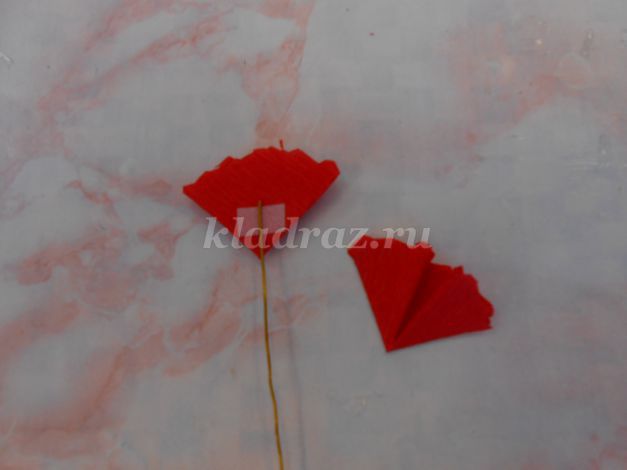
We remove the top of the tape and glue the second part of the petal so that the stem is in the center.
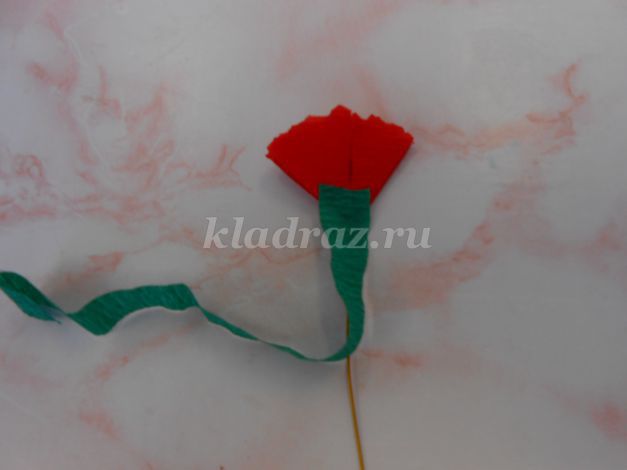
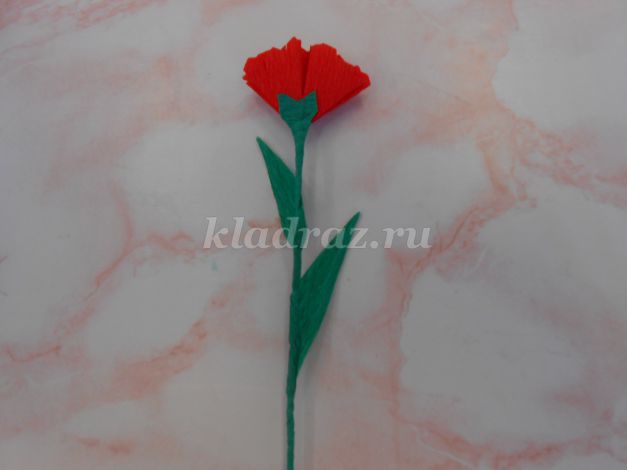
Cut a narrow strip, about 1.5 cm, from green fastened paper and lubricating the edge of glue, put it on the base of the flower. Rotating a flower stem with two fingers, neatly probably green paper.
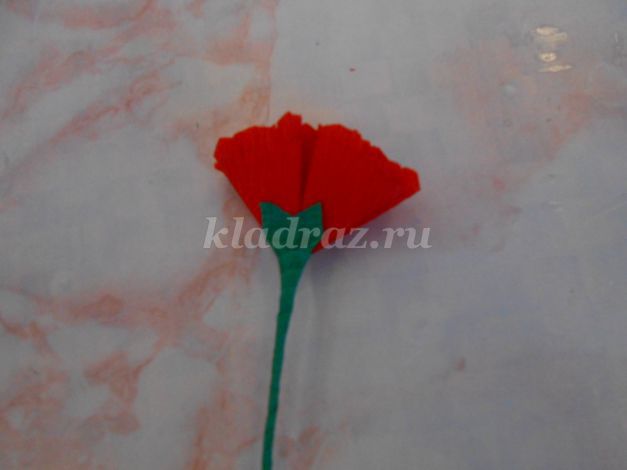
We cut off another green narrow strip of 10 cm long, fold it in half and cut the triangle. Invite the children to do this work independently, without templates, after showing what litters are in the carnation.
Lubricate the tip of the leaf, glue to the stalk, slightly wrapped the sheet around the stem. We glue the second leaf. Flower ready.
We repeat the process. We will make two more flower. These are bright, beautiful cloves turned out.
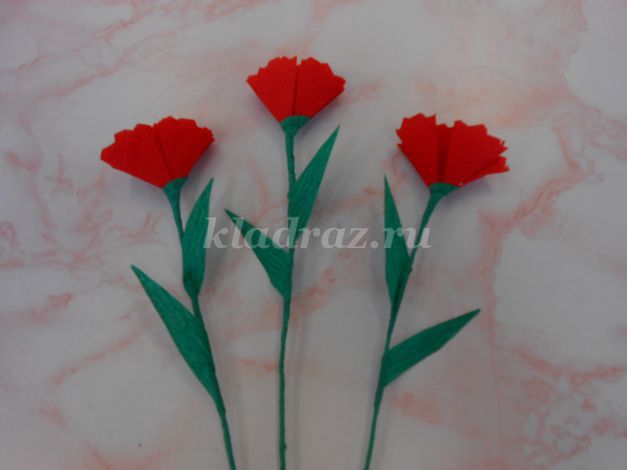
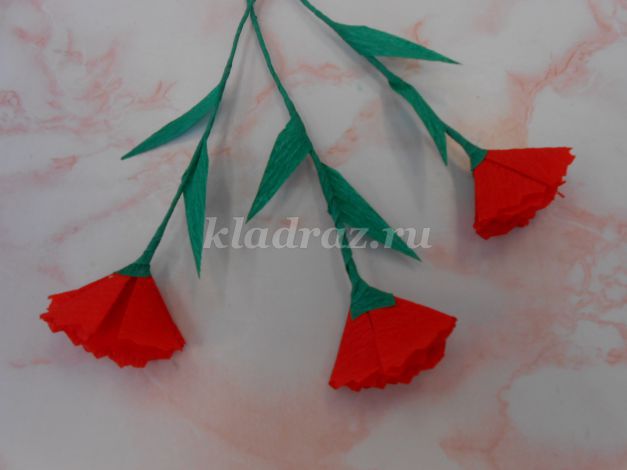
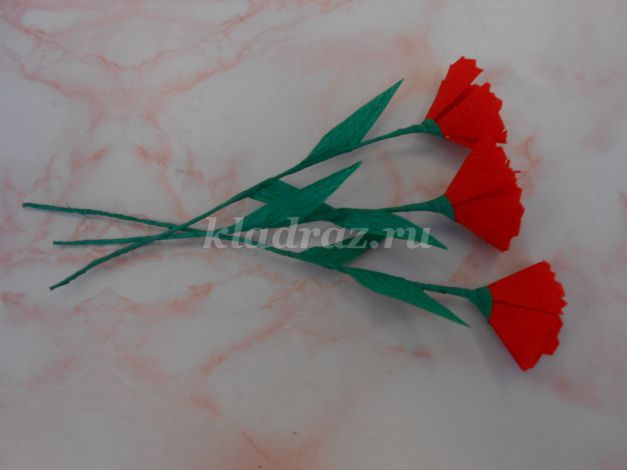
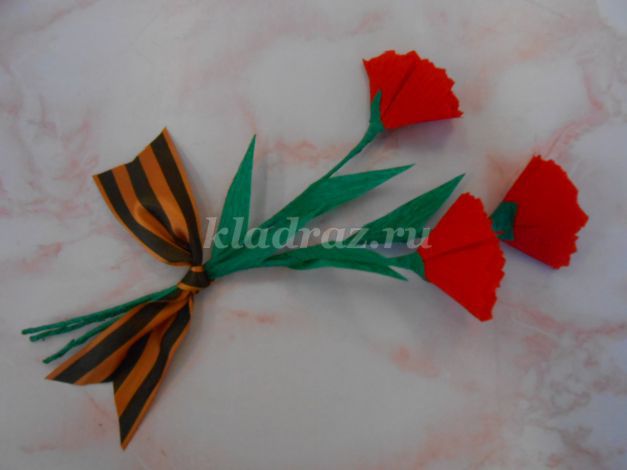
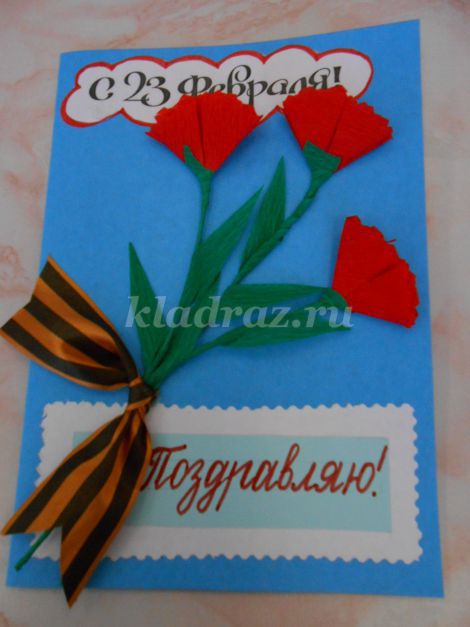
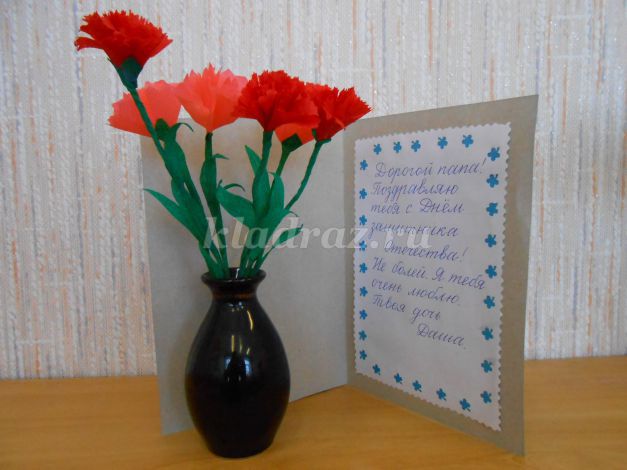
We tie flowers to the St. George ribbon. Such a small bouquet of carnations can be given to veterans for Victory Day.
Walk the design of the postcard. Connect all parts into one composition. We glue below two rectangles, top inscription.
And now the carnation bouquet is glued to bilateral scotch. Carnations will also fill with scotch. You can and glue.
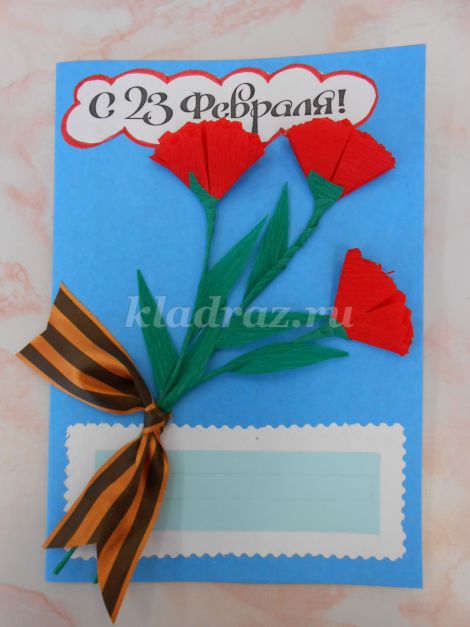
Beautifully write "Congratulations!"
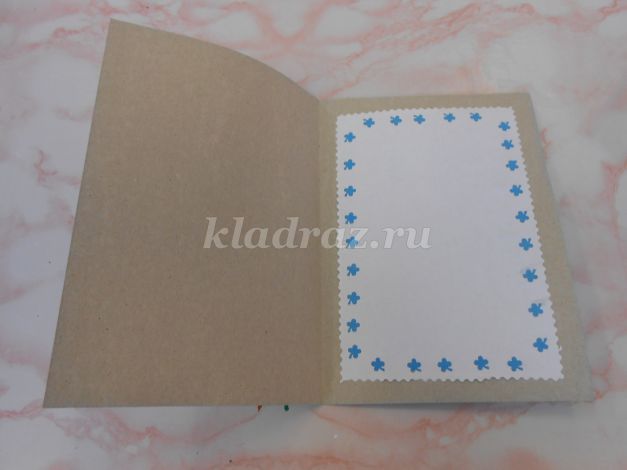
Inside the postcard we glue a carved rectangle and write a congratulation with good wishes. On the opposite side of the postcard you can glue the star. Choose your taste.
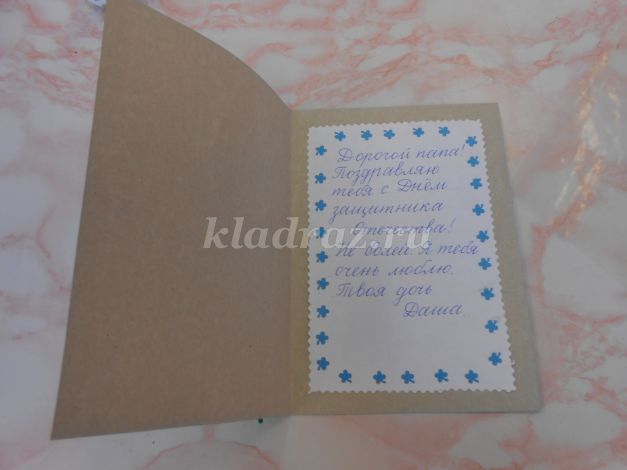
Here is a congratulation for the holiday of the Day of Defender of the Fatherland, you can do if you attach the effort and your love for your relatives.

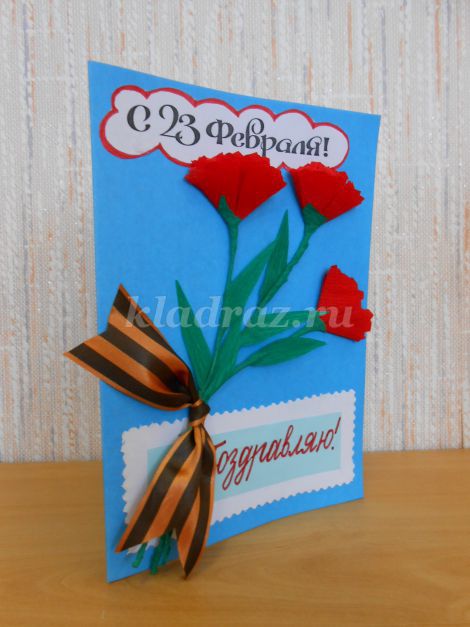
This looks like a postcard in the interior with a bouquet of carnations made on this technology.

![]()
And these are the postcards that the children made their dads and grandfathers.

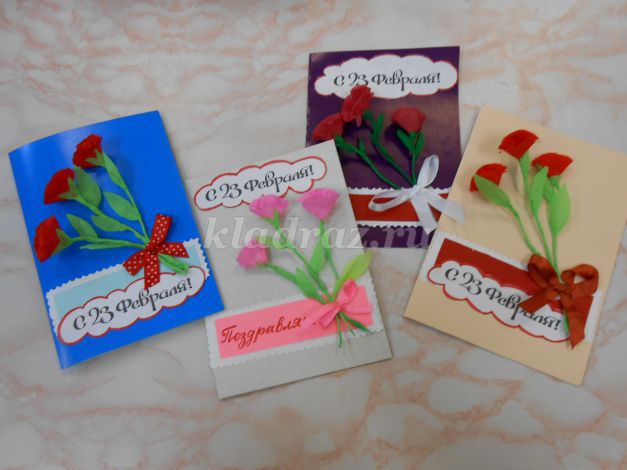
Carnations can be decorated with postcards for the Victory Day.
Defender of the Fatherland Day has long ceased to be associated in Russia only with those people who have served in the army or tied their career with military forces and other power structures. With this holiday, they congratulate all representatives of the powerful sex, from Mala to Great: fathers, brothers, husbands, friends. And any of them will be pleasant such a sign of attention as a postcard on February 23, made by hand.
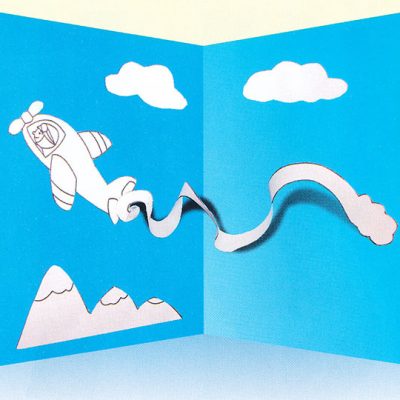
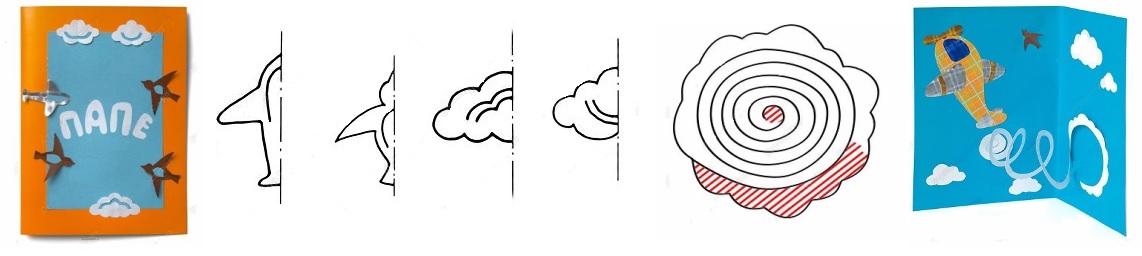
First of all - aircraft!
If your congratulatory workshop is targeted by a person associated with aviation, then use drawings in your work, appliqué in the form of aircraft, parachutes, clouds, etc.
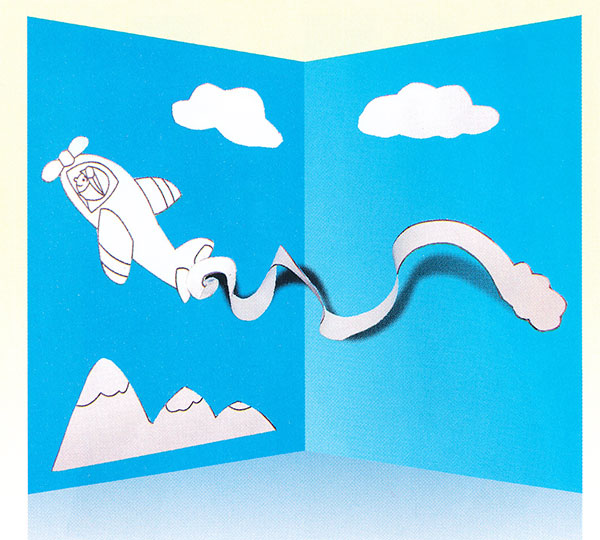
- For the manufacture of volume card On February 23, with your own hands, take two sheets, one of which should be blue or blue (like the sky), and the other is well combined with it, for example, yellow or orange. Spread the sheets with each other and fold the resulting workpiece so that the background for the sky is inside.
- Now do the cover: the center you need to stick a paper rectangle of blue or blue (the same as the inside). At its edges, there are paper white appliques: an airplane, clouds and birds. In each figure before sticking, you can cut through any element (window, wing circuit, etc.) so that the details look more interesting. Complete the cover of the inscription from paper letters, placing it in the center: "Pope", "brother", etc.
- For the inside, cut the plane from the cardboard and pull it out (or stir the color film / paper). So that it seemed to be greater, stick it to the opening half of the postcard with the help of thick bilateral tape. Cloud clouds around the aircraft.
- The last element remained - a track from the aircraft. Make it from a paper circle with wavy edges. Draw a spiral on it and shift it. The narrow part of the spiral is glued below the tail of the aircraft, and a wide with a wavy end - on the opposite direction.
Day "scenery" can be replaced by night, making a star from a foil or metallized stars on a dark blue or black sky.
Far Falnia Captain
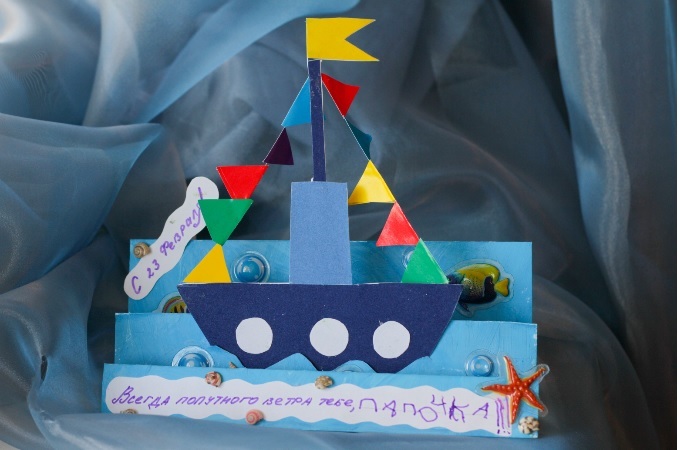
A postcard on February 23 with your own hands from the son of the dad should be not only beautiful, but also quite simple in performance. It is no secret that boys are less perfected and neat, rather than girls. Therefore, offer a child as a gift to Father, a ship sailing on the waves!
Lower tires leave for congratulations. Print the wish like "always passing wind to you, dad!" And glue a strip with text down postcards.
If your Lestenka strives to disperse, then close the part of the harmonica with each of the cardboard strips of the desired length.
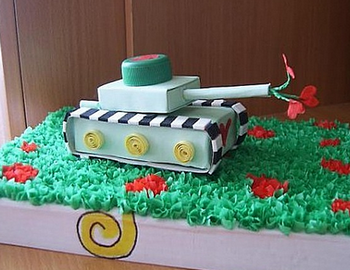
On the field tanks rumbled ...
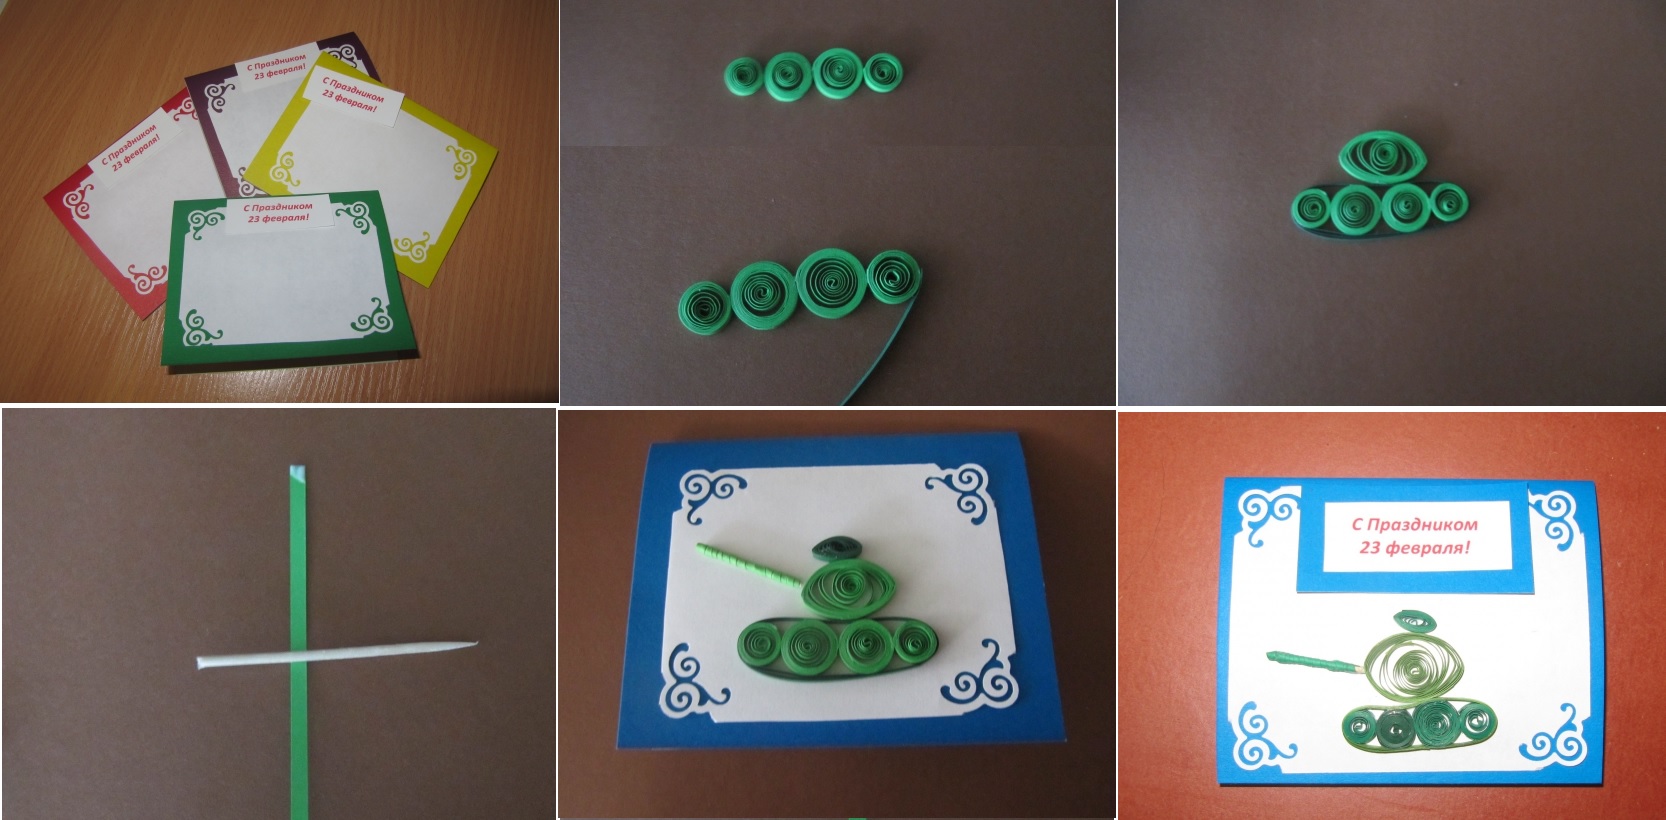
A postcard on February 23 with your own hands from my daughter can be tried to make quilling in the technique. Surely your girl will like some "openwork" crafts.
The basis will serve the cardboard bent in half. Color can be absolutely any, fully rely on your taste. Top on the cover are glued with a white sheet of thick paper, the edges of which are pretty finished. If you have a special hole punch, it greatly simplifies the task. On the printer, print the phrase "Happy Defender of the Fatherland Day" or similar and attach to the cover.
- For the manufacture of a tank in the technique of quilling, prepare a special paper or cut off with colored strips of 3 mm in width. You need to start making a tank from the caterpillar: twist two large (each of the two glued strips) and two small (each one of the strips) wheels. Large position in the center, small - along the edges. Stick to each other and paper. Another strip is how to wipe the wheels - the caterpillar is ready.
- Twist from three bands, giving it an oval shape. At the top, glue the surrendent "tower" twisted from one strip.
- For a blow, use the toothpick: take a small piece, wrap it with paper and stick to the tank.
You can adjust the degree of paper twist at your discretion, thereby making the application more or less in size.
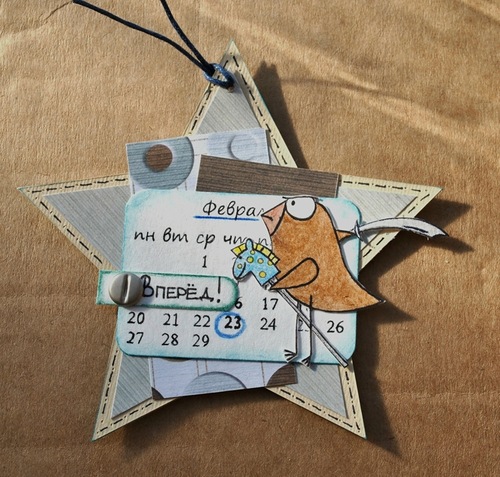
Beloved Soldier
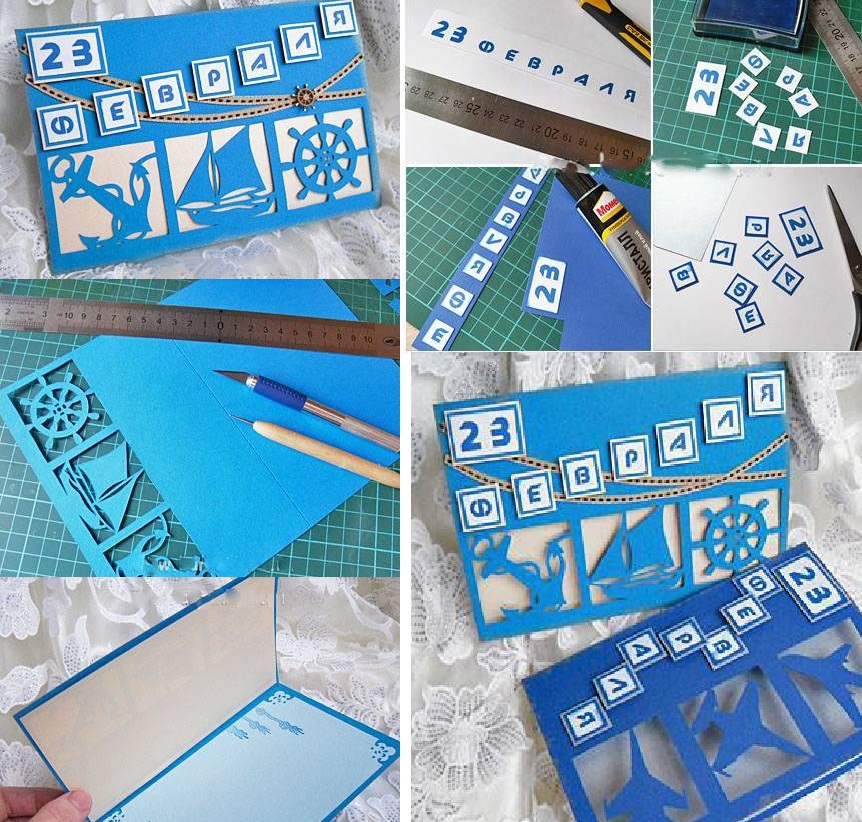
How to make a postcard on February 23 with your own hands young man? After all, one thing, give a homemade postcard to relatives, and quite another - a loved one. I want her to look like from the store and without hints on her needlework. Then you should try to cut your congratulations!
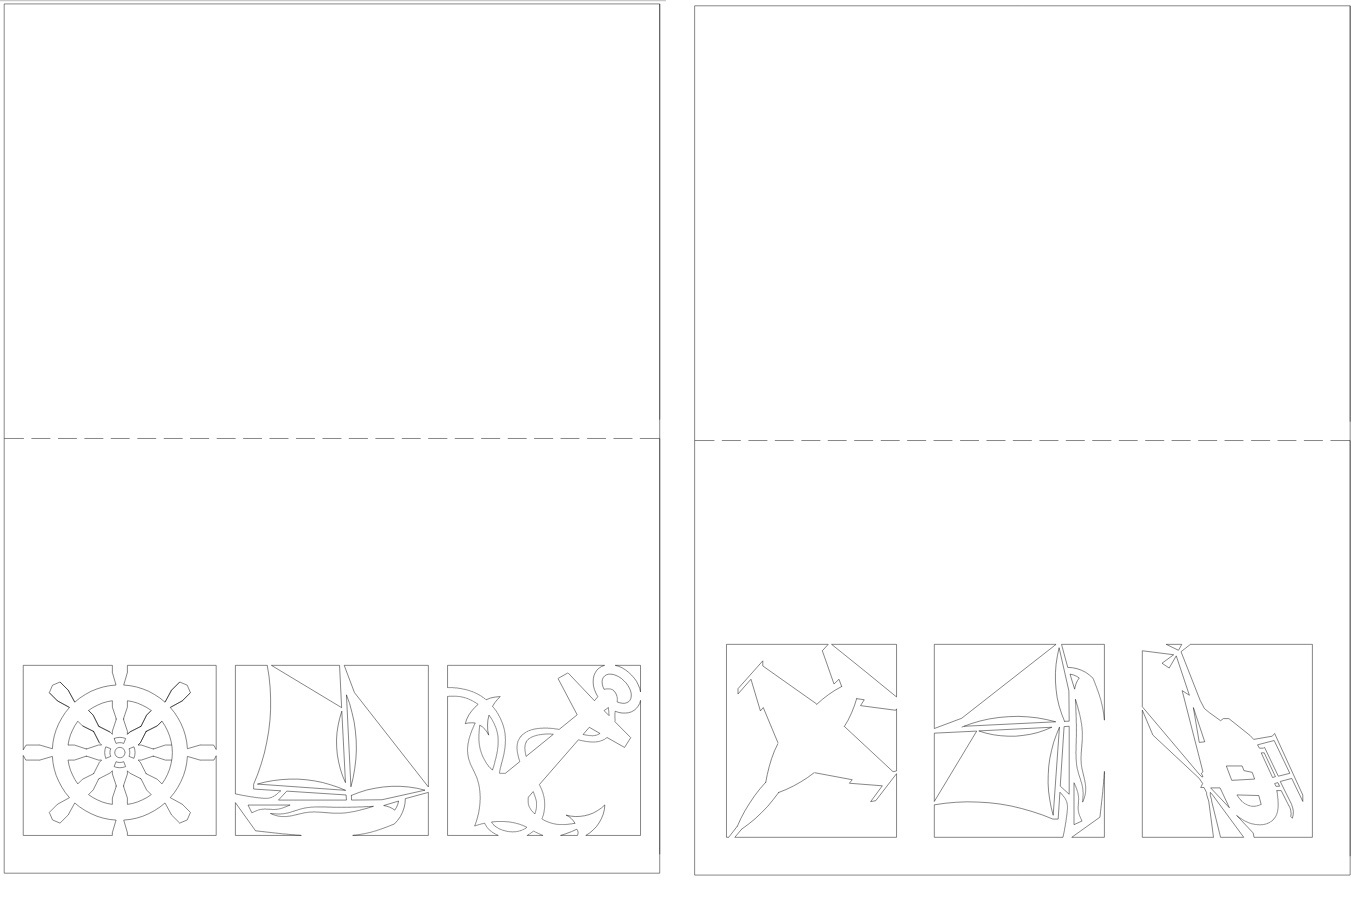
It remains to place the letters on the cover as you like, and glue them with the help of foamed tape.
You can withstand the crawl in this subject, and you can portray in each square "attribute" of different armed forces of Russia: an airplane, ship and tank.
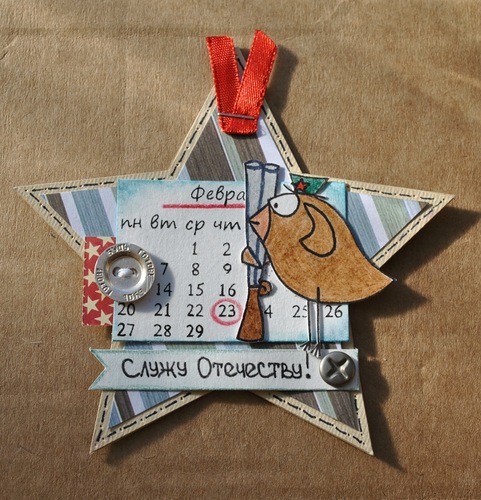
Handyman!
Creating a postcard on February 23 with his own pope or someone else, it is not necessary to emphasize on the army component of the holiday. Since February 23 has already practically became an unofficial male day, you can emphasize the fact that you will appreciate the skills and skill of your man (Pope):
- Fold in half the paper. Corners, from the fold side, squeeze scissors. On the cover, higher center, cut the rectangle with the same beveled corners above. "Box" for tools is almost ready.
- Two cardboard triangles attach the box from the lower corners. At the top of the three mug of a lighter shade, imitating nails hats. Cardboard strip "Strengthen" and the drawer handle.
- Now it is necessary to equip a postcard to the tools: hammer, hacksaw, screwdriver, nail-holder, and so on. Metal parts draw on a silver or blue paper, and the handles are white. Glue parts of each other.
- Enclose one end tools to the inside of the cover, and the opposite - to the drawer handle outside. Below you can stick a sign called the holiday or the destination name.
Do not forget to write for your man, father or brother warm and sincere wishes that will make your valuable and expensive gift!