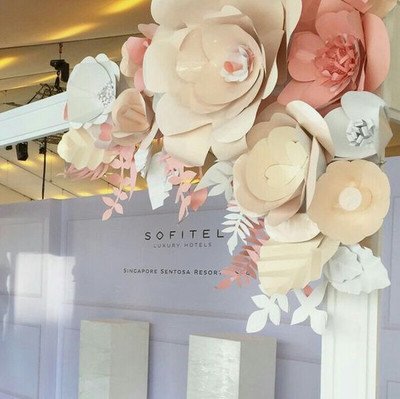
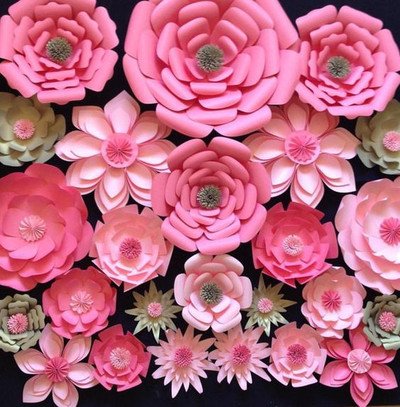
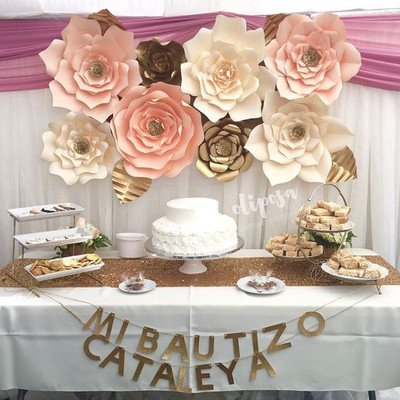
How often do we want to delight our eyes with flowers! It is not always possible to buy a fresh bouquet, but houseplants do not bloom all the time. I propose to consider an excellent option for decorating the interior with paper flowers. You can make paper crafts yourself and decorate your favorite corner with them, as well as present the fruit of your efforts as a gift.
What you need to make a paper flower bouquet
It all depends on the option you want to make. In some cases, you only need paper and a clerical knife (scissors). And sometimes the number of items in the list of materials will be much larger.
Let's review everything. what is usually needed for production.

In art salons and shops for a creative person, a huge selection of materials is offered. You can also find specialized tools. But they are not cheap. If you are going to try yourself as a master of applied art for the first time, you can do without extra costs.
The best DIY paper flower ideas
I love to make compositions and give them to friends or relatives. I use different techniques. I will briefly describe some of them.
modular origami
Currently, flowers created from many individual elements, that is, modules, are very popular. The performance of such work will be within the power of both adults and diligent elementary school students.
Modules - these are sheets of small size, folded in a certain way. There are ready-made kits for sale, but you can make blanks yourself. An A4 sheet is divided into equal parts, 16 or 32. The parts of the product are assembled together without the use of glue. Parts are simply inserted into each other.
I prefer small triangles. Works come out small and look neat.
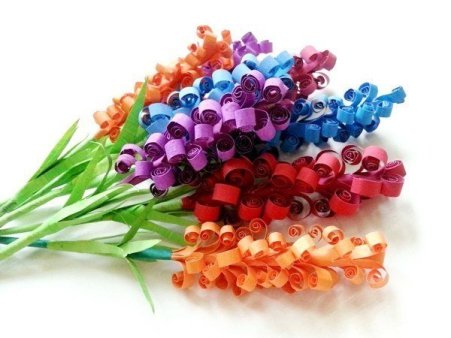
An interesting way to process paper - twisting . Thin long strips are used. Parts for work can be cut by yourself from an ordinary thin sheet suitable color.
This type of handicraft is suitable both for use on the plane: for postcards or decorative panels, and in voluminous bouquets. If you try, you can create a wonderful miniature. The main thing is to start with simple options. .
IN joint work corrugated cardboard is suitable for a child. You can find packages with ready-made paper ribbons in office supply stores.
Application
It all depends on the imagination.
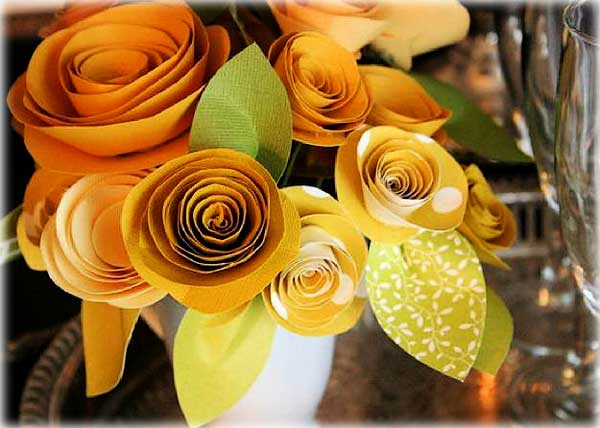
- Paper spiral flowers
You will need paper, pencil, scissors and PVA glue.
I experimented with thick and thin paper, as well as cardboard. Appearance the rosette is different. And each one is very easy to do.
On the square we draw a spiral, which we then completely cut out. The workpiece is gradually twisted: from the outer part to the inner circle. The top edge can be slightly bent. Visually get the petals. The central circle of our curl becomes the base of the flower (glue it at the bottom of the bud, fix the size). In my opinion, such roses will look better on a decorative panel than in a bouquet.
- From wide colored stripes
Here the material will be paper, glue, scissors and a stem of your choice.
![]()
We divide the standard sheet into 4 long strips. Fold each strip 4 times. Cut on one side. The width of the petals should be small for greater naturalness. In this way, you can make chrysanthemums and dandelions.
- Compositions from waste material
You will need several tubes of paper towels or toilet paper, paint (preferably gouache), brush, scissors, glue, juice tube, corrugated sheet, stapler.
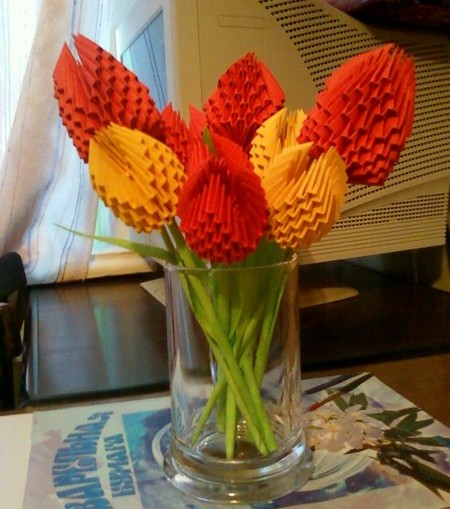
Tulips will be great. I used a soft tube (paper that melts in water) for my spring flowers. Just cut the cylinder horizontally into 2 parts. Half - 1 bud.
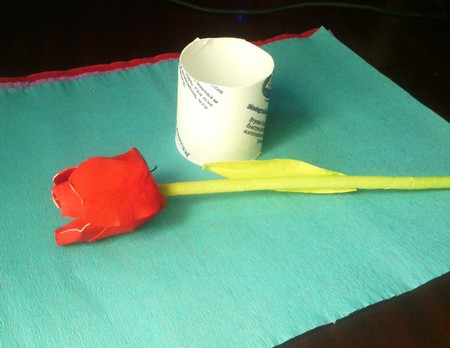
I drew the outline of the petals on the form, cut it from above and below. I cut it completely in one place, treated it with paint and twisted it so that the fourth petal was inside. I stapled the bottom of each leaf with a stapler. It remains only to insert the stem and secure.
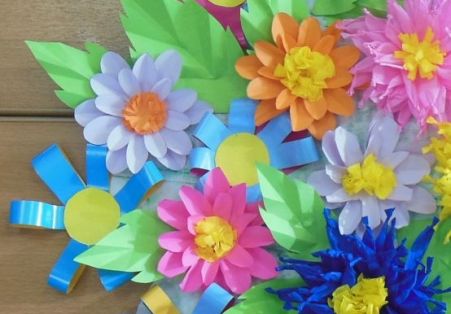
- From individual petals (according to the template)
: soft colored sheets (for example, corrugated paper, tracing paper, napkins). You will also need scissors, glue, thin twigs, wire or drinking straws.
We make several layers of future petals using a template. Glue the central part of the inflorescence onto the branch. After we proceed to the gradual formation of the bud. Your masterpiece will look more interesting if the middle differs from the petals in brightness.
- roses from corrugated paper
For such work, it is necessary to take special paper, threads, glue and a basket or other container in which the bouquet will be placed.
One flower will require : 1 sheet of corrugated paper about half of A4 size (approximately 10 cm x 29 cm).
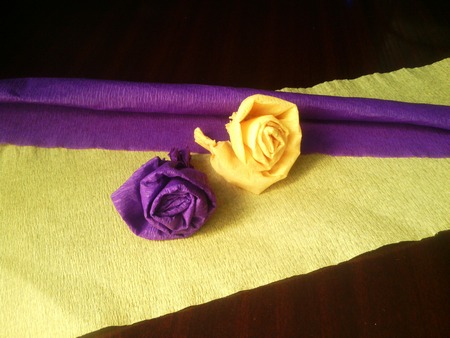
I twist the workpiece into a tube along the long side. After that, I form a rose. I fix the foundation imperceptibly with a thread. Attached to the stem. A branch wrapped in green paper can serve as a flower leg.
Personal workshop on making paper flowers for beginners
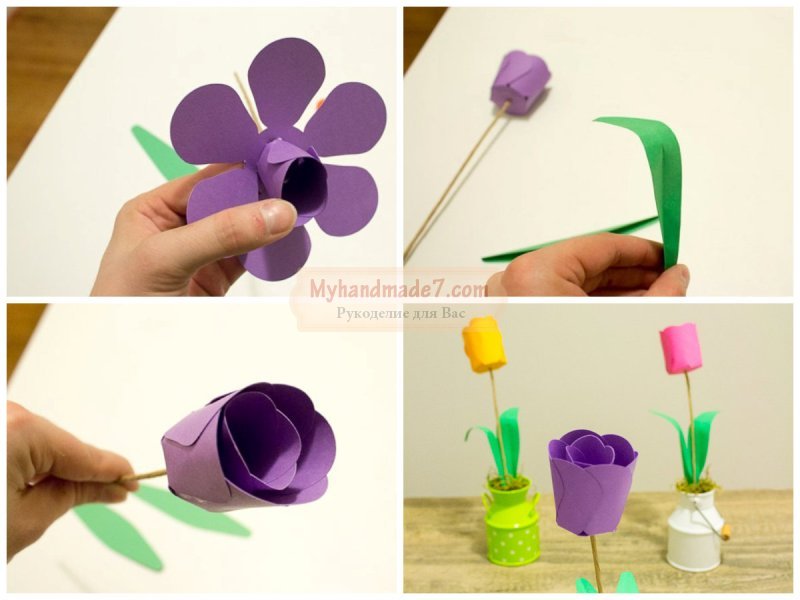
"Bouquet in a vase"
- pink and light green printer paper;
- scissors;
- wire;
- sewing needle;
- glue stick;
- vase.

Stages of making a flower arrangement
STAGE 1
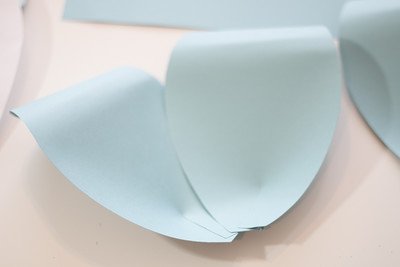
We will need paper squares of various sizes. To collect one flower, you need to prepare 6 leaves. The largest one is 10x10 cm, then each subsequent one can be reduced by 0.5-1 cm. The middle in my case has a size of 3 cm in diameter (if we consider the flower itself).
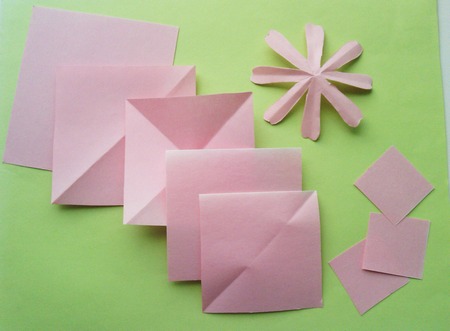
1 STEP Cut out paper squares
STAGE 2
Fold each square into a triangle and carefully cut out with scissors. Don't be discouraged if it doesn't turn out perfect. This will only add naturalness to your product.

STEP 2 We add triangles from squares
3 STEP
Prepare the layers of the future flower.
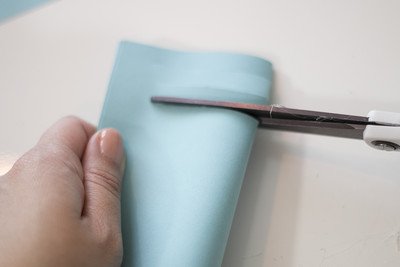
To do this, you need to curl each petal a little with a scissor blade. Moreover, the largest bottom sheets are curled in two different directions. The tips of the petals are up, and the middle is vice versa. This is done to achieve greater volume.

STEP 3 Bend the petals
4 STEP
We lay out our layers in sequence.
We adjust the flowers to size. It may seem that it is necessary to make a part smaller or curl more of a certain element.

STEP 4 Assemble the layers of petals
5 STEP
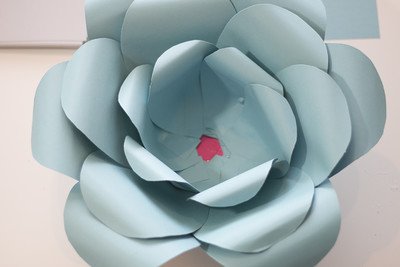
Collecting a flower.
To do this, we impose one layer on another: from the largest to the smallest bud. For the convenience of the subsequent connection, I use a needle. I pierce all the blanks and thread the wire into the hole, as if I were starting to sew on a button. There is a small stripe on the front.
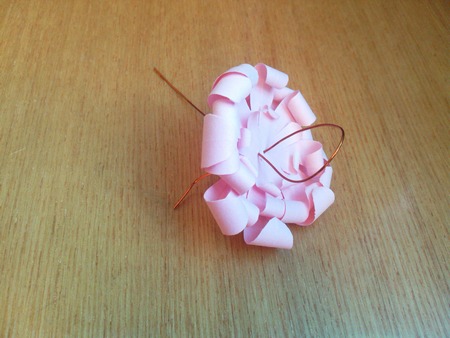
STEP 5 We prick the middle of the flower with wire
6 STEP
We make a stem for a flower. The wire (which the leaves are connected to) is wrapped with a thin strip of green paper. The sharp end of the metal can be bent and hidden inside the greenery.
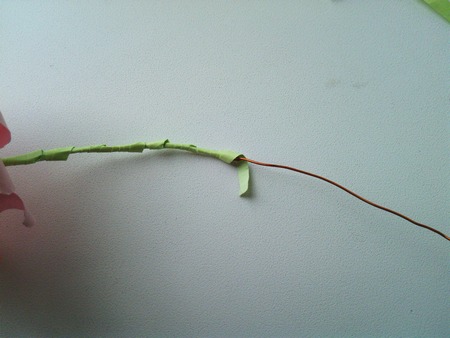
6 STEP We wind on the wire colored paper
7 STEP
We make leaves.
I cut out the leaves without preliminary drawing. I take a wide strip of paper, fold it several times. I fold in half along a long line and cut, giving shape.
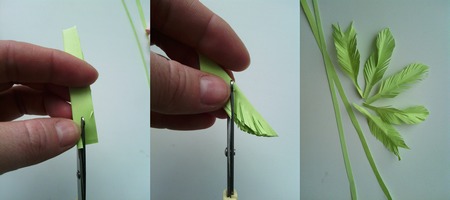
STEP 7 Cut out the leaves
8 STEP
Glue the leaves to the stem.
Everyone can choose the height and size of the leaflet to their taste. It seemed to me that they should be higher to the bud.
STEP 8 We collect all the finished parts of the flower
9 STEP
We collect our bouquet. Putting flowers in a vase

STEP 9 Bouquet is ready
Paper is a simple and surprisingly easy-to-work material. From bright colorful sheets you can create a whole botanical garden of ever-blooming plants. Easy-to-use corrugated, interesting and affordable printer paper - you will definitely find an option for yourself here. Worth trying. And you will feel how exciting it is to create decorative compositions with your own hands.
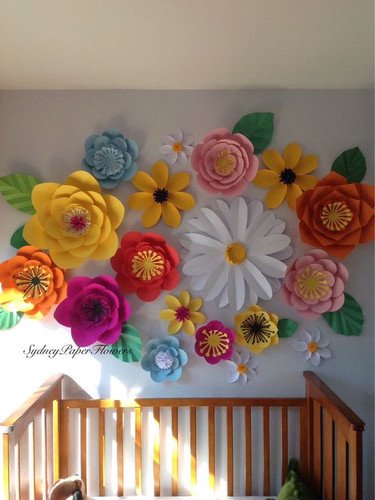
DIY paper flowers will complement the interior of your home with unique design elements, they will delight you with their lush flowering both in winter and summer. In addition, they can be used to decorate gift boxes and baskets, which will be a real surprise for the birthday person. Paper - marial is so simple that it will be interesting to work with it even for a preschooler who can be offered to make flower applications, while mom is busy decorating paper bouquets.
How to make paper flowers with your own hands
If you want to have a blooming bouquet in your house both in winter and in summer, then you will definitely like our master class, how to make paper flowers with your own hands. Today we offer you an idea for creating a beautiful fluffy hyacinth.
For this work, we need several colored sheets (it is imperative that they are painted on both sides). You will definitely need a green color for the leaves, and any other color for the buds. It can be a delicate pink color, rich purple or raspberry.
To form the stem, we will use a piece of wire, it can be ordinary aluminum wire or floristic, and to decorate it, we need a green crepe ribbon. In the process of work, we will also need glue and scissors, as in other crafts that use paper.
Hyacinth is a fluffy flower with small buds that cover a long stem, so we need to make a lot of small flowers, for this we will use leaves of the main color, let it be purple.
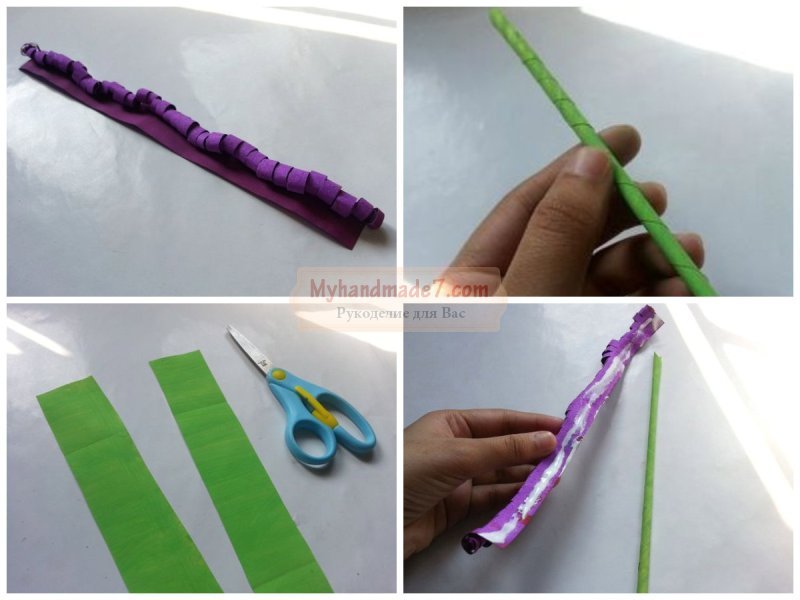
First of all, we need to cut off the purple strip, then fold it several times along the length to make it more convenient to make cuts. On the one hand, you need to make a bend to indicate the part that we will not cut, this gap will be equal to one centimeter. On the rest of the strip, it is necessary to make cuts, the width of one strip of our fringe should be about 0.7-0.8 cm. A fringe should have been obtained along the entire length of the strip, from which we will make do-it-yourself paper flowers, photo will tell you how to deal with this part of the craft.
Each thin strip of fringe must be twisted into a spiral, as if we are working in the quilling technique. All strips must be twisted, while they can be twisted unevenly: some are tight spirals, others are slightly wrapped. From this fringed strip we will make our flower, but for the base we need to make a stem.
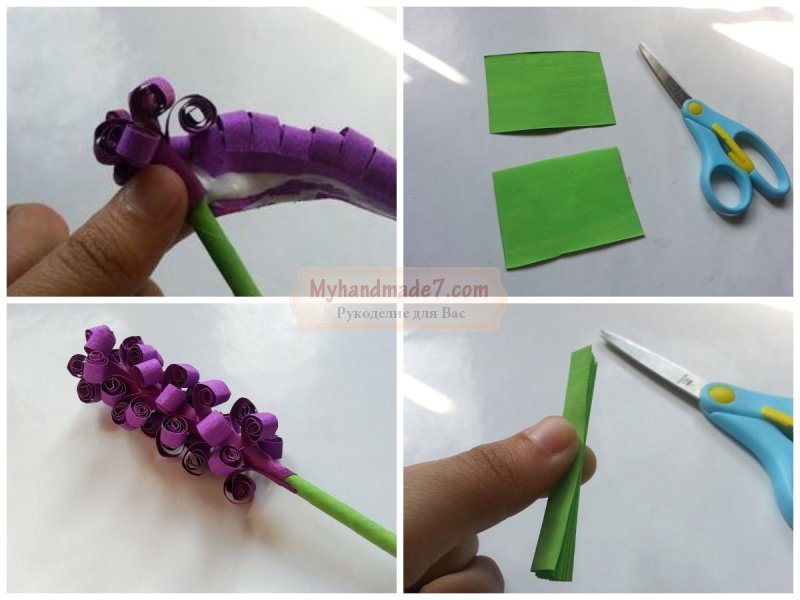
A piece of wire must be decorated with crepe tape, wrapping it around the wire and fixing it with glue. When the stalk is ready, you can start gluing a purple fringed ribbon to it. Apply a little glue to the uncut part, then wrap the tape around the stem, starting at the top and moving down. When you wrap the entire strip around the stalk, we will have a lush inflorescence.
The lower part of the inflorescence must also be closed with a crepe ribbon, forming a sepal. It remains only to make green leaves, they must be glued to the stem, and the place of gluing is also closed with crepe tape. This is how easy it is to make a hyacinth, and from a few pieces we will succeed. Its flowering will delight you all year round, but for a beautiful bouquet, you must definitely use material of different colors.

DIY paper flowers: schemes
In the process of work, you will definitely need and do-it-yourself paper flower schemes, for example, if you decide to do an origami craft. There are several options for how to make beautiful, neat flowers using origami, they can be solid or consist of individual petals, which are then glued together.
When you work with the origami technique, the main thing is that all fold lines are pronounced, for this you need to draw a ruler or other non-sharp object along the folds.

Ready-made origami flowers can also be attached to the stem using adhesive tape, or used as a decoration for a gift box, postcard, create unique flower panels, and decorate the interior and festive table to your taste. You can use the resulting flowers to create large flower balls, and use a foam ball or paper as a base. As you can see, you have many options for using the acquired skills, how to create do-it-yourself paper flowers, schemes for work we also offer you.
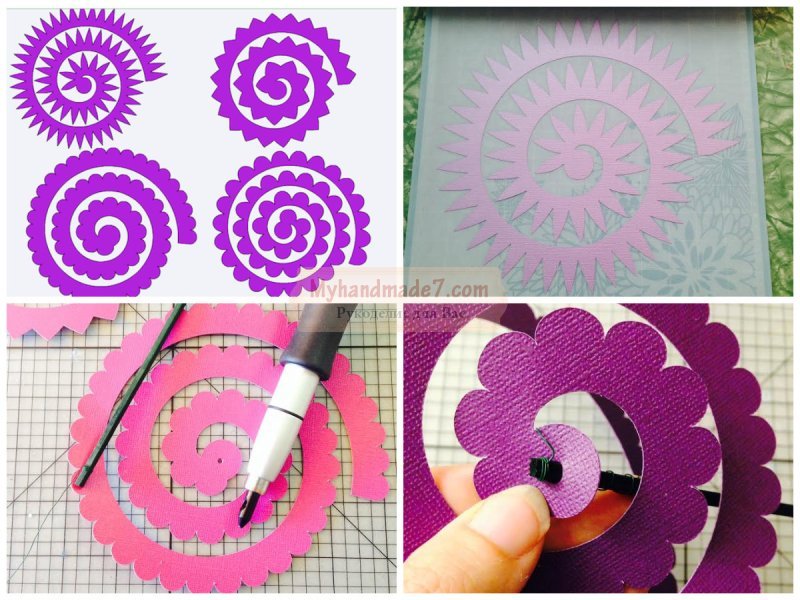
DIY paper flowers: templates
To carry out accurate do-it-yourself paper flowers, schemes, templates can be used. Now you do not need to draw many elements on your own, which should then be cut out, it is enough to find a suitable template on the Internet and print it on office sheets. Then, armed with scissors, carefully cut out the printed elements along the contour. Thus, you can quickly get all the necessary details, from which all that remains is to “assemble” a beautiful flower. Even if you do not have sheets of a suitable color, you can print petals with the most unique patterns on the printer.
You can create openwork multi-layered do-it-yourself paper flowers, templates you will be helped to cut the petals of the same shape, but different sizes. Templates are especially convenient if you need to cut out many identical petals. If you multiply such a template on a sheet over its entire area, then you will save yourself from the need to re-circle the workpiece each time.
A beautiful, delicate ranunculus flower can also be made using a template, and when the bud is ready, it can be attached to the stem or used for flower arrangements, gift box decoration. even children can do it, so be sure to involve children in the creative process.

There is no difficulty in the process, all you need is to find a template of the right size on the Internet and buy sheets in a delicate color, and then print them on such sheets.
For a ranunculus bud, you will need eight petals, two of each size, from small to largest. You can print the lower petals (large ones) on a rich shade of pink, and the smallest ones on pale pink.
All petals should be carefully cut with sharp, fine-tipped scissors, and then bent all the petals using scissors. You will get eight bent blanks, from which you can form a beautiful bud. It is necessary to collect the inflorescence from the largest petals, which will be from below, to the smallest, which will be at the top. Since we have two pieces of blanks of each size, they must be arranged so that the petals are in a checkerboard pattern. Thus, you get a fluffy voluminous flower. Place a piece of paper in the center. All layers can be easily glued together.
If you plan to attach the resulting inflorescence to the stem, then there should be a hole in the center of each blank.
Thick colored cardboard can be used to create minimalist flowers. Such compositions will surely decorate your home, and even a child can be involved in the creative process. preschool age. All you need for this craft is cardboard, template, scissors and wire. The petals on the template should be large enough, it is desirable that the size of the flower matches the size of the cardboard sheet. The finished contour should be cut out and a hole made in the center. Now it remains only to fix the wire in the center of the workpiece, and bend the edges of the petals up. The finished flower can be fixed in a decorative pot or cup.
DIY corrugated paper flowers
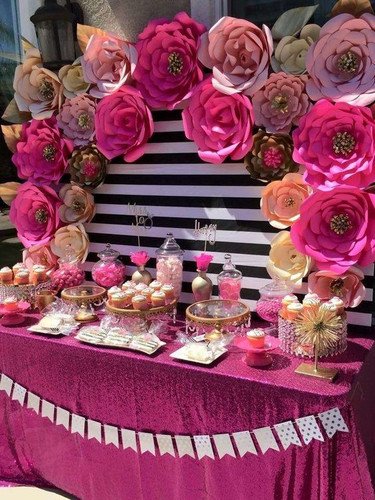
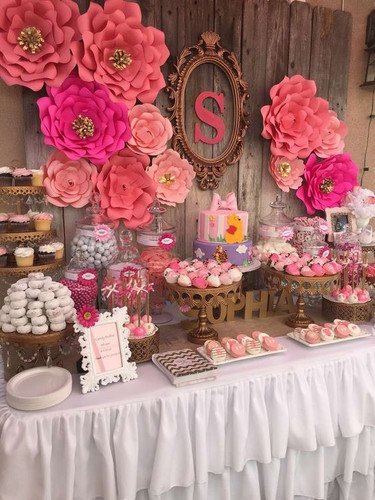
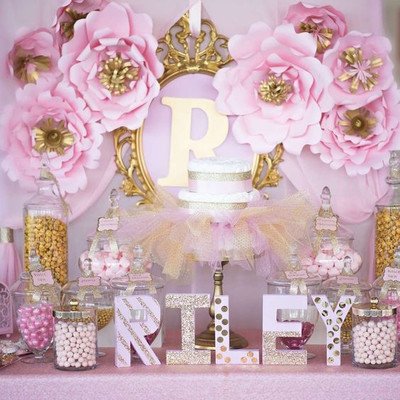
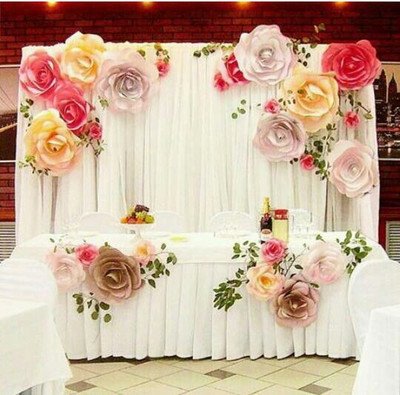
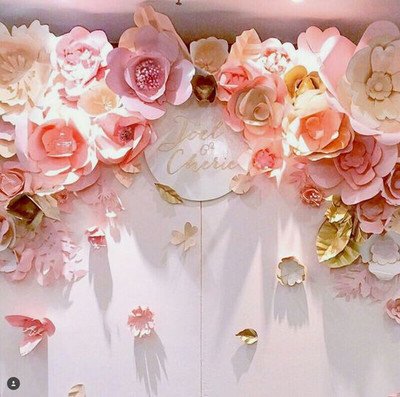
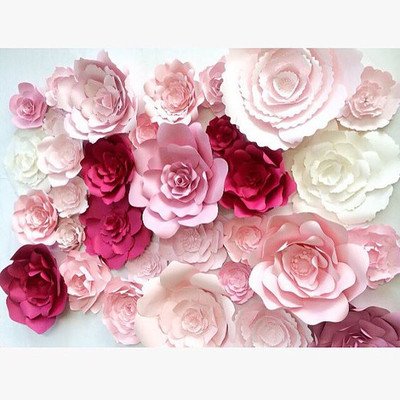
The most popular crafts are DIY corrugated paper flowers, they are used in festive and wedding decor, for decorating and setting the table, decorating gift boxes and simply for decorating the premises of a house or apartment that lacks bright colors in the interior.
It is very convenient to work with corrugation, because it can be cut folded in several layers, and thanks to the special structure of the material - the petals can be given a natural concave shape. You can cut out individual petals from the corrugation, and then make a flower, or cut the corrugation into strips, and make the edges of the stripes openwork.
turn out to be voluminous, they can be used to make flower arrangements, and even individual flowers can be used to create special decorations for the holiday - volumetric figures and flower balls.
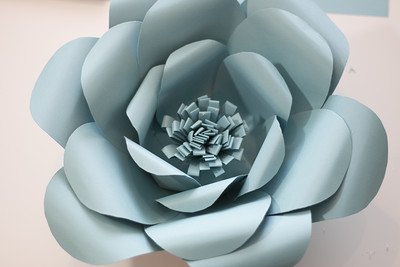
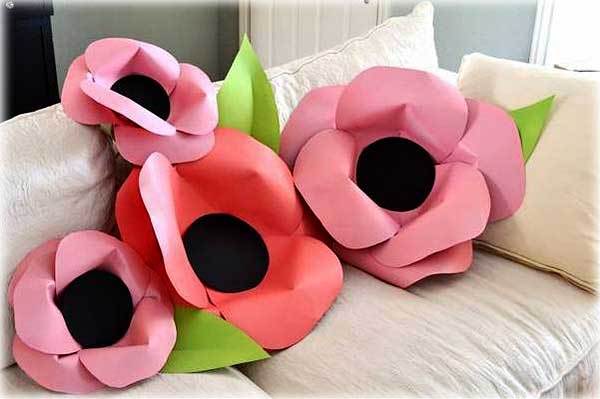
Large do-it-yourself paper flowers
To do large handmade paper flowers, you can use ordinary office sheets or corrugation. You can use them for photo shoots, decoration of festive decor. This decoration will look truly luxurious.
You can resort to one of the techniques, for example, to make a large inflorescence from individual petals that are attached to a base circle, instead of petals there can be tubules. If you use corrugation, then quickly and without unnecessary difficulties, you can make large paper pompoms.
If you look photo of paper flowers with your own hands, then you will definitely find an idea for yourself that you will definitely want to bring to life. Beautiful - a unique decoration for your home, and with its color it will delight you at any time of the year.
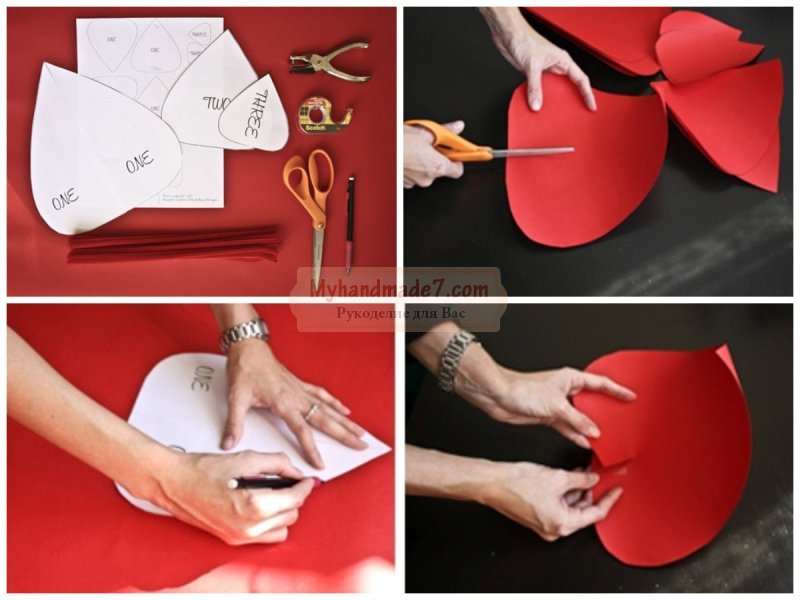
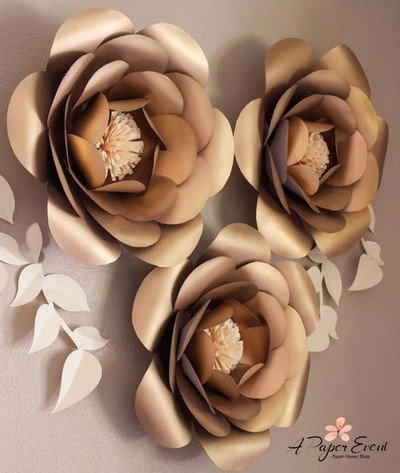
For the core of a large rose, we need three teardrop-shaped blanks, and for the petals - eight heart-shaped blanks. You can use templates, or draw it yourself on white paper, and then transfer it to corrugation. For the stem, you will need several folds of floral wire to make the stem strong enough. Green teip tape is usually used to decorate the stem, it can also be used to form the sepals.

The finished "hearts" cut from the red corrugation should be of a natural shape, reminiscent of rose petals, so they must be cut so that the corrugation strips run perpendicular. Then stretch the finished workpiece a little with your hands, and slightly wrap the two semicircular edges on a pencil.
For these flowers, you can create petals in any size! Just make sure that each layer is smaller than the previous one. I used three layers in creating these colors, however, if you wish, you can always add a few more. In addition, you can also experiment with various types centers and leaves.
To create flowers, we need:
- Paper (thick)
- Pieces of cardboard to use as a base
- Scissors
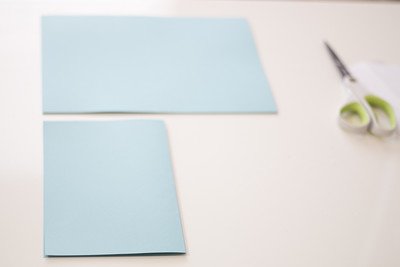
First, let's create patterns for the petals. Then take the paper and fold it in half. I made the template so that the large petal fits into half of the leaf, and the smallest petal fits into a quarter of the leaf. You will need 6 half sheets for the large petal, 6 half sheets for the medium petal, 3 quarters for the small petal, and 3 quarters for the flower center.
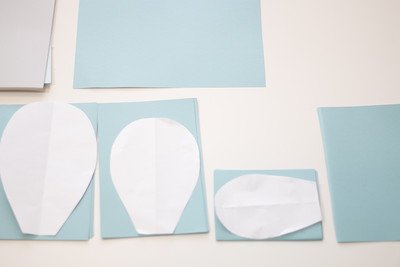
Cut out large petals according to the pattern.
At the base of the petal, cut out the base for bending, as shown in the photo:

Turn the petal over so that the widest part is at the bottom. Roll the petal away from you to create curls.
Now turn the petal back so that the base with two flaps is at the bottom. Glue the sash so that it overlaps the other. When making the outer petals, do not make too much angle, do not overlap the petals too much. As you advance, the petals should lie flatter.

Remember: for the largest petals, you need to do a lot of overlap, otherwise the flower will be too straight. Do this for all large petals.
Now we will attach more and more petals to each other to form the shape of a ball. Add glue to the edge of each petal and glue.

Continue adding petals to form a flower. Repeat all the steps above for medium and small petals.


Glue thick cardboard to the "bottom" of the flower to give firmness and a base to the flower. In this example, I just used this pink cardboard because it happened to have some sort of holdover.

To make the center of the flower, take the last quarter sheet and fold it in half. Now cut off the "brush". Make sure you cut from the side of the fold.

After you cut through 3 sheets, separate and unfold them.

After you finish rolling up the first sheet, attach it to the next sheet and continue rolling. Do this until you have rolled all 3 sheets together.
This is what the center of the flower should look like in the end. Now all you have to do is add glue to the bottom of the center and add it to your flower!

You can make many more different flowers by simply changing the petal shape, size, color, and center.
I hope you enjoyed this masterclass. If you decide to try to make such flowers, then be sure to share a photo with us!


Rate - Excellent Good Not bad Bad Awful
Be sure to read other interesting articles:
Paper bouquets can become and original gift, and decoration for gift wrapping, and decoration of a basket with sweets.
It is necessary to apply a little imagination, spend a little time and a minimum of materials.
How diverse the world of flowers is, so wide is the choice of their paper counterparts.
We bring to your attention several options.
Rose 1

The original bouquet of roses in Art Nouveau style is easy to make yourself. It's simple. Let's make some roses (odd number). To do this, take a smooth thick paper of suitable colors. If the bouquet is one-color, you can choose red, hot pink or deep blue. Flowers of the same color of different shades and tones are well combined. For the stem you need wire and green paper. Let's not make leaves.
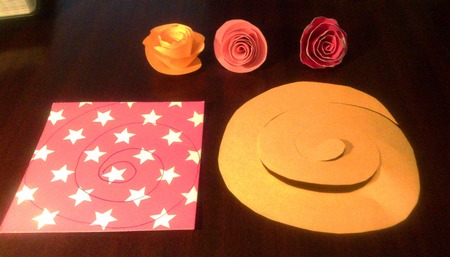
Step 1. We cut out a square of 10 * 10 cm from paper, inside it we draw a spiral with a distance between the turns of 1 cm. Cut the paper along this line. It turns out the tape. If you hold it by one end, you get a spiral.
Step 2. We turn the strip, starting from the outer end, dissolving it a little. It turns out a flower. We fix the inner and outer ends with glue.
Step 3. We smear the wire with glue and wrap it with green paper. The resulting stem is attached to the flower. You just need to pierce the middle of the flower with the end of the wire and bend the upper end with a small loop. You need to make several of these colors.
Step 4. Connect the flowers into a bouquet and tie with a silk ribbon. Depending on the size of the flowers and the number of them in a bunch, such a bouquet can be used to decorate gift wrapping or insert into a gift vase. Laconic graceful roses look very stylish.
Rose 2

Another easy way to make do-it-yourself voluminous paper flowers in the form of roses. These flowers can decorate the festive table, placing them between the plates or making a three-dimensional panel on the wall. Stems are not needed here.
We need smooth thin paper of a suitable color. The roses will be small. We take 4 squares 8 * 8 cm, fold them four times, and then from corner to corner.
Cut off the corner by 0.5 cm. This will be the central hole of each part. top cut out in a semicircle. Expand the resulting tiers.
To get a voluminous rosan, we cut each tier as shown in the picture. And the fourth part is cut into 2 identical parts.
Now we wrap the edges of each petal, winding it on a pencil. Of the 4 layers, each top will be 1 petal less than the bottom.
Thus, we begin to fold the flower, gluing the tier to the tier. In the center we fix the “pestle” rolled up with a tube.
Now we make the base and leaves. From green paper, cut out a small circle and glue it to the lower base of the rose. From the same paper we cut out 3 oval sheets with pointed ends. To give them volume, we fold them into an even "pleated". We connect the leaves together with glue as in the picture and glue them to the base. Elegant decoration is ready.
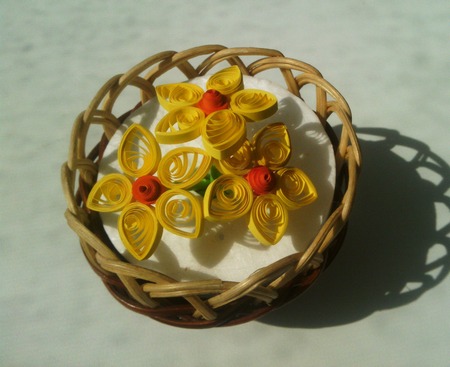
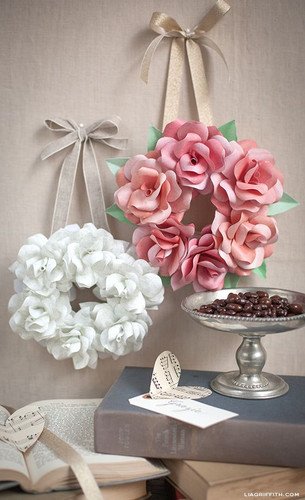
sweet basket
As you know, women of any age love sweets. But giving a banal box of chocolates is unoriginal. But hiding a delicacy in do-it-yourself voluminous paper flowers is beautiful. Such a gift indicates attention to the person to whom it is intended.
We make a basket with yellow tulips.
Cook:
. Several round-shaped sweets in a beautiful package;
. Yellow Corrugated Paper
. Smooth glossy green leaflet paper;
. Teip - green tape;
. Wire with thread winding;
. Threads, scissors, ruler
. Thermal gun or thin tape.
Step 1. For each tulip, we cut out 6 oval petals 5 cm long, 4 cm wide (in the middle of the petal). We draw out each petal in the middle, making it convex and rounded. We twist the lower end of the petal a little, sharpening.
Step 2. We form a flower. We put a candy in the middle and surround it with six petals as in the picture. We connect the lower ends, leading the end of the wire into the middle. To keep the design well, we wrap it with a thread. So we make several flowers.
There is another way to secure the stem for do-it-yourself paper flowers. We unfold one end of the candy wrapper and wind it on the end of the wire smeared with glue. And then you can stick the petals on top.
Step 3. From smooth green paper, cut out 2 elongated leaves for each tulip. First, with a green teip - we wrap the stem with a tape - a wire along the entire length. Then, using a glue gun, we attach the leaves to the stem so that the bud is between them.
Step 4. We put tulips in a basket or a low vase, we tie them satin ribbon. The gift is ready!
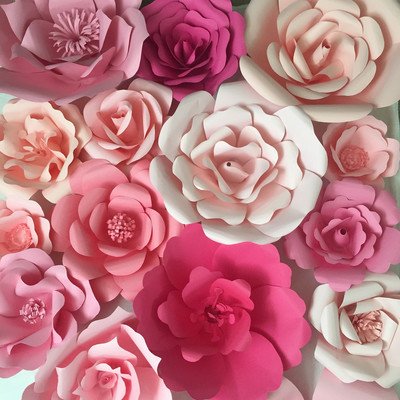
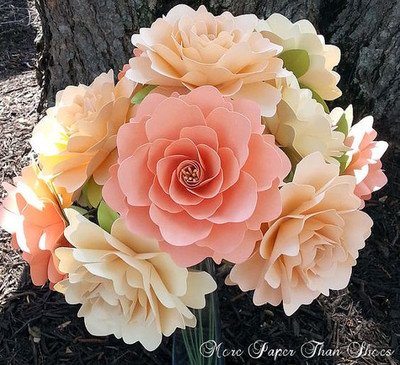
Chrysanthemums - do-it-yourself voluminous paper flowers
You can choose the most bizarre colors for fluffy chrysanthemums. The bouquet combines well lilac - pink flowers, pistachio - cream. The choice is up to you. It takes quite a bit of time and skill to make a bouquet of such flowers.
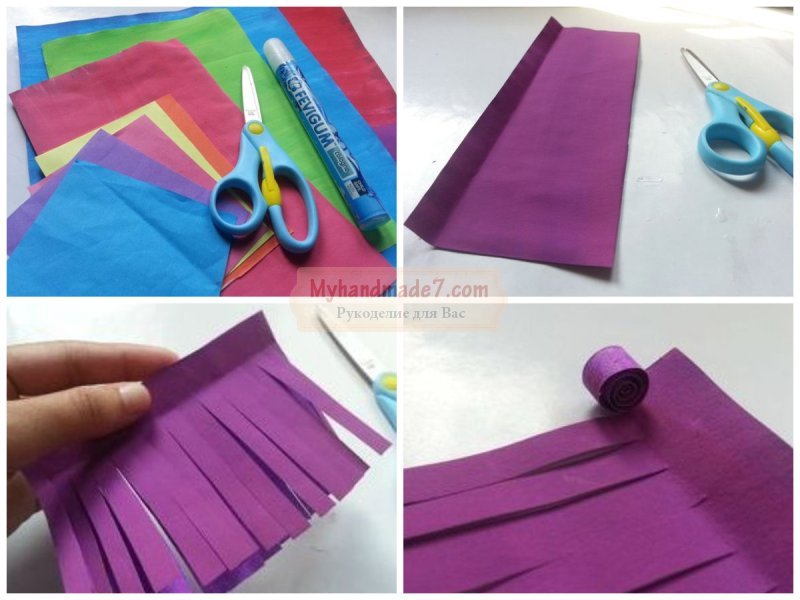
For 1 chrysanthemum, you need a strip of thin paper of the main color 5-6 cm wide, leaflet paper, green wire, scissors, glue, adhesive tape.
First, cut out a strip 20-25 cm long (the longer the strip, the fluffier and more voluminous the flower will be). We cut one side with a thin fringe after 1-2 mm. The depth of the slots is 3.5-4 cm. Then we stick adhesive tape on the lower edge, attach the end of the wire to it and wind the cut strip onto the stem. The fringe gathers into a fluffy corolla of chrysanthemum.
We cut out rounded leaves from green paper, wide folds will give them volume. We attach them with tape or glue to the stem. We tie the bouquet with a beautiful ribbon or put it in a vase.
Nowadays, in modern stores you can buy any thing, but what is made by hand will be appreciated at all times. Therefore, the manufacture of original paper flowers is becoming more and more popular. Such beautiful bouquet You can give it to your mom or grandma. With these wonderful crafts you can decorate a room, an arch or a festive table for the holiday. But not everyone still knows how to make paper flowers with their own hands. It's not too hard, be patient, and your crafts will come out no worse than real flowers.
1 Where did such classes come from and what is needed to make paper flowers
1.1 Where can you adapt paper crafts
1.2 What will be required for this case
2 Different Ways to Make Beautiful Paper Flowers
2.1 The simplest paper flower
2.2 Paper roses
2.3 Festive bouquet
2.4 Corrugated paper rosette
2.5 Bulk flower
2.6 Extra large paper flower to decorate the hall
3 Origami paper flowers
3.1 Rose Kawasaki
3.2 Simple origami flower
Where did such classes come from and what is needed to make paper flowers
Paper crafts - flowers were made in ancient times. The Egyptians made various decorations from artificial flowers, of course, they also used paper to create them. In medieval times, temples were decorated with such crafts. And in the eighteenth century, they began to create large enterprises that officially produced such flowers. Therefore, even then people already knew how flowers are made of paper.
Where can you adapt paper crafts
You can make original panels and compositions from paper flowers, because at a long distance they practically do not differ from living ones. Also, colored paper flowers are great for decorating photo frames, postcards, gift boxes and hats. Very often they are used to decorate festive halls before all sorts of celebrations, rooms and holiday tables. And such crafts will give everyone a festive mood and joy.
What will be required for this case
Such crafts can be made even by children under your strict guidance, and even from paper you can create a real masterpiece. You will need to prepare the following materials and tools:
Paper. You can take the usual - white, which you then paint with paints, but it is best to take colored paper, corrugated and crepe. From colored paper, flowers do not need to be painted with paints and this will save time;
stapler and glue;
Threads, adhesive tape and scissors;
Watercolor paints, gouache is also suitable;
Cardboard, wrapping paper and original ribbons;
Wire, straws for cocktails, ampoules from pens. From these materials you will make a stem for a flower;
Beads, beads and rhinestones. They are needed to decorate the middle of the flower.
But we will make different flowers and for each specific case, first of all, you need paper and glue, and then see what you need from the above list. Next, we will tell you how to make a flower out of paper.
Different ways to make beautiful paper flowers
There is a lot various ways making paper flowers. Each of them has its own conditional purpose. Consider the most popular methods.
The simplest paper flower
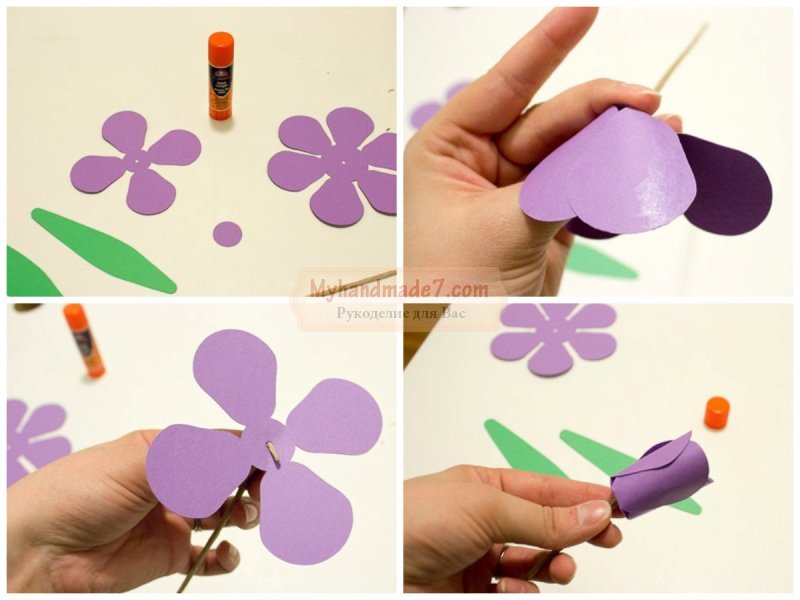
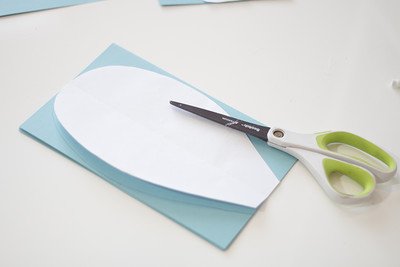
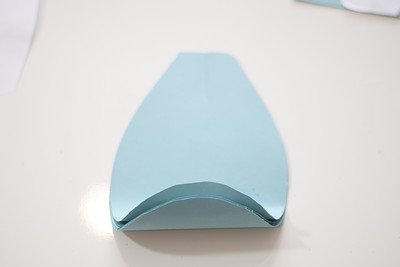
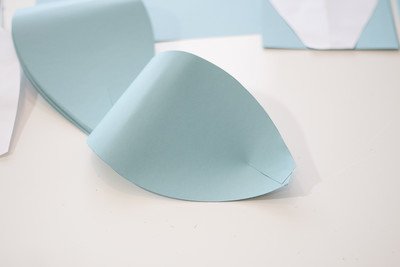
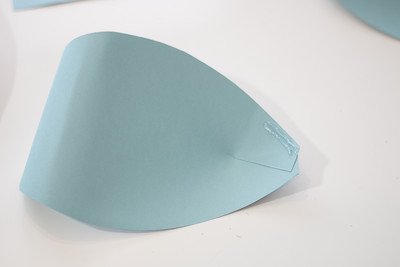
Even preschool children can make this snowdrop and give it to their mother on March 8th. For the snowdrop itself, you need to take a square white piece of paper, its dimensions are about 10 by 10 centimeters. Fold the paper diagonally and fold over the corners. It remains to glue the flower on paper of blue color or a postcard and finish drawing the stem and leaves.
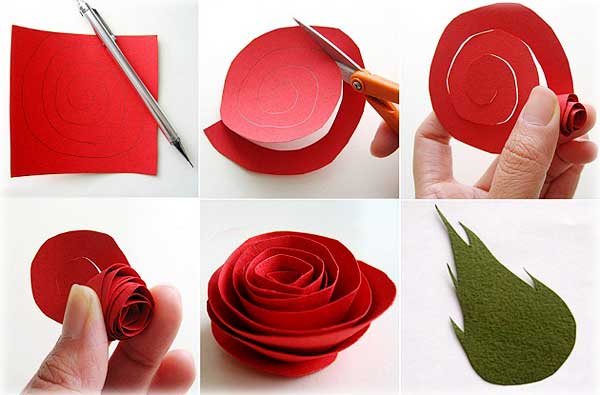
Prepare thick red paper, marker and glue with scissors. If you are wondering how to make a paper flower in the form of a rose, then your steps are as follows:
Draw a spiral on paper with a pencil and cut it out with regular or curly scissors. When using curly scissors, roses are more beautiful;
Now try to wrap the tips of the spiral outward. The paper may tear a little, but it's okay, it's even better - the flower will come out more real;
Twist the spiral so that you get a rose. Carefully twist the spiral to the end, gradually loosen the tension;
After the final twisting of the spiral - fix it with glue. Now you need to bend the circle that formed in the center of your rose when cutting out the spiral. This circle will be the base of the flower;
Put a little glue on the base and stick a rose on it. Your original rose is ready.
Now we will make not one flower with our own hands from paper, but a whole festive bouquet. Prepare soft paper of various colors, wire cutters and scissors, as well as a vase, thin wire and glue.
Let's get to work:
On the wire (it is intended for the stem) we apply a little glue;
One end of the wire must be wrapped with a thin strip of yellow paper;
Take the paper from which you will make flower buds. It can be any color. Fold the paper 12 times and cut out the petals for your flowers with scissors. From them you need to build a bud;
Apply glue to two petals and now they need to be attached to the stem in place wrapped with a yellow paper strip. Fold, thus, all the petals in a bud;
Now take green paper and wrap the stem of the flower with it. To get a whole bouquet, and the composition was considered complete, you need to make five buds. Place the finished flowers in a vase, and you have an original paper bouquet.
Corrugated paper rosette
It is best to make flowers from corrugated paper, as it is considered the best and most convenient material to work with. For the stem of a rose, you can find a wire. On a sheet of paper, mark a circle in which mark the contour of the spiral. The distance between the turns is chosen in such a way that with further folding you get rows of beautiful petals.
Cut out a circle from paper, and then cut it in a spiral. The ends of the spiral should be in one line at the diametrically reverse points of the circle. You just have to fold from the strip that turned out the flower bud. We recommend putting a solid small object on the edge of the strip and then fold the bud, as if wrapping this object in paper. Do not forget to give the bud a kind of "splendor". At the bottom, the entire assembly will need to be tightened with a thread or glued, otherwise your corrugated paper flower will simply unwind and fall apart.
Make the number of rose leaves you need from green crepe paper. The wire must also be wrapped with green paper, and the flower will have a stem.
Bulk flower
Volumetric paper flowers are perfect for decorating curtains in an apartment, and such a flower can also be added to any outfit in the form of a brooch. Prepare thin paper (cigarette paper is also suitable), scissors, glue, and a ring to secure the craft. You can use a button or something else. Consider how many layers you need for a flower, the more there are, the more voluminous the product will turn out. Five to seven layers are recommended.
Get to work:
Put all the paper layers together. From them we cut out a rectangle, its dimensions are approximately 30 by 15 centimeters;
Fold the cut layers together in an even pile and make an “accordion” out of them, the folds of which are about two centimeters wide;
Fix the "accordion" in the center with a ring. If a button is used instead of a ring, fasten with a thread, and then attach a button to this place;
You have a kind of fan, you need to glue it around. Now let your volumetric paper flower dry for about five minutes;
Gently lift the top paper layer up and begin to compact the top layer of the flower towards the center. Condense the fold by fold and repeat these steps with all layers. After that, your paper creation is ready. Now you know how to make voluminous flowers out of paper with your own hands.
First print (if you got it from the Internet) and then cut out the template. Then fold the paper in several layers, for a large flower there should be 10-15 layers. Pin the template to the paper with pins.
Next, cut out the flower petal according to the template. In the same way, you need to cut out sheets with a core. Now you need to slightly stretch the middle of all the petals. Petals are glued from the core using double-sided tape. We turn the glued petals on the back side. Plant the finished flower with glue on the rod. From corrugated green paper, you need to cut a strip a centimeter wide and wrap the flower stem with it. At the base of the product, glue a green paper leaf, and at the end of the stem - the tip of a green strip. Now you know how to make a large flower out of paper.
Origami paper flowers
Modest and colorful, delicate and luxurious - exotic and ordinary wild flowers have always been and will be a symbol of beauty. A person always wants to get a piece of nature for himself and therefore makes paper flowers. If you know the origami technique, your paper flowers will turn out just gorgeous. The petals of such a flower are usually folded from one sheet of paper, and such crafts embody the oriental perception of the harmony of unity, which is expressed in diverse forms. The origami technique allows you to create voluminous and original flowers, and they look impressive. There are a lot of origami paper flower patterns, but if you are doing this for the first time, it is best to choose the simplest pattern.
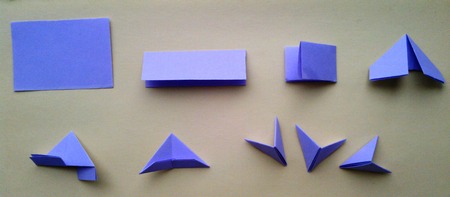
Rose Kawasaki
Take a small square piece of paper. Its size can be different, it all depends on what size you want to make a rose. Fold the paper diagonally twice. Now bend the corner of the resulting square to the center and mark the middle of the distance to the center from the edge. Connect the bent corner to this center.
Do you want something interesting?
You will get a square with truncated corners, fold it in half twice, and then unfold the sheet. Connect the midpoints of the sides opposite each other together. You should get an interesting figure.
Now the open edges of the product need to be bent towards the center and the fold is ironed, after which we unfold the resulting workpiece. We bend the side corners, and then they are tucked inside the resulting workpiece. Now you need to raise the small triangles so that a square comes out in the center. All further actions are carried out exclusively with this square.
If you are still interested in how to make origami-style paper flowers, now you need to bend a small square, straighten the pockets and fill the blanks inward. These blanks will serve as fasteners for the petals of your rose bud.
Turn the flower blank over and do the same on the other side. You will get a new interesting figure. Turn the workpiece over, and carry out all the above steps on the other side. In the end, you will have a template for the future flower.
We bend the upper corner of the template towards ourselves, and then in the opposite direction. The core of the bud will come out and it must be carefully sunk into the inside of the workpiece, thereby forming it. Fold the figure in one plane and smooth out the fold lines.
Now the bud needs to be compressed, while twisting the center in one direction, and the petals in the other. The rosette rotates completely, for this you pinch the recesses of the bud with your fingers, otherwise you will inadvertently break your creation. Your paper craft is ready! It is worth noting that the manufacture of a paper flower using the origami technique in this case is not intended for beginners, but if desired, everything will work out.
This method of folding a flower according to the origami scheme is much easier than the above rosette and will have to work less. If you want to learn how to make this paper flower craft, then your steps are as follows:
Prepare a piece of paper 15 by 15 centimeters. Lay it out in front of you so that it lies face up;
Fold the sheet on both sides diagonally so that its edges fold evenly. Press the fold, the folds form the letter X;
Now unfold the paper. Fold from left to right and unfold;
At the very bottom, where there are open windows, gently push the top left and right corners of the paper. The fold located in the center of the sheet will rise and all four corners should be joined. The end result is a square diamond;
Align the diamond. See if it has windows on the left and right sides. Now turn the diamond 180 degrees, a window should open on top;
Fold the lower left and right corners of the diamond to the center crease and eventually a kind of kite should come out. We turn the diamond over and repeat all the actions;
Let's take care of the petals, they need to be opened. Take the snake by the upper tip, pull and fold it ¾ to the bottom. With the index and thumb, press the center of the craft, a stable fold should come out of the flower. The manufacturing process is coming to an end, and now you know how to make paper flowers in this style with your own hands;
It remains to put all the remaining petals in place. Shape them the way you want. You can change their position if you pinch the base of the flower near the stem;
Finish the edges of the craft with scissors. With ordinary or scalloped scissors, you need to round the edges or make cloves on them. With rounded edges, your craft will resemble pansies, and the design of the edges with cloves will make it look like a carnation. So you made such an interesting paper flower with your own hands.
As you can see, making paper flowers is a real art and requires a lot of patience, but it's worth it. Your flower will be no different from a living one at a distance, and your guests or relatives will appreciate such an original craft. And now every home craftsman will succeed, because you know how to make flowers out of paper with your own hands, and success will depend on desire and imagination.