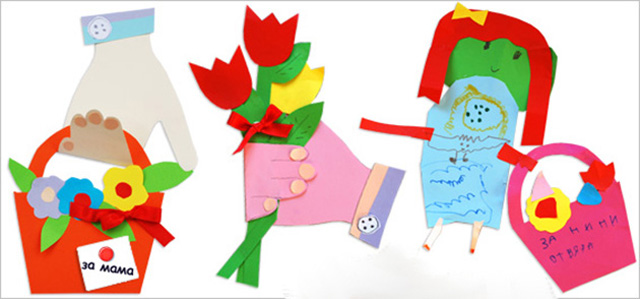
Mom is the first word, the main word ... Indeed, in the life and heart of every person, mom occupies a special place, so we all want to please her more. Already in kindergarten, children learn to make gifts with their own hands, which afterwards they can solemnly present to mothers for the holiday. As a rule, these are various cards with birthday greetings or March 8th. And even if you have already matured, forgetting the wonderful tradition of giving homemade postcards is not at all necessary, because it is they, made with love and a piece of soul, that can become the most valuable gift for your mothers.

Inspiration plus desire - and everything will work out
In an age of high speeds and universal automation, when you can simply buy anything you want, any handmade product is the best confirmation of the sincerity of your feelings and words. Moreover, children inspired by your example can also participate in the production of postcards, and together you will get a double gift - for both mom and grandmother in honor of their birthday or March 8.
Today there are a huge variety of different techniques that you can use: quilling, scrapbooking, 3D modeling and many others. If the children are very young, it is better to stop at the very easy way- to draw something, make a small application. For older children, you can already offer to try more complex cardmaking options (this is how the art of making cards with your own hands is called).
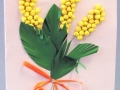
For the holiday on March 8, gentle tones, floral, spring themes are suitable, and if you need to congratulate your mother on her birthday, you can make a curly postcard in the form of a dress, or a voluminous one with a whole cake, gifts and hearts inside - it all depends on the flight of your imagination.
Postcard for March 8 (video)
If you have an idea, you can start
Having decided on the theme and type of the future postcard, you can start creating.
Here are some simple ideas to guide you on how to make a card for mom.
To congratulate your beloved mom on her birthday or on March 8, use the whole flight of your imagination: sculpt from plasticine, paint, make applications from paper, napkins and cotton pads, use origami, quilling and scrapbooking techniques, in a word, allow yourself to create. Your desire to make a gift from the bottom of your heart will definitely help you please the dearest and loved one.
See the video for more postcards.
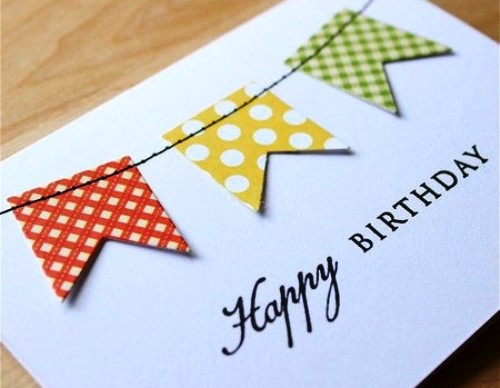
Hand-made gifts and cards are much more valuable than standard purchased ones. And this is not surprising. After all, all hand made products are unique and created in a single copy. Moreover, a handmade greeting card with warm wishes will pleasantly surprise the birthday person and complement the birthday present.
Many people think what to create beautiful postcard at home it is impossible without expensive materials and tools, but this is far from the case. Knowing the basic principles of cardmaking and scrapbooking, you can make original birthday cards with your own hands from scrap materials that can be found in almost every home.
What do you need to create a Happy Birthday card?
- First of all, you need to prepare the base of the postcard. It is best if it is cardboard or whatman paper. Base color - any, preferably monochromatic.
- You will need two types of scissors - some large ones to cut out the base of the postcard, others - small manicure scissors. The latter are convenient to cut out miniature applications or pictures.
- A ruler and pencil are needed to correctly mark the length and width of the card on the cardboard.
- With colored pens, especially helium pens with sparkles, you can make beautiful inscriptions and drawings on postcards.
- The glue stick will help you make beautiful paper applications on postcards without smudges and stains. For fastening fabric, lace, felt, it is better to use PVA glue, and for more "serious" decorations, such as buttons, rhinestones, sequins, and so on, using the Moment universal glue or a glue gun will help to avoid the troubles associated with the parts of the postcard falling off in the most inopportune moment.
- Anything can be a decoration for postcards: colored paper, felt, pictures from old magazines and newspapers, beads, rhinestones, sequins, beads, coffee, pasta, cereals, old strings, threads and much, much more. In general, anything that is in every home.
The Process of Making a Simple Happy Birthday Card
Making any postcard, no matter how simple or complex, begins with preparing the foundation. Postcards can be single and double, of different formats, configurations and sizes.
The simplest postcard is, of course, a single one, when a square or rectangle of the required size is cut out with scissors. If you need a double postcard, the cardboard is folded in half, the desired size of the postcard is outlined and the part is cut out along the contours.
The dimensions of the base can be any. However, if you are going to mail the postcard, it is best to do it under an envelope.
Envelope sizes:
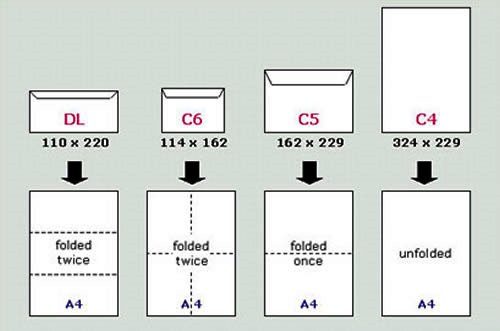
The same applies to the configuration of the postcard - it can also be varied: in the form of any shape - round, square, rectangular, oval with smooth or fancy-cut edges.
When the base is prepared, proceed to the preparation of decorations for the postcard. The simplest is, of course, applique, when the parts are glued to the base. For example, here is such a postcard, on which a balloon is glued, is done very simply and quickly, the whole secret lies in the selected materials:
You can even not use glue, but sew on the necessary elements using a sewing machine:
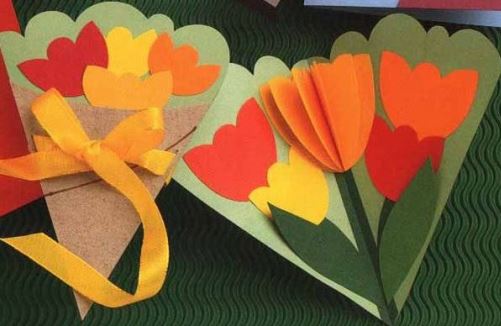
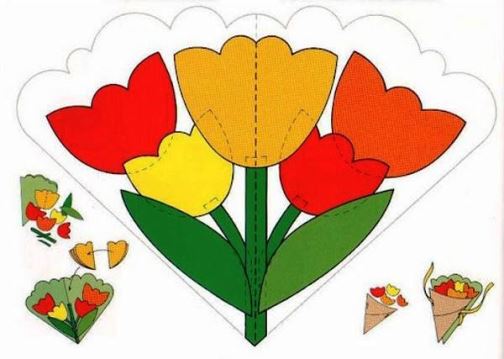
For versatile birthday cards that will work for anyone, flowers are best. Details can be cut according to templates or you can come up with something of your own.
The edges of the card can be decorated with ribbons, lace, beads, etc. 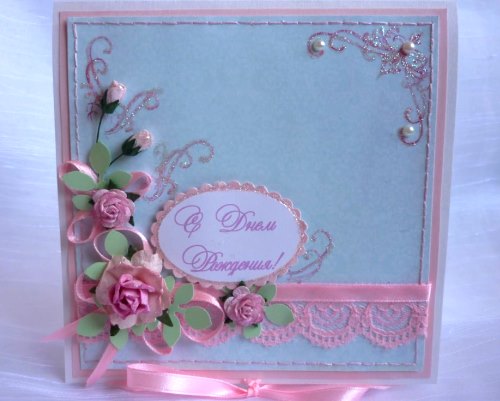
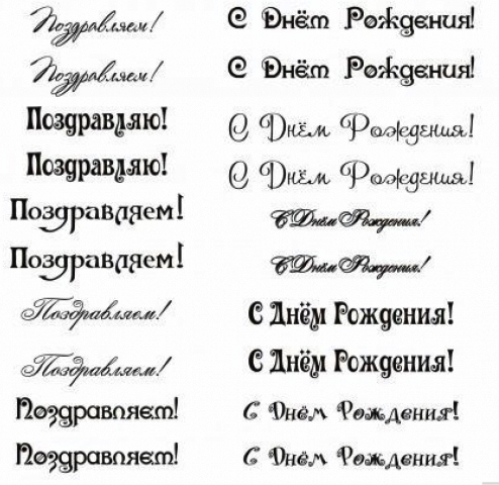
And the finishing touch is the inscription. You can sign with a colored pen, felt-tip pen, or beautiful inscriptions for postcards "Happy Birthday!" and "Congratulations!", made using the scrapbooking technique, print on a printer:
Creative ideas: how to make original birthday cards with your own hands
- Using different kinds of unusual stems. For example - watercolor paper for the background. Or drawing a drawing by stamping on tracing paper, and use bright decorative paper as a substrate under it.
- A correctly selected color scheme will make the simplest composition original. It is enough to use three colors - two contrasting and one neutral.
- Using various options for folding postcards that break symmetry.
- For inscriptions and signatures of cards, use calligraphic outlines of letters and apply them with paint with silver or gilding.
- In the technique of scrapbooking. The base of the postcard is made of colored cardboard. Decorative elements and backgrounds are selected for them, combined in texture and color. Layer-by-layer glued (using helium-based glue) each background with decorative elements.
- In the quilling technique. These are three-dimensional drawings made of folded strips of double-sided colored paper. Figures are made (spirals, leaves, flower petals are folded) and glued to the base.
- In decoupage technique. Choose a napkin with an appropriate pattern, remove the top layer and carefully stick it with PVA glue diluted with water on the base of the card, avoiding the appearance of wrinkled folds.
As you can see, making a simple and creative postcard quickly isn't that difficult. If you spend a little more time making, you can make more original postcards with your own hands.
DIY original birthday card from watercolor paper
It doesn't take long to make a birthday card using watercolor or ink on watercolor paper.
Materials:
- watercolor, ink, ink;
- watercolor paper;
- aquacist;
- colored cardboard for the base;
- thematic sets of stamps for drawing.
Manufacturing
- If you make a square postcard, then the length of the cardboard should be twice the width. To fold the workpiece in half, you need to align the upper left corner with the upper right. Do the same with the lower corners, then make an even break in the middle and cover with a load for a few minutes.
- Watercolor paper should be in the form of a square, the side of which is commensurate with the width of the cardboard base.
- A drawing is applied to the paper using stamps with the image of flowers. Stamping is done in a circle, with a change in angle. The image is obtained in the form of a wreath of flowers, leaves, directed both inside the circle and outward. Then the drawing is painted with watercolors, or ink using an aquacist. On a separate sheet, it is recommended to practice choosing the color scheme for the wreath.
- When the drawing is dry, it should be trimmed (the sides of the square of the watercolor sheet should be slightly smaller than the sides of the base). The glue should be applied in dots in several places, or use double-sided tape. The picture is placed in the center. If you wish, you can make the inscription "Happy Birthday!" In ink.
More difficult to make, but very beautiful - the next craft.
Volumetric birthday card
An original option can be a voluminous postcard made with your own hands on the principle of children's books. When the card is opened, three-dimensional compositions with elements on different planes are formed.
You will need:
- thick decorative paper;
- white cardboard;
- curly and ordinary scissors;
- PVA glue or pencil;
- colored paper;
- colored pens.
Manufacturing
- You need to take decorative rectangular paper, roll it in half. This will be a cover for a future postcard.
- You can make an applique on it from colored paper or leave it white, and use gel pens to highlight the details of the image.
- The silhouette is neatly cut out in the central part of the base of the postcard. At the edges of the cardboard, the drawing remains uncut. The flower should bend forward, creating volume in the composition. To understand the manufacturing principle volume postcard, take a close look at this master class:
- On a flower, you can make an applique of bright colored paper or leave it white, and raise the details of the image with a colored pen.
- Curly scissors cut the cardboard along the edge.
- A cardboard with a flower should be glued to the cover and placed under the load.
- Write your congratulations and wishes near the flower.
- On the outside of the postcard, you can stick pallets, a ribbon, make the inscription "Happy Birthday!"
A beautiful handmade greeting card will delight loved ones for a long time.
Be able to do DIY happy birthday cards- this is extremely useful, because with the help of such a greeting card you can show the birthday boy how much you love and appreciate him. We are sure that such a hand-made postcard will never get lost, but will bring positive emotions to its owner after many years.
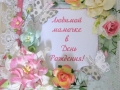
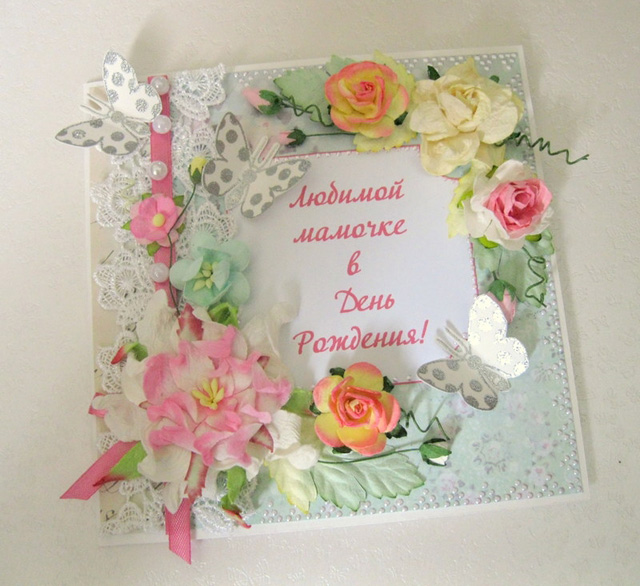
DIY birthday cards for mom
And in grief and joy, it is mommy who is always with her children, which is why on mom's holiday you should certainly please her not only with an excellent gift, but also with a beautiful homemade postcard.
3D applique
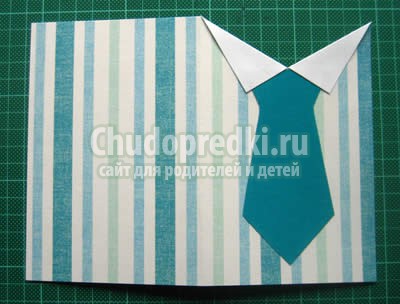
Postcard-shirt
On thick paper, using a ruler (in this case, the lines will turn out to be even) draw the outlines of the tie, cut out the template, and then use it to cut out the colored "tie".
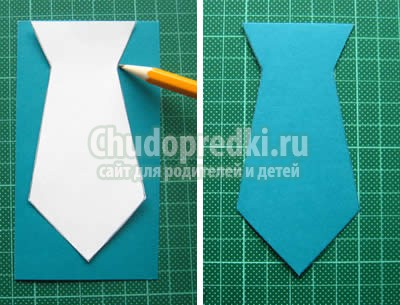
Fold a 15 x 20 cm cardboard sheet in half, find and mark the middle on the left side. Make a perpendicular from this point 3 cm long, this will be the line along which you want to cut.
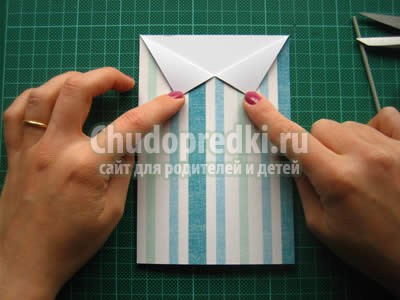
Bend the corners of the "shirt", place the "tie" under the corners, and then glue these elements to the card so that they fix the "tie".
So you have your original shirt-postcard ready, all that remains is to write warm wishes for daddy inside.
Do-it-yourself birthday card for grandfather
Every grandfather will love a homemade postcard made by his grandchildren. The base will be a sheet of blue cardboard folded in half.
Cut out and details shown in the photo:
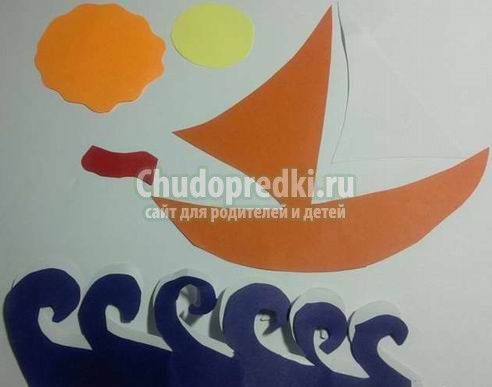
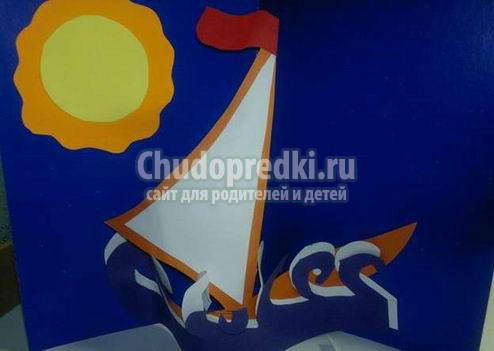
Cut out the silhouettes of the waves of white and of blue color, glue these silhouettes along the base so that you get white foam "lambs". Cut the boat out entirely, glue the base to the waves on the reverse side, separately glue the white sail and the red flag on top. To assemble the sun, you will need two parts - a circle and a circle with wavy edges.
Collect all of the craft items together. In order for the "needlework" to acquire volume, it is necessary to grease the waves with glue only at the base and along the edges. It's so easy and simple to make a great craft
As you can see DIY happy birthday cards not at all as difficult as it might seem to a beginner. You don't even need expensive materials to make a great greeting card with your own hands.
If you liked our site, please express your "thank you"
by clicking on the buttons below.
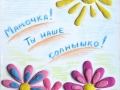
Mom is a person who will always be by your side both in sorrow and in joy. And when such an important event as her birthday is approaching, children should definitely pay maximum attention to her.
You can thank her for her attention and care with a warm, pleasant gift made with your own hands. It is not always possible to purchase a bouquet of flowers or an expensive perfume, but a handmade card for mom's birthday will definitely show her your gratitude and love.
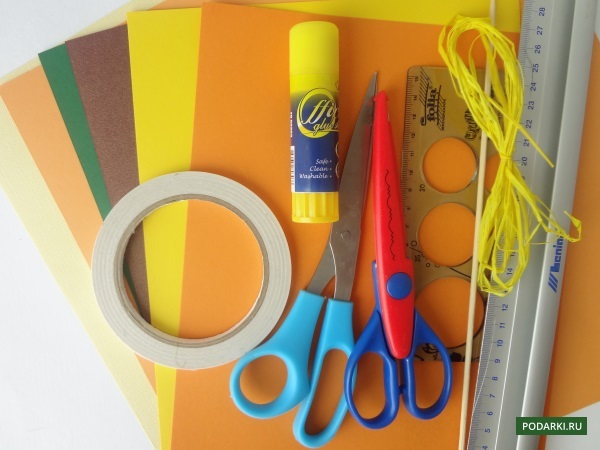
Materials (edit)
Traditional ones can be made using the applique technique or with the help of artistic paints, but in order to truly surprise a loved one, use an original and creative decor.
To showcase your creative talents, experiment with materials. You can make a voluminous and custom postcard using a small piece of fabric. By rolling a small bow out of silk and securing it with a couple of stitches or glue, you will get a beautiful butterfly that will realistically flutter in the wind.
Amazing dandelions and asters are easy to make with ordinary pencil shavings. Sharpen the pencils lying around at home and use such an unusual material as petals. And the colored line left over from the lead will add color and festivity to them.
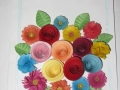
Fluffy applique
This volumetric 3D postcard will be a wonderful birthday present. Beautiful roses and asters are made from small lumps of paper, and such a product is made in just twenty minutes.
Necessary materials:
- colored paper;
- cardboard for the base;
- scissors;
- glue.
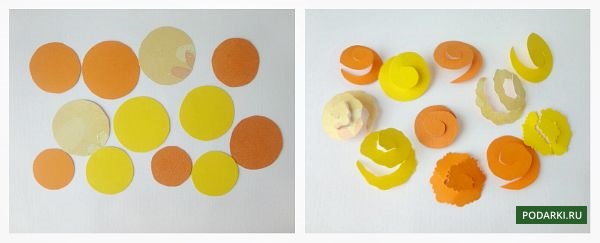
Use a pencil to outline a bouquet and a vase of flowers. For roses, you need large balls, and for asters or peonies, smaller ones. Colored paper must be cut into small squares, and then rolled into balls.
It is necessary to completely fill the contours of the drawing with such lumps. The flowers are fluffy and lively. A vase can also be made using this technique, but if you want to make it more realistic - use textured paper.
A similar applique is also suitable for the image of animals, for example, a small fluffy rabbit with a large pink bow will look cute on a greeting card.
![]()
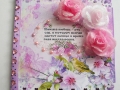
Delicate lace
An openwork and airy birthday card for mom from her daughter, created with her own hands, will perfectly decorate her mother's dressing table or dressing table. Cute hearts and lace will look especially good in pastel colors.
You will need:
- red, pink and white cardboard;
- lace napkin;
- glue;
- scissors.
To make the base, bend a sheet of pink cardboard in half. A round or oval openwork napkin must be glued to the center of the cover. You can replace it with a piece of lace, in which case it must be glued horizontally.
Several hearts of the same size must be cut out of red, white and pink cardboard. Bend each of the hearts vertically and connect them together with glue. Carefully glue all the folds so that the voluminous heart does not fall apart.
Gently glue the resulting shape, decorating it with a congratulatory lettering. On the inner pages, you can place pleasant poems or good wishes.
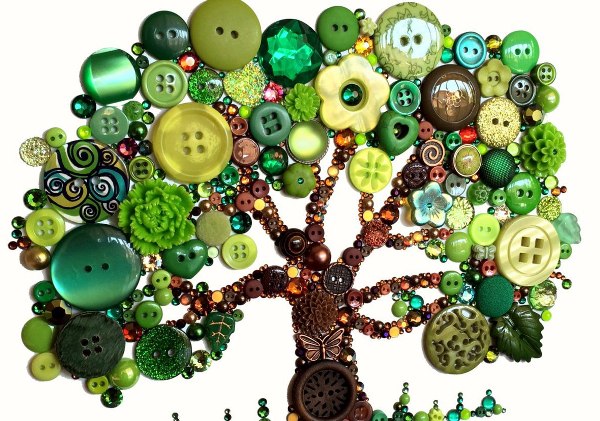
Button tree
Remember how as a child, my mother constantly sewed buttons to her clothes that were torn off during active games and pranks? This is especially true for boys, so a do-it-yourself card made from buttons to mom for her son's birthday will become a very symbolic and sentimental gift.
In addition to a dozen bright buttons, you will need:
- colored cardboard;
- scissors;
- bow;
- gouache set;
- stationery glue.
Choose the colors of the buttons according to the time of year when your mom's birthday. For autumn, yellow, red and brown are suitable, in a warm natural range, and for spring - green and juicy. The basis of the postcard will be thick light cardboard, bend the A4 sheet in half and you can start the creative part. The tree will look much contrasting on a light background like beige or pink.
The future tree should be outlined on thick green cardboard. It can be painted with gouache or cut out of brown cardboard and then glued to the base. As a replacement for glue, use double-sided tape, with its help you can do everything as neatly and quickly as possible.
Decorate the tree branches with buttons of different sizes, the more buttons you can find, the more luxuriant your tree will be. A small bow should be glued to the lower right corner of the postcard.
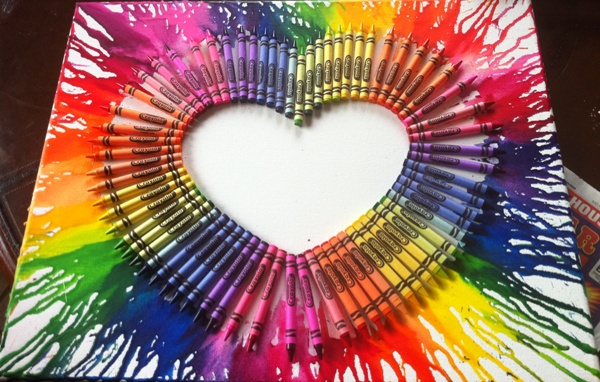
Bright heart
If you are wondering how to make your mom's birthday card creative and unusual, use wax crayons and an ordinary hair dryer.
To embody such a creative idea, you will need:
- glue;
- a couple of sets of wax crayons;
- thick cardboard A3;
If you are going to use colored cardboard for the base, choose light shades, on them bright wax streaks will look better. A large heart of wax crayons should be laid out on cardboard, and if desired, they can be sorted according to the colors of the rainbow. Fix the crayons with glue and prepare a powerful hair dryer. All unnecessary attachments can be removed from it, they will not be useful when working with crayons.
To make beautiful colored spots, it is necessary to warm up the crayons with a hairdryer so that the air flow is directed in the direction in which streaks should form. Do not point the hair dryer directly at the tip, otherwise the molten wax will scatter in all directions with a powerful stream of hot air. It is better to melt the crayons by heating the middle, in this case the stains will come out even and neat. At the same time, the sheet of cardboard must be held so that the wax flows in the right direction.
When you finish melting the crayons, wait until it dries completely, and then write warm, sincere words for your beloved mother in the center of the picture. This large bright postcard can be hung on the wall like a painting, because it is a real work of art!
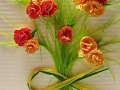
Quilling
A postcard for mom using the quilling technique is simple to execute, so even small children can make it. Amazing patterns from paper strips add up to real paintings, you just have to turn on your imagination.
For the quilling technique you will need:
- colored paper;
- cardboard or thick paper for the base;
- toothpick;
- scissors or clerical knife;
- gouache;
- half beads;
- decorative bow;
- glue.
Fold cardboard or heavy paper in half, and cut colored paper into small strips. These blanks need to be wound on a toothpick one by one. On the basis, outline the contours of the future drawing. The future bouquet should consist of several large flowers and small leaves. The stems must be drawn with gouache or green marker.
Shape the petals by matching the dimensions with the outlines on the base. Glue should be applied to one of the sides of the petal, and then using it to fix the part in the figure. When finished with the petals, do the same with the leaves, using green paper.
This bright bouquet should be decorated with a small decorative bow, and a small half-bead should be glued on top. Your mother will definitely like this touching postcard, and if imagination allows, you can even make a portrait of her using the quilling technique.
Congratulations from the bottom of my heart
Giving a gift is an important part of congratulations, so be sure to mention everything that you love your mom so much for. greeting card will cause her a real delight, because she, like no one else, knows how to appreciate what you do for her.
Such a unique do-it-yourself card for mom for an anniversary or birthday will surely give her a lot of pleasant emotions. Your gift will show off in the most conspicuous place in the house, and every time you look at it, your mother will remember what a wonderful holiday you have organized for her.
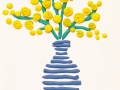
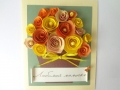
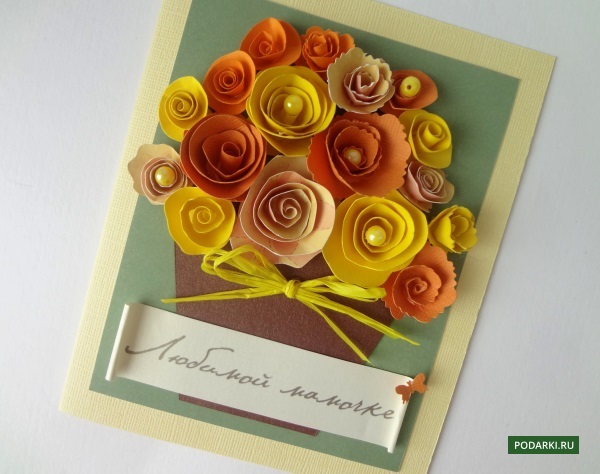
Happy Birthday
We will make flowers using the quilling technique - they turn out to be very effective and stylish. Depending on the number of flowers and the size of the postcard, creating a postcard will take from half an hour to an hour, be patient.
To make a postcard, we need:
- Thin cardboard or paper of different colors
- Scissors
- Curly scissors (optional)
- Double sided tape
- Glue stick or PVA glue
- Ribbon
- Wooden skewer or quilling tool
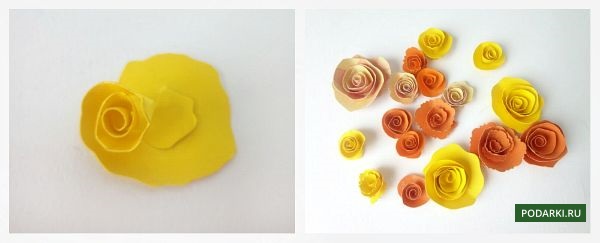
1) Cut out circles of different sizes from paper. Then we cut each circle in a spiral from the edge to the center. You can cut it evenly, or you can cut it with waves or curly scissors - so the flowers will become more carved.
2) We form the flowers by twisting them in a spiral from edge to center using a wooden skewer or a quilling tool. Twisting the flowers, glue them to the center of the spiral.
3) We fold the cardboard in half, it will be the basis of the postcard. We try on the flowers on the cardboard and check if there are enough of them.
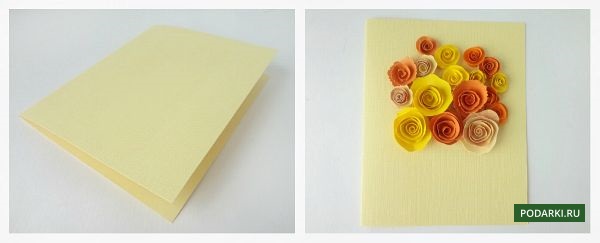
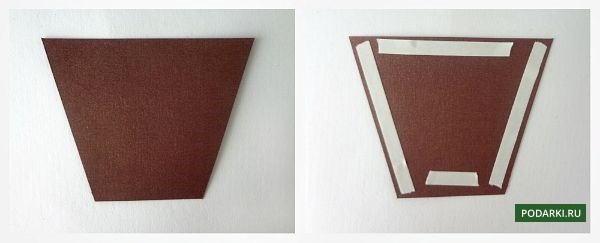
4) Cut out a container for flowers from dark cardboard and glue double-sided tape to the back side.
5) Cut out the background slightly smaller than the base of the postcard and glue it on double-sided tape in the center.
We glue the flowers to the background, creating a bouquet. You can glue them a little on top of each other - it will be more magnificent.
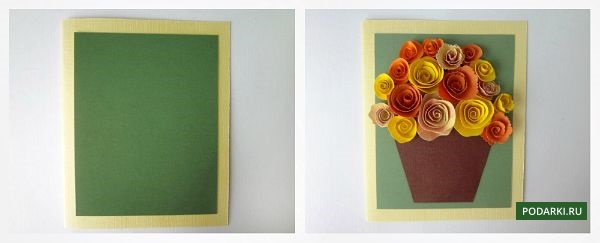
6) Glue a ribbon and a piece of paper with an inscription to the vessel. Beads can be glued in the center of the flowers. Ready!
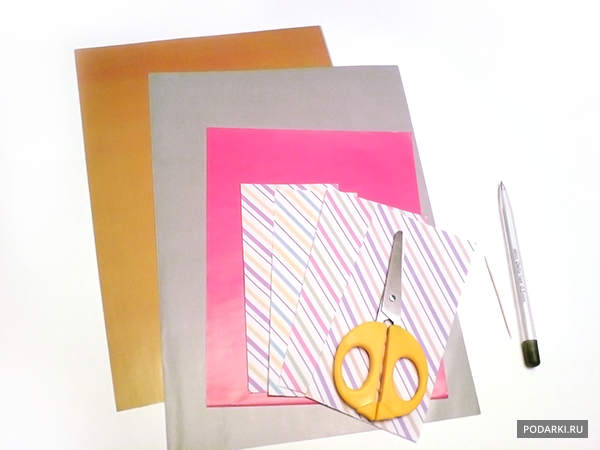
1. Postcard "Candles".
Volumetric paper candles bring originality to this simple birthday card.
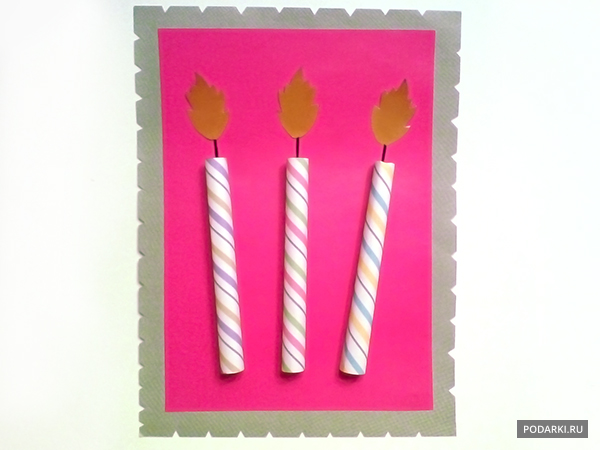
To create a postcard you will need:
- colored paper
- scissors
- pen
- glue
- 10-15 minutes
STEP 1
First, we will roll the candles out of paper. Roll the strips of paper onto the handle and secure the edges with glue.
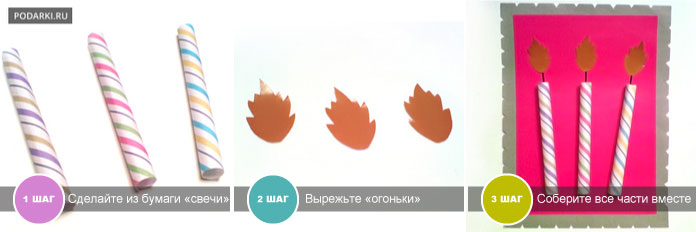
STEP 2 Now cut the lights out of the paper.
STEP 3 Now put all the elements of the card together.
2. Postcard with the age of the birthday boy.
We will learn how to make a handmade birthday card indicating the age of the birthday person.
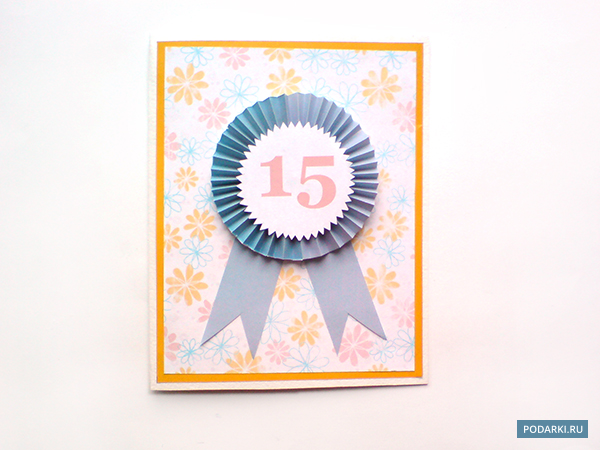
For such a postcard, you will need:
- base paper
- colored paper
- threads
- scissors
- glue
- 20 minutes of free time
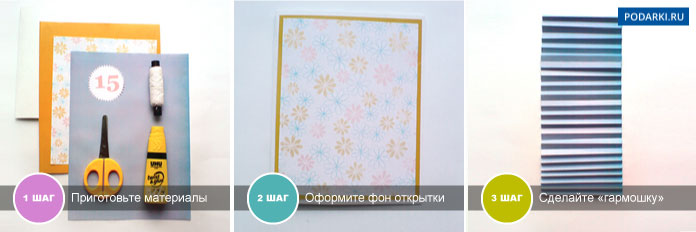
STEP 1 Prepare the required materials.
STEP 2 Decorate the background of the card the way you like.
STEP 3 Now let's make a volumetric medal element. To do this, fold a strip of paper with an accordion.
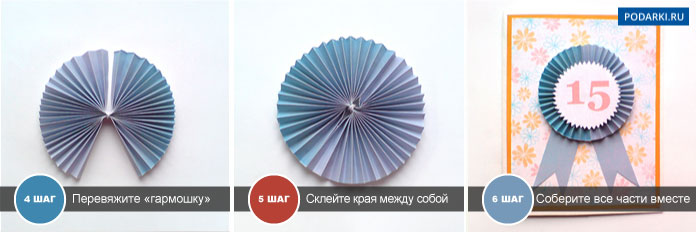
STEP 4
We bandage it in the middle and straighten it.
Ribbon or twine
We need:
- A sheet of bright cardboard
- A small piece of decorative light paper
- Ink ribbon
- Artificial flowers
- Double sided tape
- Rhinestones or beads will come in handy
1) We bend a square sheet of bright cardboard in half. Cut out a square of light paper to the width of the postcard. We glue double-sided tape on the reverse side.
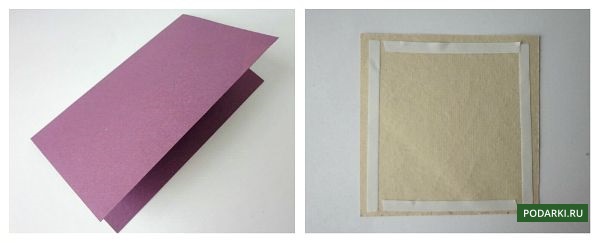
2) Glue light-colored paper to the bottom of the postcard. There will be a ribbon on the border of the postcard and paper. We make a slot for it as close as possible to the fold of the card or on it. We insert the tape into the slot.
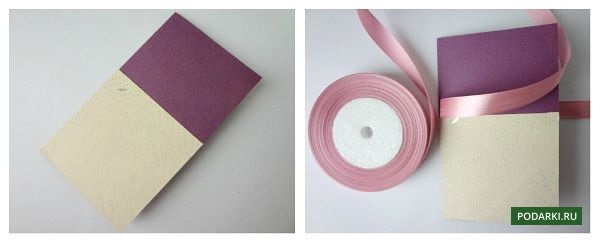
3) We glue the flowers under the tape on double-sided tape. We glue the tape and tie it to a bow. Glue a rectangle made of light paper for text inside the postcard. It remains only to decorate with rhinestones. Ready!