The introduction of new lighting technologies allows you to carry out the calculation and installation with your own hands. I will tell you how to choose the right plastic and aluminum profile for LED strip. Many simply do not know that cooling is required.
The LED profile is quite expensive due to the cost of the aluminum material and the complexity of its processing. If you want to save 5-10 times when buying, then you will find out what inexpensive alternative you can use from suitable materials.

- 1. Main types
- 2. 1. Corner
- 3. 2. Embedded
- 5. Correct prices
- 6. Iron do it yourself
- 7. Do-it-yourself plastic box
- 8. Video
- 9. Correct installation
Main types
The main characteristic is its ability to dissipate heat, and is expressed in watts per meter. The characteristic depends on the size and area of its surface, usually from 10 to 150 W / m. Of course, stores rarely indicate it, but you can ask the seller. Powerful is produced on SMD 5630 and SMD 5730 LEDs, the power is from 15W to 30W. You can glue on a wide box for an LED strip in several rows, so when selecting, keep in mind that the power per meter should be higher than that of LEDs.
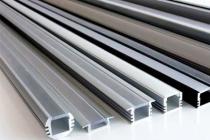
It is made from aluminum and plastic. At the place of installation, it is divided into categories:
- angular;
- built-in, mortise;
- overhead;

As a rule, an aluminum corner profile for LED strip is equipped with a removable diffuser. The brightness of the LEDs is high and therefore a diffuser is required to protect the eyes. I measured how much luminous flux is lost on it, usually 25% is lost, but I got results in 40%. These numbers are worth considering when designing lighting.

Most often, built-in is used for design solutions, it allows you to connect chipboard and drywall, and install tape at the junction. May protrude above the surface or be flush.
Mortise differs from other types by the presence of an edge that covers uneven places in the groove. Allows you to illuminate the kitchen work surface so that the LEDs do not stick out near the cupboards. A recess is cut into the chipboard in the shape of the cut-in element, which completely hides it. As a result, it turns out that the wall cabinet itself glows from below.

The overhead is mounted on any surface, can be glued or fastened with self-tapping screws. Flexible plastic has a certain amount of flexibility that allows it to be mounted on a curved surface such as an arch or circumference.
The profile for the Korean-made Leroy Merlin LED strip is in special demand in Moscow.
Correct prices
 I will give an example of correct prices for mid-summer 2015.
Many shops sell expensive with prices ranging from 300-400 rubles. for 1m. But often the store indicates the cost for 2 meters, and this is indicated in small handwriting or somewhere on the sidelines. Be careful when comparing prices across locations.
As a rule, you do not need Italian or foreign production, domestic production is sufficient. Finding a cheap one is not easy, it is rarely sold. I was asked about Leroy Merlin, I thought a glamorous profile, it turned out to be the name of the store.
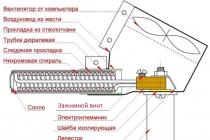
Iron do it yourself
 Construction for drywall and ceilings
Often, when you make lighting in an uninhabited room, for example, a storage room, a bathhouse, a garage, then you do not need high-quality installation. A high-quality appearance is not always required, even if it looks worse outwardly by 30%, it will come out 10 times cheaper. In this case, an affordable alternative to an aluminum profile for a led strip can be a construction one, made of iron or aluminum. Just choose smooth, non-perforated and non-grooved. Iron comes in different sizes and thicknesses of metal, moreover, it is galvanized and does not rust. At the price of an aluminum LED profile for an average power of 400 rubles. for 1 m., construction costs 15-20 rubles. It turns out to be 20 times cheaper.
The quality of the thermal conductivity of iron is certainly worse, but when installing medium-power diode tapes, it will be enough. It doesn't look like anodized aluminum, but still no one will be looking at it. And in a week you yourself will not pay attention to it.
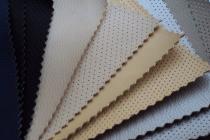
DIY plastic box
 Plain white
An alternative to a plastic profile is a plastic cable duct, which is used for laying wires. The cable channel, like a box, is tightly closed with a lid. The dimensions of the box can be from 10 to 100 mm wide, and the depth from 5 to 50 mm. A cover is also used in the case, this plastic strip is used when mounting on uneven surfaces, such as wood or brick. It is glued to a flexible strip, which is then attached in a convenient way, to liquid nails or polyurethane. It bends well, you can install it on uneven and curved surfaces. From a thick cable channel, I made full-fledged lamps for the summer kitchen and veranda.

Modern cable channels have a high-quality wood grain finish and can be of different colors. The fittings will allow you to harmoniously connect them at different angles and in different shapes. If you use it outdoors, then for the winter you can close it with a sealed lid and put plugs to protect the LEDs from ice and snow.
During operation, plastic can heat up from the LEDs and deform. The situation will be corrected by a channel made of high-quality plastic, it is a little more expensive.
Price with wood finish:
- 12 by 12 mm. on average 10 rubles / m;
- 40 by 25 mm. 30 rubles / m;
- 100 by 60 mm. RUB 100 / m2

There are other suitable materials, aluminum curtain rods, window and facade. Cornice 8 cm wide. I bought 700 rubles. for 3 meters, such an LED costs 1000 rubles. On such an impromptu box for an LED strip, you can glue it from above, you get an interesting backlighting along the top of the window. It will be especially interesting to look at the new year if there is color RGB backlighting.

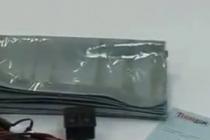
Video
A colleague demonstrates the manufacture of cheap materials from scrap materials. Used cable channel for LED strip.
Correct installation
A foreign colleague in the video will show you how to correctly in the profile, how to solder the wires and install the plugs. Everything is accessible and understandable.
Recently, LED strips have become incredibly popular. They often began to be used as a bright element and variation for or in a private house, in some commercial enterprises. Such a great interest has changed the idea of many people about how to beautifully and modernly illuminate a particular room.
Today, very often they use exactly those LED products that need to be fixed using special profiles. With their help, you can provide not only full protection, but also quickly fix this type of lighting.
Of course, many people have already heard about this type of lighting technology and there is enough information to be able to do so. If we consider a profile for an LED strip and other elements that act as a decor and help perform some important functions, then in this situation there is not much information. In this regard, making a profile with your own hands for an LED strip sometimes causes significant difficulties and problems for people.
Types and purposes of profiles by installation method
Today, experts distinguish only three types of profiles that can be used for mounting LED products. Directly by the method of installation, the contours can be divided into the following interesting types:
- corner;
- mortise or built-in;
- waybills.
As modern practice shows, corner profiles, which are made of aluminum, are sold complete with a special diffuser, which can be removed if necessary or desired. The diffuser is used to protect the eyes from too bright light emitted by LED-type products. At the time when you will draw up a project, it is very important to remember that with the help of a diffuser, you can lose up to 40% of the light, although in most cases this figure does not exceed 25%.

In turn, embedded profiles are very often used to implement some specific design solutions. With their help, you can quite simply connect parts of drywall or chipboard together. Directly in the place where the profile was installed and the LED strip itself is held. In some cases, it may protrude slightly above the profile surface, and in others (which is most common) it may be in this depression and not go beyond the surface level.
If we talk about a cut-in profile for an LED strip, then a distinctive feature of such a product is that it has an edge that may well cover all uneven places, and they are very often present at the edges of the groove. With the help of the cut-in profile, you can illuminate the room in such a way that the LEDs do not stick out from the flat surface. It is very easy to use such products. It is enough to cut a recess in the chipboard or drywall, which would have the shape of a directly cut-in element. At the same time, its depth should be such as to completely hide the LED product.
A recess is cut into the chipboard in the shape of the cut-in element, which completely hides it. As a result, it turns out that the wall cabinet itself glows from below.
DIY aluminum profile for LED strip video
The cover profile can be mounted on a wide variety of surfaces. An interesting fact is that it can be glued or attached with self-tapping screws. If the overlay profile is made of plastic, then it bends well enough. Thus, this view can be used without problems on any surface that is even slightly curved. Quite often, an overhead contour is used to mount LED products in an arch or along its circumference.
Varieties of profiles in shape
If you want to install a profile with your own hands, then you must first make a choice of the product. It is very important to take into account the shape of the profiles for LED strips, because further work will depend on this.
Particularly popular today are those contour models that have a rectangular shape. It is worth noting that this form includes a standard cut-in profile, which in some cases may additionally have a small shelf, which is designed for milling.

Round products are usually referred to as universal. They can be easily combined with a wide variety of fixtures and positions. The interesting thing is that the round profiles allow you to implement even the most complex track system. It should be noted that a modification of this type of system is a panel that has slightly rounded edges. An important point is that they are mounted using a special overhead technique.
Profiles that have a rather complex shape are not very popular. They can even be triangular, but incredibly strong. They are mainly designed for installation in floor coverings where a sufficiently large weight must be supported. It is necessary to use contours of a complex shape where a regular profile for an LED strip does not fit. Some profile options allow you to place lighting even at a different degree of inclination in relation to the surface.
Hanging models are becoming more and more popular every day. They do not need to be arranged anywhere or even mechanically fixed. With the help of special, very strong ropes, panels of this type can be suspended. With the help of a suspended structure in any room, you can provide not only the brightest lighting, but also an incredibly original, beautiful design move.
DIY aluminum profile
The contour, which are made of aluminum, are very popular, because they managed to combine the last two modern technologies. Experts managed to place in one product not only a strong and high-quality anodized alloy, but also LED technology, which is gaining popularity every day.
Thanks to this, as a result, it turned out to increase the functionality of the backlight several times and make the device for mounting LEDs much more reliable and durable. The contour, which is usually made of excellent quality aluminum, can be used to directly mount the LED strip into the wall. In addition, the aluminum profile for such products can be safely used for mounting the backlight in the floor covering, and so on.
Preparing an aluminum profile for an LED strip with your own hands video
Such profiles look great even in a wide variety of designs, and at the same time do not harm other material or its integrity. At the same time, aluminum alloy contours can be non-standard. This means that many modern models were decorated with accessories of different types. For example, you can often find the presence of plugs or various clamps, even holders that look very nice, modern, original and at the same time, restrained. The aluminum profile is a great option if you plan to make a classic interior in the room.
Making a box from plastic
Plastic boxes, which are used to install LED backlighting, are used very often today. Such products are considered to be inexpensive and easy enough to work with. The plastic box can be made of polycarbonate, which is very flexible and can be either colored or transparent or, for example, matte.
Production of a profile for a LED strip from 12mm cable. video
A plastic box is a sealed product that is not affected by any mechanical influences or temperature drops. An interesting fact is that such products can be used in a wide variety of conditions and in order to bring to life the most daring design decisions.
In order for the installation of the LED strip with your own hands to be carried out as correctly and accurately as possible, it is worth considering some recommendations while working with such products. Experts recommend the following:
- Carefully inspect all elements of the products with which you work. If you find damaged or oxidized parts, then they need to be replaced immediately, because this will very soon be displayed on the operation of LED lighting in the room.
- During the installation of LED strips, it is imperative to pay attention to the polarity and strictly observe this rule - then the products will work normally and no damage will occur.
- It is best to connect tapes in parallel to avoid overloading the voltage during operation.
Profiles for LED strips can be installed without the help of specialists, namely with your own hands. If you are not confident in your abilities, then watch the video on our website, which will help you not only make the right choice of the product, but will also tell you all the nuances of installation.
LED profile (corner, surface-mounted or cut-in) can be used when organizing backlighting using a tape based on diodes. This solution provides an effective alternative to installing lighting fixtures directly on a wall / ceiling or other surface.
The main reason why an LED profile should be used is the increased strength of the fixing of such a structure. And in addition to that, it is quite easy to install it yourself.
Application area
The main purpose of these elements is to install a tape based on diodes. It can be of different types (plastic, aluminum) used when organizing backlighting in different areas. This can be the ceiling, walls, corners of the room. In addition, by choosing one of the execution options, it is possible to use it as a surface-mounted luminaire.
The design of some models (cut-in version) allows you to embed profiles in different surfaces, including when organizing stair lighting, and also to be installed outdoors (as a backlight in landscape design). This is facilitated by the type of material - anodized aluminum, which does not corrode. In short, they can be used as decorative elements, as well as perform protective functions when installing tape-type luminaires.
Species overview
Fasteners for LED strips are divided into groups depending on the type of material:
- the aluminum version is more resistant to external factors, is durable and is used more often;
- plastic version - made of polycarbonate.
According to the method of fastening, these elements are divided into the following types:
- angular - from the name it is clear that this option was created for installation in the corner of a room, and usually there are models with a diffuser, such an element can significantly reduce the intensity of the tape glow (within 25-40%, depending on the version);
- mortise - built into any surface (floor, walls) made of plasterboard or chipboard, this option can be installed flush or protrude, in addition, the mortise profile is almost always mounted with a diffuser and is characterized by protruding edges, the function of which is to smooth out irregularities in the edge of the material;
- invoice - easily installed on any surface, this option for LED strips can be glued or fastened with self-tapping screws.
A distinctive feature that characterizes the polycarbonate version is its ability to take the shape of a slightly curved surface, since this profile is quite flexible. But you should not install it on surfaces that are too rounded, because the polycarbonate element, although flexible, may not withstand the increased stress on fracture.
Various kinds of aluminum models
They are also classified by design features and shape:
- round;
- square;
- taper;
- trapezoidal.
Versions with a diffuser differ in the type of material of this element: transparent, matt. Depending on the option chosen, you can provide a more or less noticeable decrease in the intensity of the glow of the tape. In addition, an aluminum or polycarbonate profile with a diffuser is presented in different versions, which also differ in the shape of this element: flat, round, triangular, rectangular.

Polycarbonate look
The plastic fastener for the LED strip is available in different versions: matt and white. And in addition to that, there is an opportunity to choose an option by color. This is the main advantage of such profiles in comparison with the aluminum analogue.
In addition to buying different types of designs (round, square, made of metal or polycarbonate), there is also the opportunity to make fasteners for LED strips with your own hands. Similar designs can be made of plastic, iron. The process itself is quite laborious, but the cost of the product will be lower.
Installation sequence
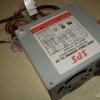
To install the tape with your own hands, you need to choose a power supply according to the load level. This must be done, guided by the total length of the product and the capacity of 1 m of the strip. The resulting value is added 25% as a margin. The length of the tape and the profile with the diffuser is determined by measuring the area of the surface where the illumination is organized.
Regardless of what type of fastener is used (aluminum, plastic, corner, invoice, round), a small cut is made on one side of the edge with your own hands to output the supply wire of the tape.
The installation of the profile is carried out using screws with a countersunk head, so that the fasteners do not interfere with the laying of the tapes. The size of the screws is determined by the thickness of the material on which the aluminum profile is installed.

Ribbon connection diagram
Further, the surface of this element is cleaned and degreased, which will ensure a better installation of the belts. These steps are repeated in the same sequence if a corner or overhead profile is mounted. The flush design option can be installed without fasteners, but this is determined by the surface configuration, as well as the type of material.
Nuances of work
Do-it-yourself aluminum profile is always mounted as carefully as possible, even when organizing the illumination of the steps, so that the appearance of such lamps does not cause discomfort due to careless design. When the aluminum profile (regardless of whether the cut-in or overhead version is selected) is prepared for installation, its edges must be deburred. In addition, these areas are closed with plugs, which will provide additional protection for the tapes.

Profile assembly stages
It is advisable to arrange the entire structure (cut-in, overhead profile) so that in the future it is easy to get to the built-in tapes. Otherwise, there will be significant difficulties when trying to replace lighting devices of this type with your own hands.
Installation of the mortise structure into the floor should be carried out in areas not subject to increased loads.
Thus, it is a preferable option in comparison with different types of lamp fixtures. It is quite easy to fix a patch or corner profile for fixing tape lighting fixtures with your own hands.
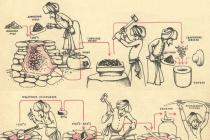
Lighting in the kitchen is a very important component of a comfortable stay and eating there. Also, the right lighting contributes to comfortable work. Competently supplied led lamps will help you to cook better and tastier food. Lighting near the sink will help wash the dishes and leave no specks.
There are a lot of varieties, it all depends on the materials, the method of attachment and much more. In this article we will tell you what types of lighting boxes are there, how to install it yourself. Let's explain which box is better for drywall, and which one is better to use outdoors. Let's talk about skirting boards for LEDs and touch on the topic of lighting arrangement.
What boxes are there, their features
The boxes are divided into several groups, we will consider each of them. Having decided on the box you need, you will be able to harmoniously and beautifully install the backlight in your kitchen.
The material from which the device is made:
- Plastic
- Aluminum
If you need a more economical solution or light materials are more suitable for your interior, then a plastic box will help you. Usually polycarbonate is used for manufacturing, it has good characteristics suitable for led strips. Such cases can be both transparent and matte, using plastic, it is possible to make absolute waterproofness.
Aluminum profile
In addition, such a cover serves as additional protection against mechanical damage. They are well suited for flush mounting in plasterboard walls. The plastic is easy to adhere to the drywall and will not carry a heavy load on the false ceiling frame.

Various types and shapes
Aluminum are more popular, their field of application is also very wide. Such profiles are used in places with high humidity, they have good resistance to mechanical damage. Additionally, they protect LEDs from overheating with high thermal conductivity. Since they are aluminum, they do not corrode and practically do not lose their appearance over time with proper care.
You can also split it according to the installation method:
- Corner - installation in corners, in cabinets, niches, arches is possible, due to the fact that one of the sides is made by an angle. There are also special corner boxes for installation as a skirting board.
- Overhead - they are mounted on any surface, they can have different functions such as diffusion, direction of light, a matte coating will create soft lighting, and a transparent one, on the contrary, a more aggressive luminous flux.
- Mortise - they can be hidden in the wall, ceiling or floor, so that they will be invisible. They have high strength and tightness, which makes them suitable for outdoor use.
Installed in walls and plasterboard floors
For lighting the contours of the ceiling, a cornice for an LED strip is perfect. The installation technology and the shape of such a cornice contribute to the creation of an unforgettable image of the room. But don't confuse it with a regular skirting board. In a specialized one, a gutter is made, into which the entire diode circuit is embedded and fixed there.
 Remember that the plinth fits harmoniously into the room, it is worth considering its size. The wider and higher the room, the larger the decoration itself should be.
How to make installation correctly
Making repairs in your house or building a new house, the question of lighting arises, or rather, how to do it better, while minimizing its visibility. Multi-tiered gypsum plasterboard ceilings, niches, arches, all this has become an incredibly popular solution for creating an unforgettable design.
Technology has reached the level that any backlight can be hidden in walls, ceiling or floor. In order to hide the led strip, you can use, for example, an aluminum box, it can be installed both inside the wall and superimposed on top. There are special corners, the use of which is also very diverse.
Do-it-yourself installation of a led strip in a profile is very simple, special grooves or fasteners are made there, inserting the tape into which, it is instantly fixed. There are also those where LEDs are attached to glue or adhesive tape. The tape can already go immediately glued, it will be enough just to remove the protective film, and perhaps you will need to glue it yourself.
When installing in a drywall structure, you should adhere to some rules. For example, the installation depth should be about 2-3 cm, so the light will be more intense. If installed closer to the edge of the drywall, then the light will be scattered.
The LEDs are installed in the box in the following sequence:
- Mounting the base of the box.
- Installing a tape with LEDs in it.
- Closing the box with a lid or glass (depending on the model you purchased).
The box is mounted on glue or on self-tapping screws, depending on the material from which it is made, the place of installation and its variety. Surface-mounted aluminum, it is better to install on self-tapping screws, since with a long length it will be quite weighty. If the aluminum profile is installed inside the furniture, then it is better to use glue or double-sided adhesive tape, as self-tapping screws will spoil the walls to which it will be attached.
Making a glowing cornice with your own hands is also quite simple. The essence is all the same, the entire led strip scheme is attached to the cornice, and the cornice is glued to the wall. In this case, do not forget to leave about 7-10 cm gap between the ceiling and the edge of the cornice.
If the gutter in the cornice is quite large, to simplify the installation with your own hands, you can fix the tape directly on the wall, and then fix the cornice itself.
How best to arrange led backlight
When setting up lighting in your kitchen, use boxes with a matte finish to soften the lighting and promote relaxation. After all, the kitchen is a place where you want to relax after a hard day's work and enjoy your meal. In turn, softer lighting will contribute to a calm awakening in the morning, and will not strain eyes that are not yet attuned to the light.
Illumination of the working area is best done in light colors, best of all with white light. It is most suitable for the job. If there are plasterboard products, then flush lighting methods should be used, they will look very impressive and add mystery to your interior.
Summarize
To create a special lighting effect or to direct the light from the led strip, you must use special boxes, plastic or aluminum. They will not only give the luminous flux a special effect, but will also help protect the diodes from damage or moisture ingress, and this is enough in the kitchen. To illuminate street paths, you can use an aluminum profile, it will perfectly protect the LED strip from damage and moisture.
The LED profile in the backlight has two main functions:
- heat removal from the LED strip, the diode temperature in which should not exceed 60 degrees
- decorative function - as an element of decoration
The LED strip heats up in the course of its work and the more it heats up, the faster the crystals in the LEDs degrade. That is, the tape will lose brightness much earlier than its warranty period. 
Therefore, it needs to maintain a certain temperature regime of operation. This is achieved by means of heat removal from the surface of the aluminum profiles.
 Profiles are divided into 3 types:


The groove is specially created on the surface, and the profile after immersion in it is obtained on the same level with this very surface. 
Since the main function of an LED profile is heat dissipation, a very important parameter that you should pay attention to is its surface area.
Keep in mind that heat is removed not only from the bottom pad, but also from the side edges.
 The higher they are, the better. Therefore, during installation, be sure to maintain free access for air to each side.
For example, when installing a cover profile, at least one surface (bottom) is already isolated. Therefore, it is necessary to make special spacers on it.
These can be plastic or metal elements. It is best to use factory mounting clips for this. 
The main thing is to ensure the passage of air under the substrate.
It is advisable to maintain the distance from the wall to the bottom surface at least 3mm.
If you can't do this, buy products with high sides - 15-20mm. Then it will be possible to fasten closely.
There are also profiles that come with a removable base. In them, the base is first attached to the surface, and the profile itself is inserted into it. The necessary gap is provided between them. 
The rules for creating gaps also apply to the sides. You cannot mount them, which is called end-to-end with another surface.
In addition to better cooling, high sides have another advantage. Thanks to them, inside you can easily place special connectors for connecting pieces of tape. 
If the sides are low, you will have to remove the top cover from the connector. And insert the connector from the side, after grinding it off a little with a file. 
Based on the above, it is best to use overhead profiles. Other species will in any case be closed from the air on either side.
As soon as the cut-in profile is inserted into the groove, three sides of it are immediately insulated. Only the area of the upper protruding side remains, and this will clearly not be enough. 
It is recommended to choose models in which this platform will be as wide as possible. Firstly, better cooling, and secondly, you do not need to cut a groove in furniture with millimeter accuracy. Make a mistake and the profile will simply fail there. 
In fact, cut-in views perform only one function - decorative. For powerful LED strips in the absence of voids and gaps, it is better not to use them, for a maximum of 9.6 W / meter for strips.
The same is true for the corner models. When you put them in a corner, you immediately insulate it on both sides. 
Therefore, it is not advisable to use such profiles precisely as a heat sink when working with bright and powerful LED strips SMD 5050, 5630, 5730.
Several types of aluminum profiles from Klus, accessories and sizes:
PDS Alu-Power Alu-Wide EX HR PLS-Lock PLS-Gip PHS Mic


Diffuser
All profiles can be matched with special polycarbonate diffusers. Polycarbonate has high mechanical strength and is not subject to damage from ultraviolet radiation. 
The glow angle of the LED strip is 120 degrees and it simply illuminates the space in front of it without any screens. At the same time, with low-power diodes, you can visually observe pronounced glow points, and sometimes dark gaps between them.
Here is a clear difference in luminous flux with and without a diffuser: 
To increase the area of the illuminated space and smooth out dark stripes, a diffuser is used. In addition, it also performs a protective function against accidental damage by foreign objects and splashes.
Diffusers are:
- transparent

- semi-matt - throughput 70-75%
- internal - inserted into the inside of the groove
- external - put on over the sides
Plugs
 End caps can be installed on either side of the profile. They also act as a decorative element so that the backlight has a finished look.
In the plugs there are holes for the output of the wires. If you want no wires to be seen on the mounted backlight, you can file the profile from the end with a file, and secretly remove the power from the back side. 
It turns out that using 4 components - tape, profile, diffuser and plugs, you can independently assemble your own lamp of any size. It can be used on the ceiling, suspended in the middle of the room on special hangers like factory models. 
In free sale, only direct profiles are distributed. If you need to make the illumination in a semicircle on any arch or circular ceiling, then there are two options:
- bend yourself to the desired radius
- use low-power LED strip P = 9.6 W / m max without profile

Installation of a cover profile
Fastening is carried out in three ways:
- on double-sided tape
- for screws or dowels
- on glue
For installation with self-tapping screws, you need the following tools: 
Measure with a tape measure the distance at the place of the fastener. 
Then with a hacksaw for metal, cut off the required length of the profile. 
At the base, drill several holes with a diameter of 3mm for 3.5mm self-tapping screws. 
In some types of plugs, there are already holes for fasteners. Therefore, before you drill the edges, check what plugs you have. 
Hole pitch 100-200mm... Do not forget to cross each hole under the screw head, otherwise the tape will come off in these places. 
Using screws, mount the base-base on the spot of the illumination. 
Measure the required length of the LED strip according to the length of the substrate and cut along the cut marks. 
Peel off the protective layer of double-sided tape and stick the tape. Install the diffuser and plug. 
After that, it remains to insert the profile into the base already fixed on the surface and connect the power wires to the unit. 
Installation of a cut-in profile
First, form a groove in furniture or other material, according to the dimensions of the profile. 
Drill a notch hole for the power wires from the very edge. 
Then glue the tape and insert the diffusion lens. 
It remains to install the plug and drive the whole thing into the groove. If the groove is “back to back”, a rubber mallet can be used. 
Corner profile installation
It is not so easy to mount such an element on self-tapping screws, so it is much easier to use double-sided tape here.
First degrease the substrate with solvent or alcohol. 
Then apply tape on both sides and cut off the excess. 
Now degrease the surface itself. To do this, lightly sprinkle it with water or "Mister Muscle".
Why is this done? The corner profile in most cases is mounted unevenly to two planes. And initially, putting it straight is very problematic. 
And if the surface is lightly sprinkled with water, the tape will not immediately stick and will give time to adjust everything as needed.
For more reliable fastening, it is recommended to use polyurethane glue together with tape. It remains to stick the tape inside, insert the lens and close everything with plugs.