Origami is a very popular art among both children and adults. The literal translation of this word is “fold paper”. It's simple. But when you immerse yourself in this kind of creativity, you open before you an endless world of fantasy.
Varieties of origami
There are several types of origami: simple and modular.
Simple origami is the most primitive kind of origami aimed at children and beginners. It was invented by the origamist John Smith. The style is limited only to the use of folds by the mountain and the valley and the most primitive figurines (dogs, birds, flowers, etc.) are made using this type.
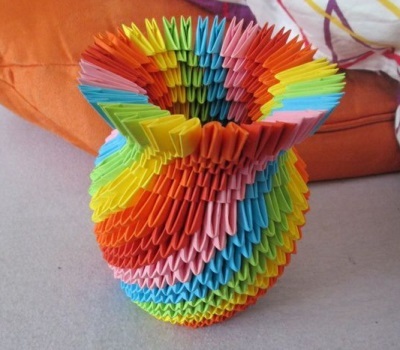
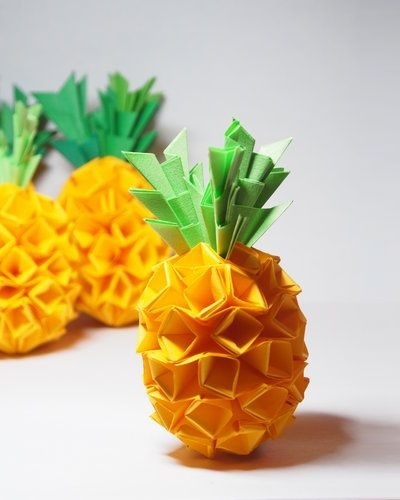
Modular origami is the most complex and is aimed at experienced origami specialists. With this technique, volumetric crafts are made by folding a large number of identical modules. It requires more patience and perseverance, as the work is very painstaking, but interesting. The main difference is that not one sheet of paper is used here, but many and they are connected by nesting into each other, they are held due to the friction force.
The most common object modular origami is kirigami and kusudama.
Kirigami is a technique that requires only scissors and paper, and during which it is possible to cut blanks. Perhaps this is the main difference. Cutting kirigami is used to create postcards and colorful 3D designs.
Kusudama - creating paper models by stitching several elements into one spherical body.
As you can see, absolutely anyone can do origami. It will be interesting to understand for both a beginner and an advanced origamist.
For children, this art form is especially useful not only because it develops fine motor skills and coordination of hand movement, but also contributes to the disclosure of his spatial imagination, which will ultimately allow his creativity to flourish and instill interest in him. There are so many amazing and interesting things hidden in origami!
But it must be borne in mind that at first it may be difficult for a child to figure out the features of origami alone, so it is advisable to do them together.
You can develop the creativity and imagination of a child from an early age, and start with the simplest thing - folding the simplest figures made of paper (boats, airplanes, frogs, etc.), after a while, add another figure with him, and then the third and fourth. And when he learns to add them himself, offer to diversify his figures - with color, other details, shapes. You will see how your child, carried away by this process, over time begins to create something new, because everyone wants to bring something of their own into this world, to do something that he has not yet been able to do.
Take the first step with it and you will see what happens!
Download simple origami paper for beginners - schemes:
| The Eiffel Tower | |
| (Downloads: 20) | |
| Grasshopper | |
 |
(Downloads: 26) |
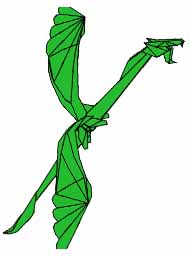
| The Dragon | |
 |
(Downloads: 32) |
| Dinosaur | |
 |
(Downloads: 23) |
| Kitty | |
 |
(Downloads: 32) |
| Mammoth | |
 |
(Downloads: 22) |
| Airplane | |
 |
(Downloads: 18) |
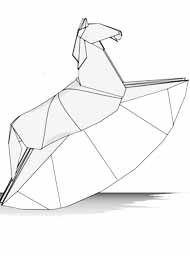
| Horse | |
 |
(Downloads: 14) |
|
Dog |
|
 |
(Downloads: 29) |
|
Termite
|
(Downloads: 25) |
| Rose flower | |
 |
(Downloads: 31) |
| Penguin | |
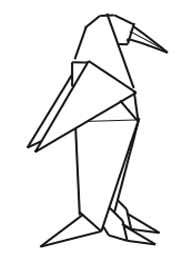 |
(Downloads: 36) |
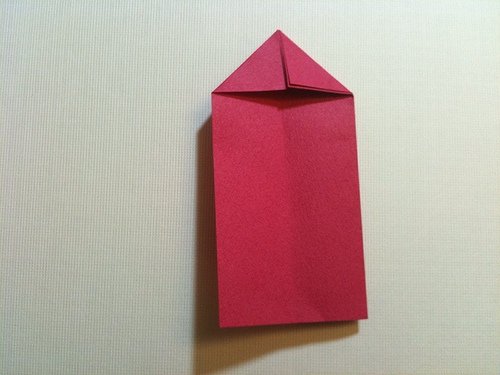
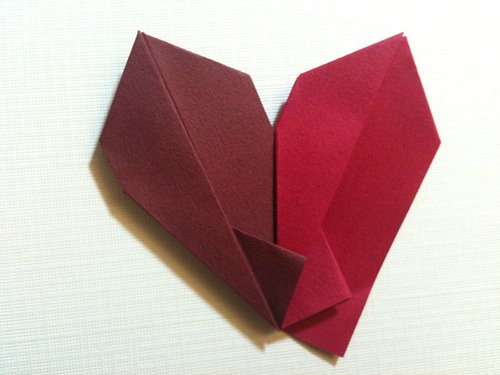
| Heart with swans | |
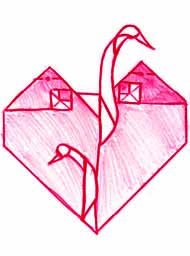 |
(Downloads: 11) |
| Scorpio | |
 |
(Downloads: 11) |
| Dinosaur | |
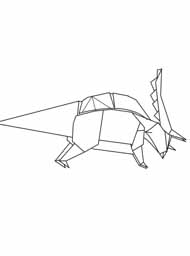 |
|

and I want everyone to join this wonderful pastime. Follow my video tutorials and you, too, will be able to please your loved ones with cool and beautiful paper crafts.
All of us have at least once heard about such animals, which are often called "ships of the desert", from oriental fairy tales about Aladdin or from TV programs. Both adults and children know that this large animal is called a camel. In the distant desert, where it is very hot and little water, long caravans of camels walk ...
The slow and stately ships of the desert are as sturdy as elephants. While many have the opportunity to ride a camel on vacation or at the zoo, not many can feel like a real Bedouin sitting on this beautiful animal.
DIY paper bow origami. Photo, video
May 21, 2016.
Let's try to make graceful paper bows... Being able to make various paper gizmos is very useful not only for developing creativity, but also for decoration. Where can they be applied? They can be used to decorate a gift, stage costume, decorate interior items, and you can also make original hairpins from them. You can make paper bows in different sizes. It depends on what they are for. A paper bow can be an independent gift. It is enough to make it out of bright paper and decorate with sparkles.
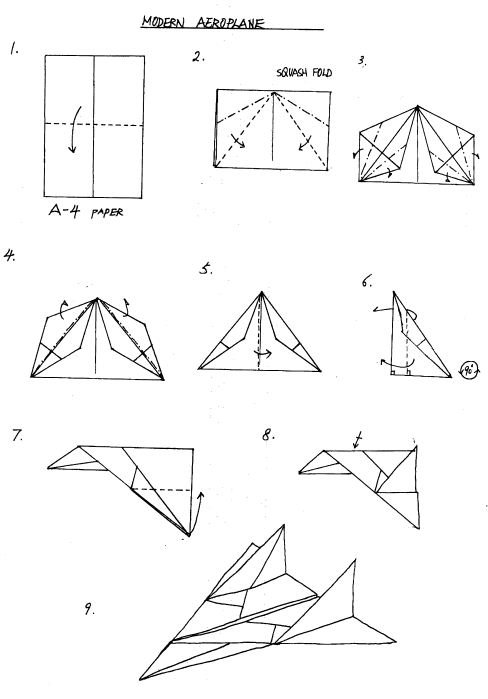
How to make different paper airplanes with your child
13 March 2013.
How to make a paper airplane
 Recently my little son asked me to teach him do it yourself paper airplanes... Without hesitation, I showed my son the simplest method of making paper crafts , which I remember from childhood. But after a while I thought about it, and how to make a paper airplane more difficult and what are the methods of making the popular flyingorigami crafts is there some more. The computer was turned on and to my surprise I found on the Internet a dozen different schemes with which you can make a very .
Kids love origami. Making paper products is a very fun process that contributes to the development of a child. When a baby does something with his own hands, his fingers are developed, he learns to think creatively, connect his imagination, concentrate attention and work according to a certain plan. When forming paper crafts awakens in a childlove for the art of origami .
Most popularorigami product - airplane ... Each of us made small flying machines out of paper in childhood. Scheme quite light and easy to remember, without looking into special books, parents from memory show their kids how airplanes are made.
Not everyone knows thatpaper airplane models there are so many. Some schemes are very simple, with others you have to be smart and take longer to work on. Today we will tell you how to make a flying paper airplane in different ways, and the visual lesson and diagrams that you will find below will help you and yourchild quickly learn how to do it yourself simple and complex paper airplanes.
Making a lotus using origami technique
17 February 2012.
Origami lotus and paper tiger
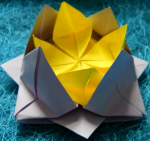 Lotuscreated in technique origami - an amazing flower that can attract attention for a long time. Everyone, even a beginner origamist, should definitely try to fold such a flower, especially since there are detailed video tutorials on assembling origami lotuscreated from 12 sheets of paper. Below you can find interesting master classes in which the masters tell how to make origami lotus and a simple cracker, and also - a master class in design origami tiger from paper.
Modular origami sometimes uses glue to connect parts, but most often it does without it. Ordinary origami uses exclusively mountain and valley folds, while the elements are usually simple, so even an inexperienced origamiist \u200b\u200bcan master them.
Making flowers from paper modules
16 February 2012.
Modular Origami Flowers
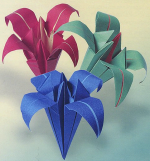 In childhood, everyone had the pleasure of folding paper crafts with their own hands. Remember what was popular at that time: frogs, airplanes, boats and cranes. But this, in fact, was not limited to the imagination of the patient Japanese, who from origamimade a whole traditional art, with their own canons of paper plastic. One of the varieties was modular origami (flowersin this technique are most popular today), or kusudama (beautiful volumetric balls, transformers). As the name suggests, figures are not created from one sheet of paper, but from several, from which they make identical modules, inserted into each other, like a constructor. Modular origaminot too much sophisticated technique performed (using the example of the lessons at the end of the article, you can make a whole bouquet of different origami flowers) - the main thing is to carefully do the right amount modules and clearly follow the diagram or video lesson with a step-by-step description of the work process.
make completely different crafts Origami is the original Japanese art of creating paper by folding various objects. These can be animals, birds, flowers. Can make even origami angelby taking only one sheet of paper and a diagram (which you can find at the end of the article, but first, learn the basic shapes and conventions in origami). Neither the date of origami's origin nor its creator is known exactly. It is believed that this art originated before the advent of paper, and is based on the art of draping fabric, used to create traditional Japanese clothing. For many generations of the Japanese, various ideas and principles have been introduced into origami, which are inherited. Thanks to this, today there is such an art of folding a flat sheet into wonderful figures. Watch the demonstrative video tutorials below, where origami lily and postcards are successively made
 Today, with very little known about origami's original temple meaning, this ancient art form is lending itself to new trends. Now origami is more of a paper design, with the use of both glue and paints, with the possible creation of composite or prefabricated figures from several parts. Often this wonderful ancient art is used in the restaurant business, making origami from napkins for table decoration... In origami, paper cuts and scissors are increasingly appearing. Also in this kind of art, as in many others, computer graphics penetrate, and the founders of this change were again the Japanese. But even in the classical style, new, very original paper crafts are often created - below you can see the diagram and video lesson - how to make origami shuriken (a throwing star with sharpened blades, a formidable weapon of Japanese ninja warriors).
Origami for kids is the legendary art of folding paper figures for all-round development of your little one. Various origami schemes for children of different ages.
The art of folding paper figures appeared in ancient China. This did not happen by chance, since it was here that paper was first made. For a long time, origami was available exclusively to the upper classes, who studied it along with obtaining a musical education and the art of adding hokku.
However, despite its homeland, paper origami for children became known thanks to Japan, China's neighbor and main competitor, both in production and in cultural life. Local samurai folded figurines from ribbons to give to each other before the battle. And to the wedding, paper butterflies accompanied the bride and groom, symbolizing their pure and light souls.
After Japan opened its borders to the rest of the world, origami for children in the form of diagrams quickly spread around the world. The German teacher Friedrich Frebel made a significant contribution to the development of art. He came up with the idea of \u200b\u200busing folding as an activity to help develop fine motor skills and spatial imagination in children. Since the late 19th century, this technique has been successfully used in kindergartens around the world.
Origami materials
The classic, familiar material for folding is paper. However, any sheet is suitable for origami, for example, foil, parchment, starched fabric. Specialty paper can be purchased at the store and is square, with one white side and one colored side. It feels thinner than the one we buy for the printer, so that it is easier to fold several times.
But in Japan, classic figures are made of washi paper. This is a handmade material, dense, uneven compared to ordinary sheets.
Variety of origami types
Experts distinguish between several types of folding art:
- classic. For him, one square sheet is taken, and the figures are folded without scissors and glue;
- modular. Several sheets of different shapes and sizes are used, from which modules are folded according to the origami scheme. Then the individual figures are connected by nesting;
- kusudama. A type of modular assembly that results in a large ball-like shape. You can put souvenirs or fragrant herbs inside it, using the ball as a sachet;
- kirigami. This version of origami allows the use of scissors and glue.
Paper folding for babies
Modern origami for children carries many features of classical art, since the simplest, initial models are taken as a basis. Kids are happy to do folding, for them it is real magic when a crane, a boat or a frog suddenly appears from a square sheet of paper. Origami paper for children is a great option for a quiet activity that develops fine motor skills and abstract thinking, because when making the next fold, the baby must understand how it will look when finished.
Origami classes are suitable for both creative groups kindergartenand for studying at home. Folding the figurines with their parents is a fun, interesting activity that all family members will enjoy.
Simple paper crafts can be made from a regular square cut from an A4 sheet. Before starting work, you need to choose the right paper and master the basic techniques. Most often, paper origami for beginners is represented by classic models of animals, vehicles, amazing structures, natural forms, plants and people.
Choosing origami paper
You can fold beautiful figures from almost any type of paper: the thinner one is used for simple shapes, and the dense one is used for wet folding. Some manufacturers are ready to offer special origami paper that has a minimum thickness and a square shape. It differs in that one of its sides is painted in some color, and the other is white.
Most often, origami is made from square sheets, but it is possible to use rectangular, triangular, pentagonal, hexagonal and octagonal blanks.
Children are the most fun and laid-back natures that can be carried away by various crafts. Origami will distract them from pampering and turn them into real wizards. Most often, they are represented by the simplest and most beautiful figures that any child can fold. This way of spending time will develop fine motor skills of hands, thinking, dexterity, attention, artistic taste and patience.
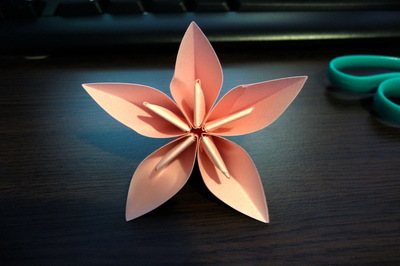
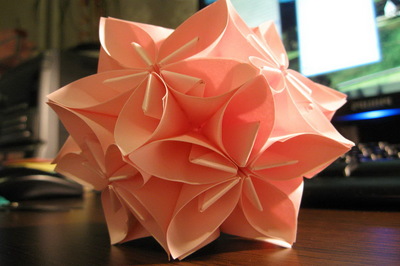
Origami paper for beginners - flower ball workshop
Let's create a 3D origami ball for beginners made of many colors. Making such a ball is quite simple, the main thing is to follow the description of the master class and be patient.

Such an original decor can be used to decorate rooms, for table setting, or as a Christmas tree decoration.
You will need:
- Note paper;
- Double-sided tape or glue;
- Scissors.
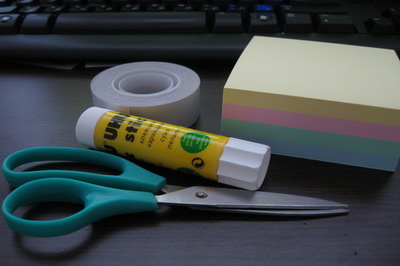
Manufacturing:
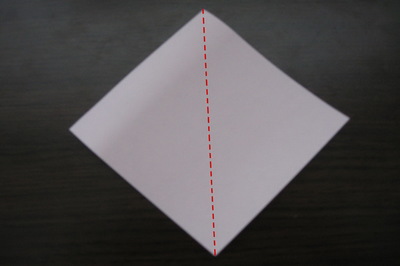


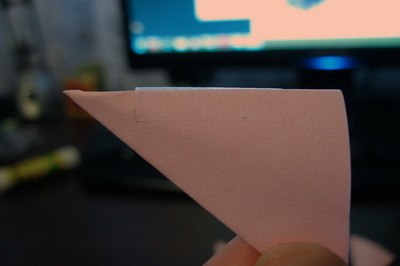
Then we fold the entire model in half.

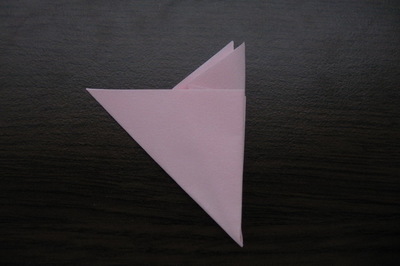
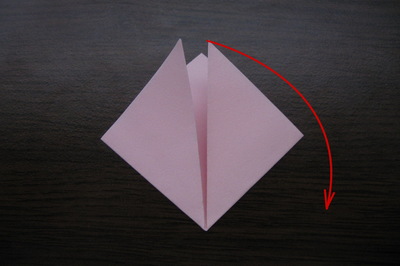
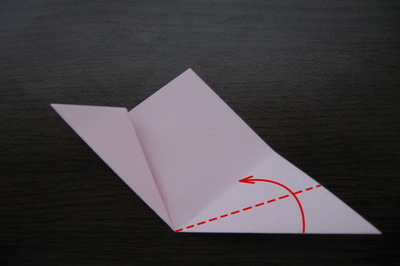
Fold the protruding part of the triangle along the dotted line and tuck it inward.

The model is ready. Now add 4 more note sheets in the same way.
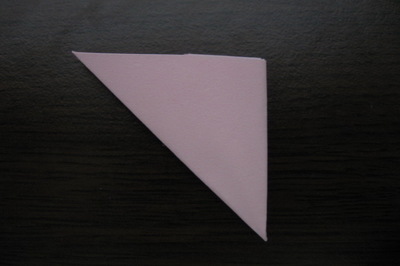
All of them should turn out to be even and the same.
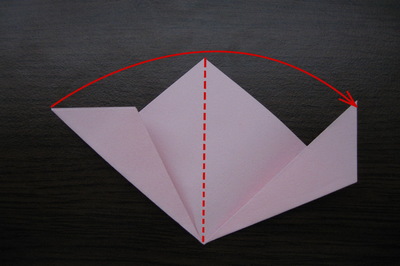
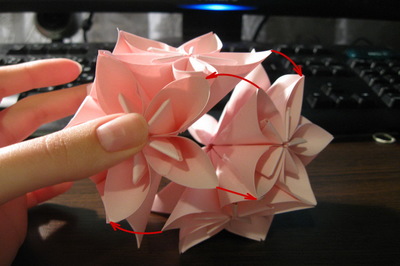
We connect together the resulting leaves from the previous steps using tape or glue.
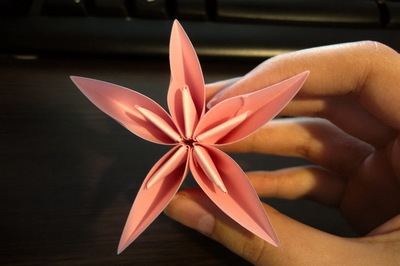
We straighten the middle of each triangle and get a volumetric flower.
We start making the next flower - we do it in the same way. Now we glue the two volumetric flowers together.

![]()


Add flowers by gluing them to each other (11 in total) until the ball closes.
Origami ball in the form of a volumetric flower for beginners is ready!
Modular paper origami for beginners
Using this technique, you can get a three-dimensional figure, for the creation of which you need single modules. Each of them is folded according to all origami rules and joined by nesting into each other. Modular origami allows you to experiment and get all kinds of garlands, sculptural compositions (for example, a swan from triangular blanks), etc.
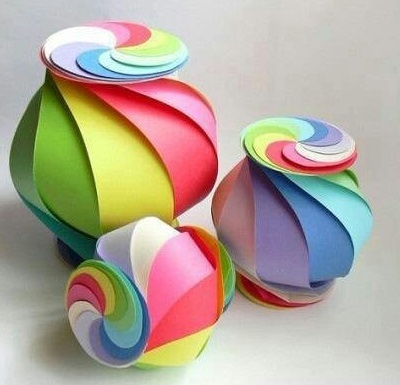
Kusudama
Such an interesting name was given to volumetric flower balls, which consist of single elements. Unlike modular origami, kusudams are held not only by friction, but also by glue and sewing. Initially, these balls were filled with herbs, dried petals and incense. Today, they are considered decorative elements that bring a little fabulous oriental flavor and festive spirit into the house.
This version of origami is a drawing that shows all the folds of the future product. Its folding is somewhat more complicated than the traditional scheme. Most often, sweeps are used to develop new models. They not only suggest the stages of work, but also tell how they were invented.
This folding technique involves the use of paper moistened with water, which gives the shapes smoothness, expressiveness and rigidity. It is ideal for complex objects such as flowers and animals. As a result, they look very much like the original.
For wet folding, use paper made with water-soluble glue.
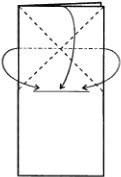
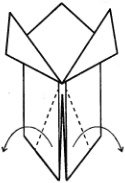
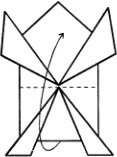
Assembly sequence
People who have just started to master the origami technique should start with the simplest figures and models. To deal with it, you need to know some requirements and rules:
- Prepare paper of the required size and shape, stand near the table and place the blank on it, all the necessary diagrams.
- To get the perfect fit, mark the fold line. Draw it with a metal nail file, which needs to be moved along the ruler.
- Master basic shapes: rhombus, square, door, snake, etc. With their help, you can learn basic origami skills.
- Learn basic folding techniques: folds, petals, flattening, indentation, single (double) rabbit ear and bird heads.
- After learning the basics, start folding certain shapes and authoring models. For starters, try making boats, boxes, glasses, seals, pigeons, and cranes. Author's origami are considered not only difficult, but also beautiful.
Master an even more complex and interesting technique - kirigami. Scissors are used to make models: the paper is folded, cut or cut in a certain order, and from this an unusual model is obtained.
137 0Toys from the store bore children very quickly. In search of what to do with their child, some parents spend money on another trinket for the child. But there are moms and dads who have a different approach to their offspring - they take his time with hand-made and show how to make simple origami from paper for children.
What you need for paper figures
In order not to waste time in the process of work and not to run around the house in search of what you need, prepare everything in advance. You will need to take:
- Colored double-sided paper.
- Scissors.
- Ruler.
- Good mood and fantasy.
How to make a fairy tale for a child
Every child has extraordinary imagination and out-of-the-box thinking. Therefore, the creation of various figures from paper will help the child to be in the role of a magician. If parents do not know where to start, you can watch the video "paper origami for children" just below, where everything is explained in an accessible way. You can also do handicrafts describing step-by-step actions. For children, it is better to choose simple schemes so that they can repeat the technique themselves.
Paper flower
One of the simpler origami schemes is flowers. Try to make a flower consisting of several petals with your child:
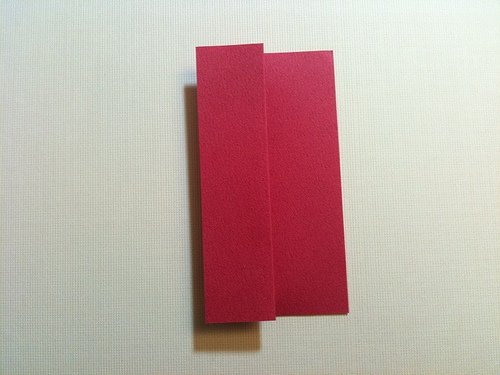
Cut into strips of colored paper (8X16)
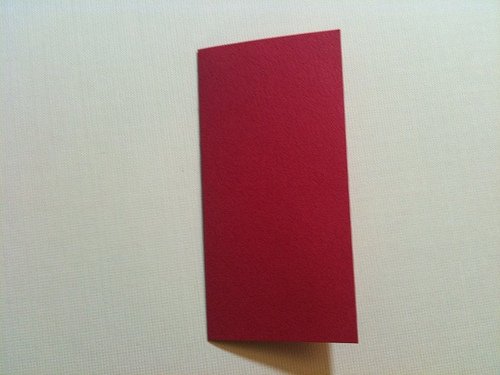
Fold the strip in half lengthwise and straighten it so that the fold line is visible. Then, bend one side to the center line, turning the workpiece over, bend the other side, aligning along the visible line.
Fold in the top corners.
Turning the future petal over, turn the lower left corner, as shown in the figure.
Do these manipulations with each strip, forming petals.
Connect the parts as shown in the image.
You can make each petal in different colors, then you get a seven-flowered flower. Video tutorials on forming paper flowers will clearly show how to perform certain actions. Therefore, in parallel with the execution of the described instructions, you can watch the video.
How to make animals
Children love to play with their crafts. The paper bird will cheer up your baby and help develop motor skills in fingers and hands:
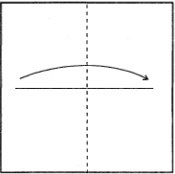
- Take a square and fold it in half from corner to corner. Straighten the sheet.
- Align the other two corners along the visible fold line.
- Bend the corners connected in step 2 outward. But this must be done in half, as shown in the figure. These are the wings of your ostrich.
- Bend the workpiece in the middle.
- Fold the untouched corner downward between the wings.
- Bend the nose along the line of the wings.
- Straighten the workpiece by keeping the legs, wings and neck in proportion.
- Form the head of the ostrich, add the eye. You can entertain your baby.

And video tutorials to help beginners:
Paper ship
Children are very fond of launching boats in a basin or bath with water. Therefore, it is worth teaching them how to make a paper boat on their own:
- You can take a regular sheet of A-4 format. Fold it in half.
- Fold the top corners towards the center.
- Fold the bottom edges out.
- Wrap the small corners inward, securing the structure.
- Keeping only the folded corners, bring the two corners of the triangle together. You should get a square.
- Fold the free corners up to form a triangle. Below are diagrams to help you figure it out.
- Gently part the edges, forming the boat. Happy swimming for your baby!
"Live" origami
Paper animals that jump or wiggle body parts may seem funny to your little one. According to the proposed photos, you can build a frog that can move:
Fold the square in four and straighten.
Bending it vertically, bend the upper end to the middle.
Bend the corners diagonally one by one. Bend the structure along the fold lines.
Fold the free bottom side in half, then straighten. Bend the sides as shown in the photo:

Tuck the bottom ponytail up along the fold line you made and turn the corners away.

Grasp the inner corners and straighten the inverted trapezoid below.
Fold down the upper corners of the trapezoid. Then unfold them to the sides, as in the picture:
Bend the workpiece in half and turn the edge off. Flip it over and see that you have a jumping frog. You can make it move by pressing your fingers between the hind legs and sharply releasing it.
Using this technique, you can make, for example, a moving frog.
Or speaking lips:
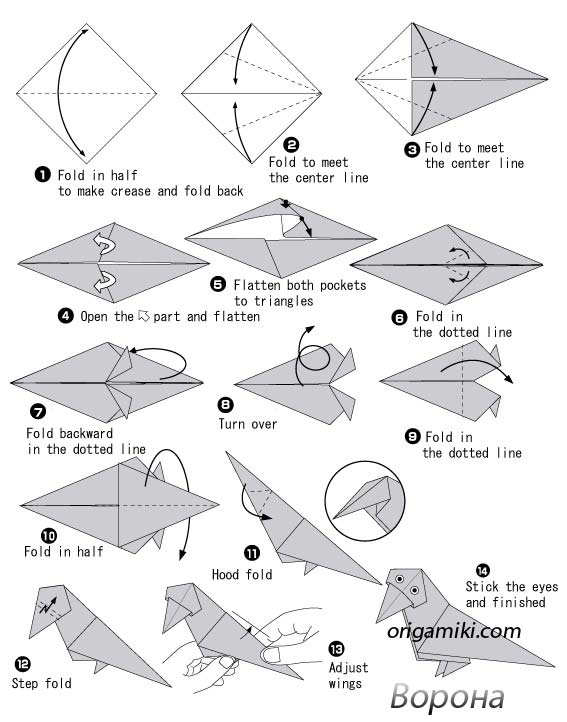
Mouth Opening Crow:
Paper cars
Plastic cars are, of course, interesting. But it will be much more entertaining for a child to learn how to build cars himself. Easy schematic sketches will help you understand the origami technique:

With the help of parents, the baby will get a paper typewriter. The color can be chosen at the discretion of the child.
You can also design figures that will amuse your child with an easy flight. For beginners, you can use the old method of folding airplanes. But there are more complex layouts that make paper airplanes look more attractive: